
Civic L4-1.8L (2006)
Electronic Brake Control Module: Service and Repair
ABS Modulator-Control Unit Removal and Installation
NOTE:
^
Do not spill brake fluid on the vehicle; it may damage the paint; if brake fluid gets on the paint, wash it off immediately with water.
^
Be careful not to damage or deform the brake lines during removal and installation.
^
To prevent the brake fluid from flowing, plug and cover the hose ends and joints with a shop towel or equivalent material.
Removal - 4-door model
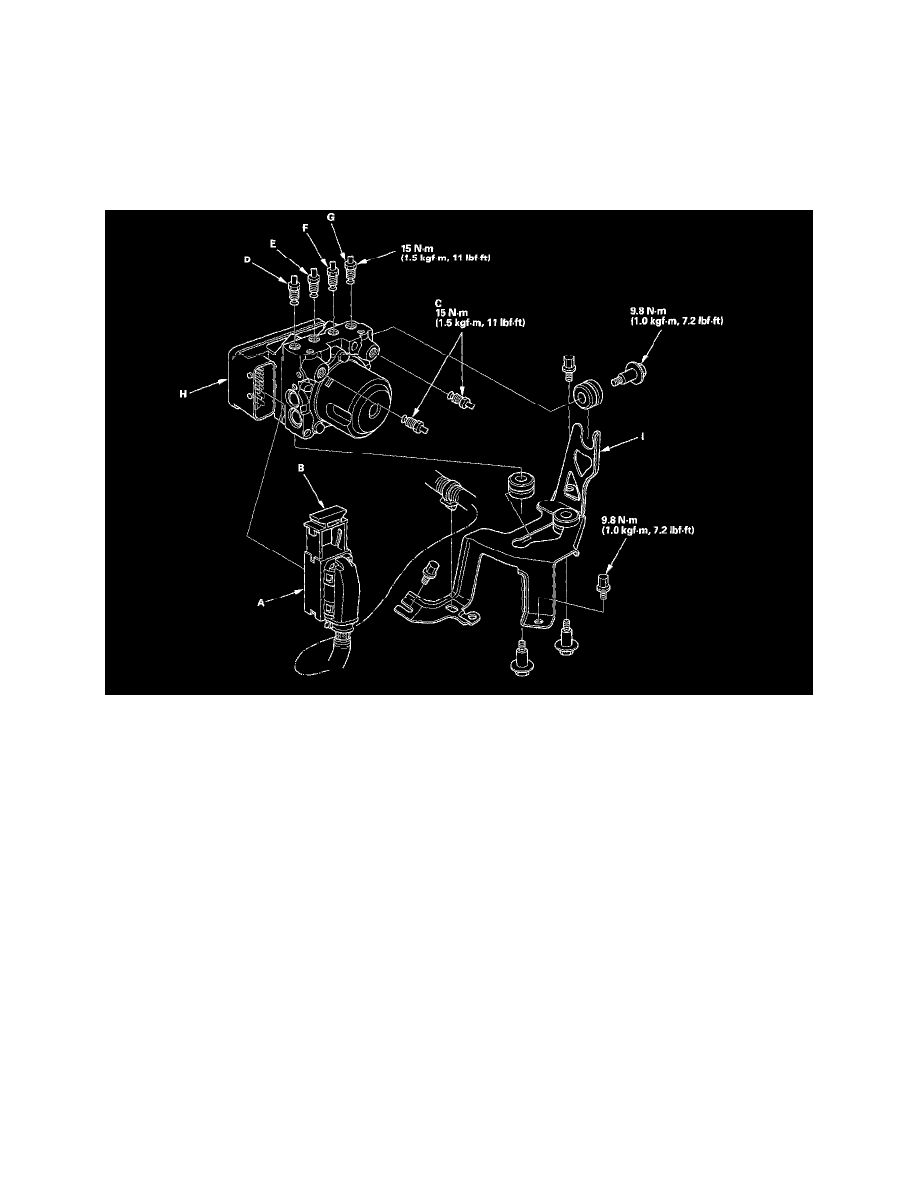
1. Disconnect the ABS modulator-control unit 25P connector (A) pulling up the lock (B), then the connector disconnects itself.
2. Disconnect the six brake lines from the ABS modulator-control unit.
NOTE: Brake lines are connected to the master cylinder (C) and the brake system of right-front (D), left-rear (E), right-rear (F) and left-front (G).
3. Remove the ABS modulator-control unit (H) with the bracket (I) from the body.
4. Remove the ABS modulator-control unit from the bracket.
Installation - 4-door model
1. Install the ABS modulator-control unit on the bracket.
2. Install the bracket with the ABS modulator-control unit.
3. Reconnect the six brake lines, then tighten the flare nuts to the specified torque.
4. Align the connecting surface of the ABS modulator-control unit 25P connector to the ABS modulator-control unit.
5. Lower the lock of the ABS modulator-control unit 25P connector, then confirm the connector is fully seated.
6. Bleed the brake system.
7. Start the engine, and check that the ABS indicator goes off.
8. Test-drive the vehicle, and check that the ABS indicator does not come on.
NOTE: If the brake pedal is spongy, there may be air trapped in the modulator and then induced into the normal brake system during modulation.
Bleed the brake system again.
Removal - 2-door model