
Civic L4-1.8L (2006)
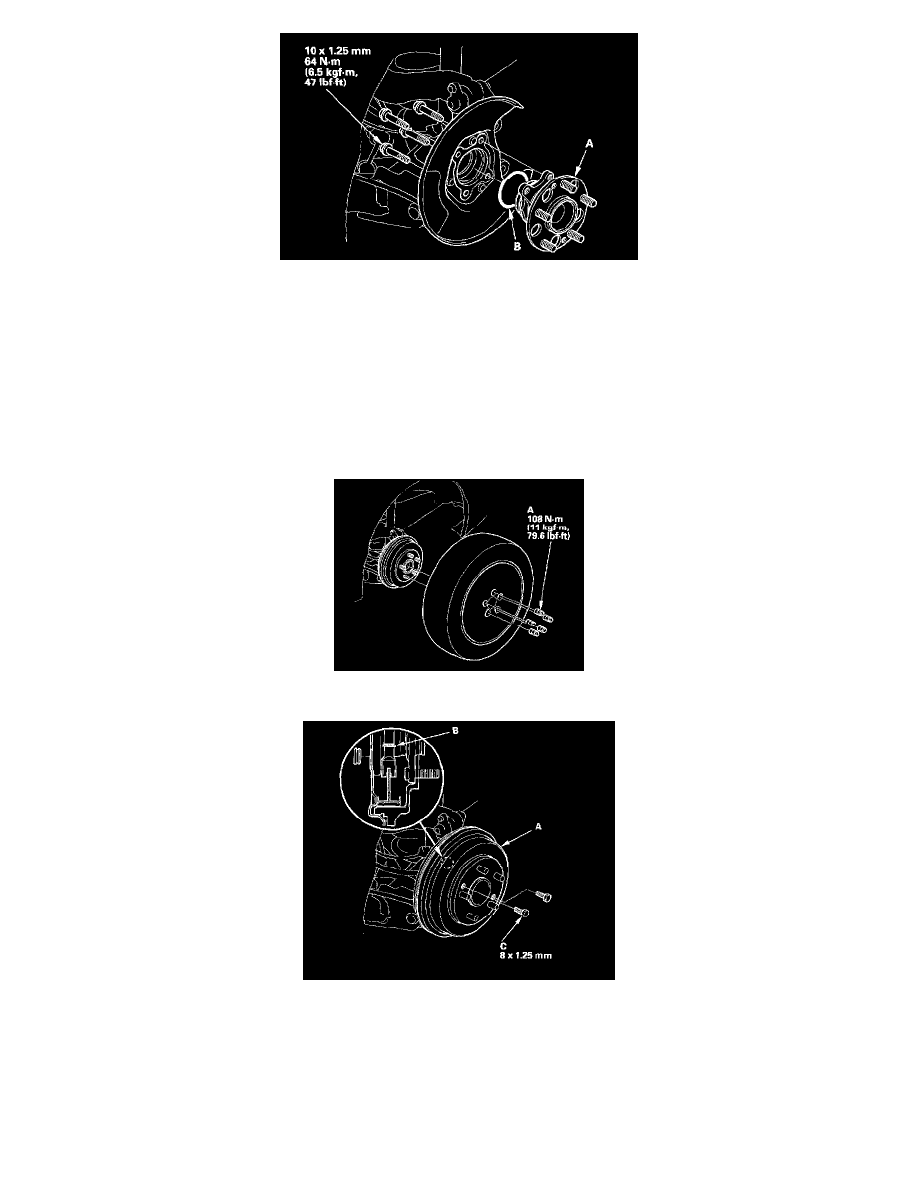
8. Remove the hub bearing unit (A) and the O-ring (B).
9. Check the rear hub for damage and cracks.
10. Install the hub bearing unit in the reverse order of removal, and note these items:
^
Use a new O-ring during reassembly.
^
Tighten all mounting hardware to the specified torque values.
^
Before installing the brake disc, Clean the matching surface of the hub bearing unit and inside of the brake disc.
^
Before installing the wheel, clean the mating surface of the brake disc and the inside of the wheel.
^
Check the wheel alignment, and adjust it if necessary.
Hub Bearing Unit Replacement-Drum Brake Type
1. Raise the rear of the vehicle, and support it with safety stands in the proper locations.
2. Remove the wheel nuts (A) and the rear wheel.
3. Release the parking brake, and remove the brake drum (A) from the hub bearing unit.
NOTE:
^
Turn the adjuster bolt (B) with a flat-tip screwdriver until the shoes become loose if necessary.
^
If the brake drum has clung to the hub bearing unit. Screw two 8 x 1.25 mm bolts (C) into the brake drum to push it away from the hub bearing
unit. Turn each bolt 90 degrees at a time to prevent cocking the brake drum.
^
After installation, press the brake pedal several times to make sure the brakes work.