
Civic L4-1.8L (2006)
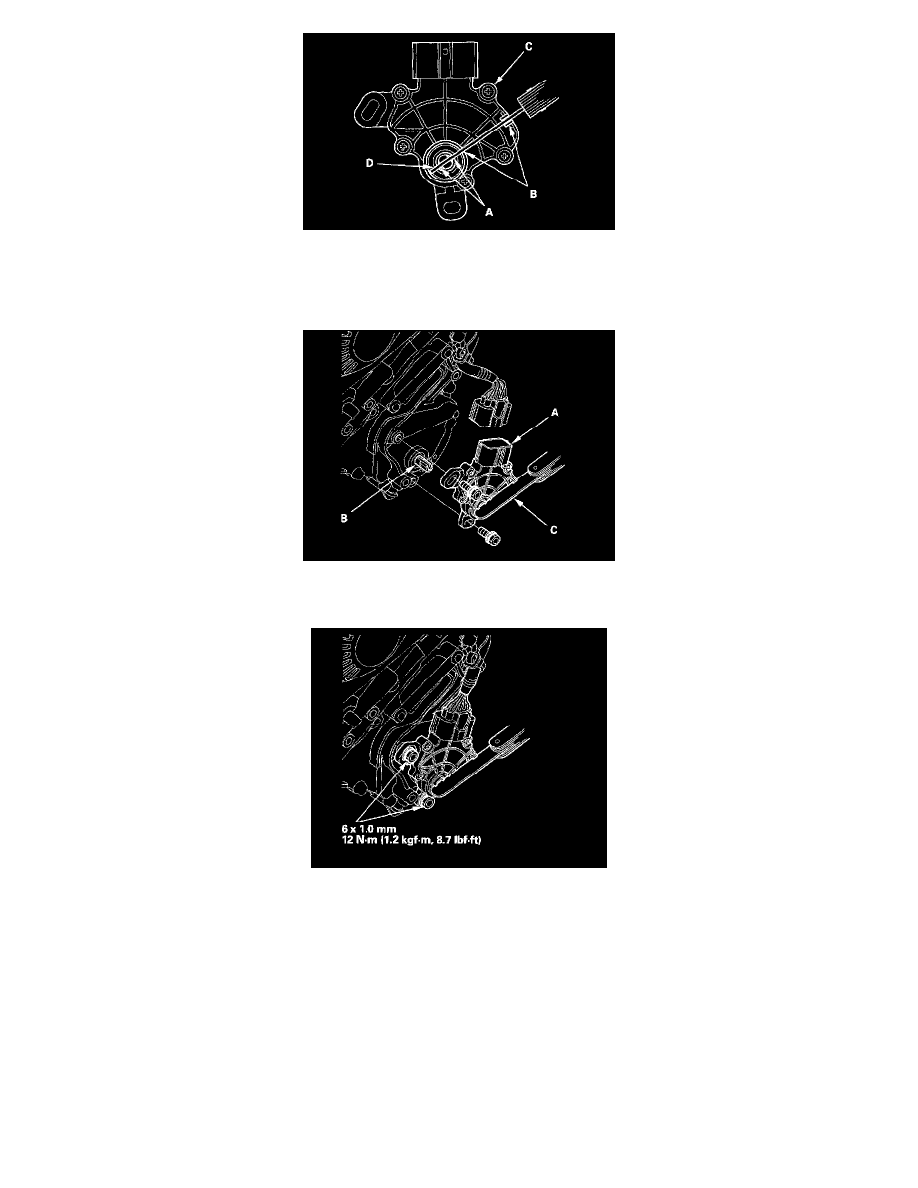
6. Align the cutouts (A) on the rotary-frame with the neutral positioning cutouts (B) on the transmission range switch (C), then put a 2.0 mm (0.08
inch) feeler gauge blade (D) in the cutouts to hold the switch in the N position.
NOTE: Be sure to use a 2.0 mm (0.08 inch) blade or equivalent to hold the switch in the N position.
7. Install the transmission range switch (A) gently on the selector control shaft (B) while holding it in the N position with the 2.0 mm (0.08 inch)
blade (C).
8. Tighten the bolts on the transmission range switch while you continue to hold the N position. Do not move the transmission range switch when
tightening the bolts. Remove the feeler gauge.
9. Check the connectors for rust, dirt, or oil, clean or repair if necessary, then connect the connector securely.
10. Turn the ignition switch ON (II). Move the shift lever through all positions, and check the transmission range switch synchronization with the A/T
gear position indicator.
11. Check that the engine will start in the P and N positions, and will not start in any other shift lever position.
12. Check that the back-up lights come on when the shift lever is in the R position.
13. Allow the front wheels to rotate freely, then start the engine, and check the shift lever operation.