
Civic L4-1668cc 1.7L SOHC MFI (2003)
Rear Shelf: Service and Repair
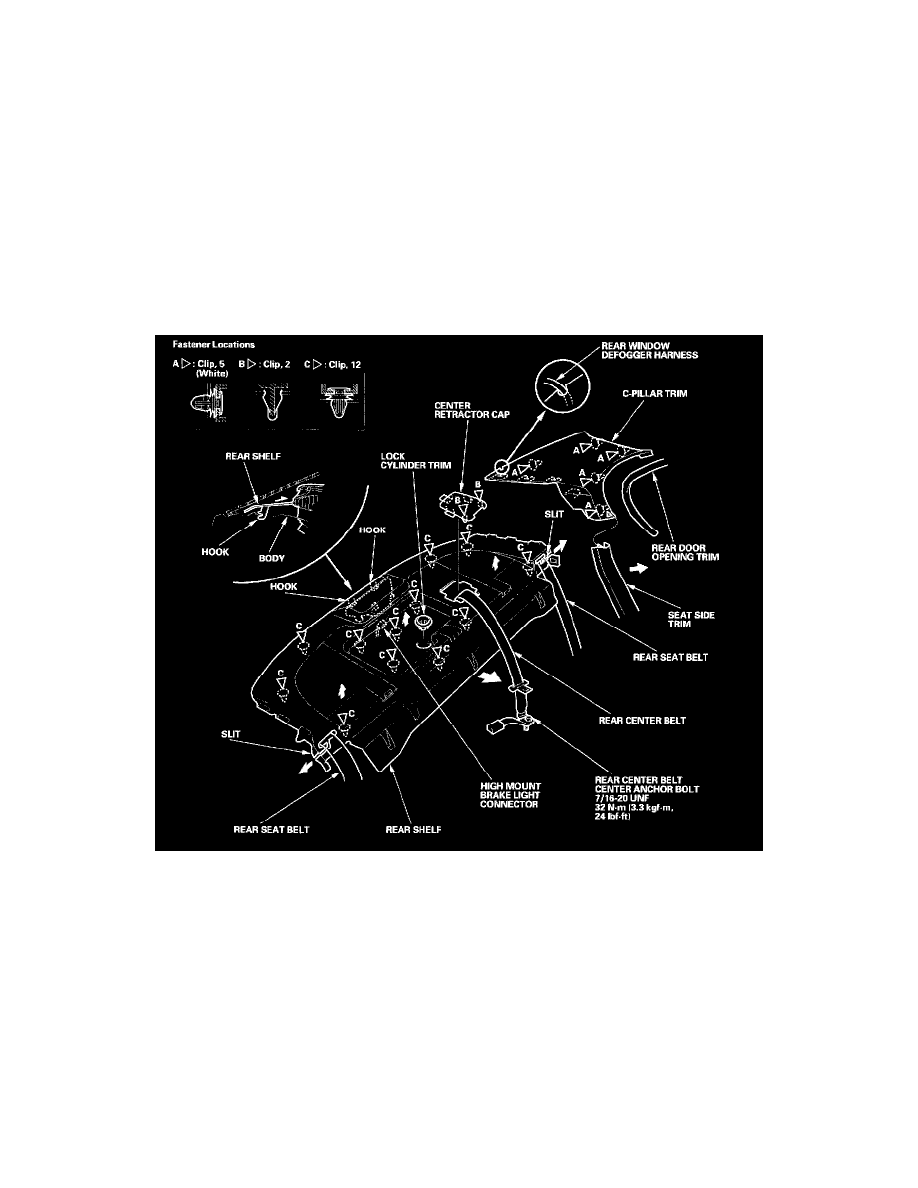
Trim Removal/Installation - Rear Shelf Area
Trim Removal/Installation - Rear Shelf Area
Special Tools Required
KTC trim tool set SOJATP2014
4-door
NOTE:
-
Put on gloves to protect your hands.
-
Use the appropriate tool from the KTC trim tool set to avoid damage when prying components.
-
Take care not to bend or scratch the trim and panels.
1. Remove the trim as shown. To remove the rear shelf, remove the rear seat side bolster from each side and lock cylinder trim.
2. Install the parts in the reverse order of removal, and note these items:
-
Replace any damaged clips.
-
When installing the rear shelf, slip the rear seat belts and center belt through the slits and hole in the rear shelf.
-
Apply liquid thread lock to the anchor bolt before installation.
-
Make sure the high mount brake light connector is plugged in properly.