
Civic L4-1668cc 1.7L SOHC MFI (2003)
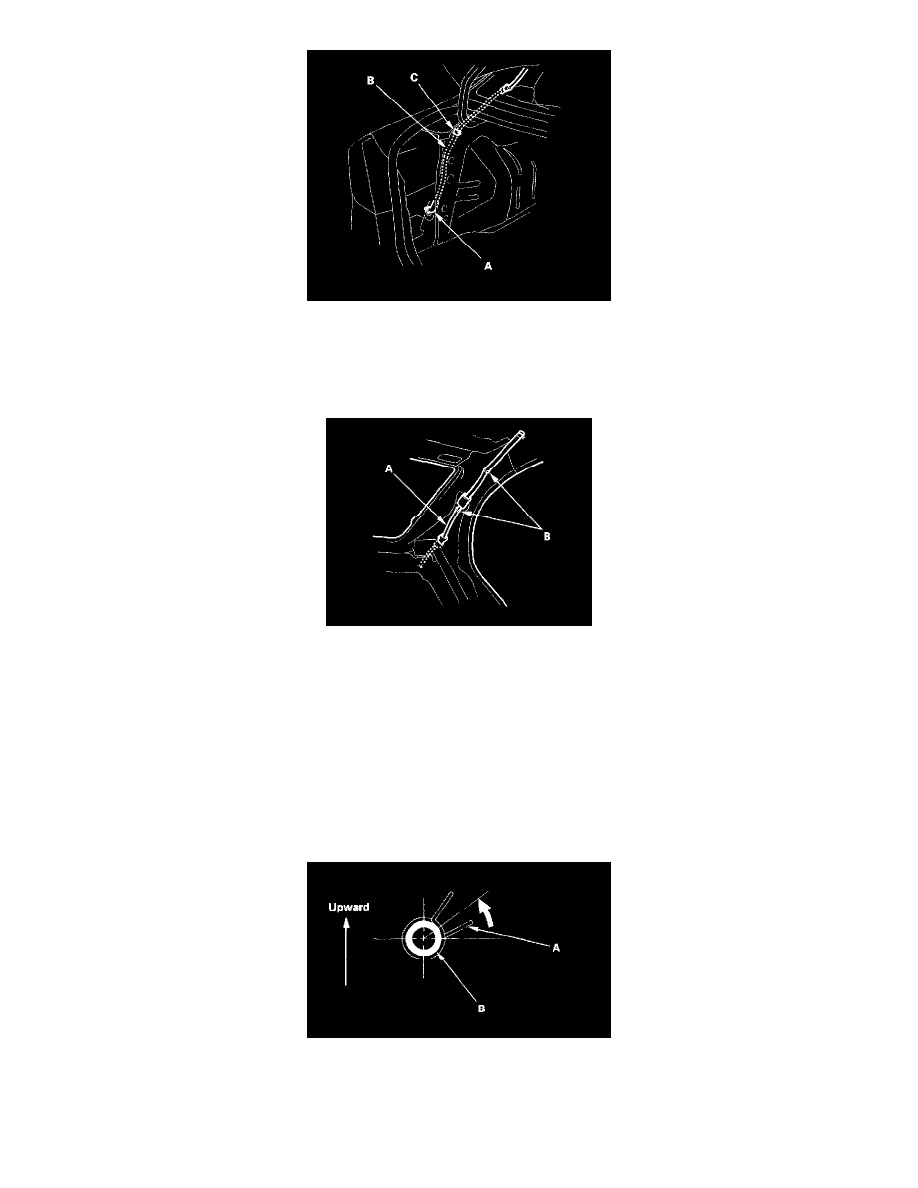
7. To remove a rear drain valve (A) from the trunk compartment, remove these parts, 2-door, 4-door:
-
Trunk floor mat and trunk floor
-
Trunk rear trim panel
Pull back the trunk side trim panel and release the rear drain tube (B) from the clip (C), and pull the drain tube out through the hole in the pillar.
8. From inside: Release the rear drain tube (A) from the inside of the vehicle by releasing the clips (B). Remove the rear drain tube.
9. Install the frame and drain tube in the reverse order of removal, and note these items:
-
Before installing the frame, clear the drain tubes and drain valves using compressed air.
-
Check the frame seal.
-
Clean the surface of the frame.
-
When installing the frame, first attach the rear hooks into the body holes.
-
Make sure the connectors are plugged in properly.
-
When installing the rear drain tube to the body at the C-pillar, align the cushion of the tube to the hole in the body, and align the alignment
mark of the tube to the clip of the upper portion.
-
When connecting the drain tube, slide it over the frame nozzle at least 10 mm (0.39 in).
-
Install the tube clip (A) on the drain tube (B) as shown.
10. Check for water leaks. Let the water run freely from a hose without a nozzle. Do not use a high-pressure spray.