
Civic L4-1668cc 1.7L SOHC MFI (2003)
Drive Belt: Adjustments
Power Steering Belt
Pump Belt Inspection and Adjustment
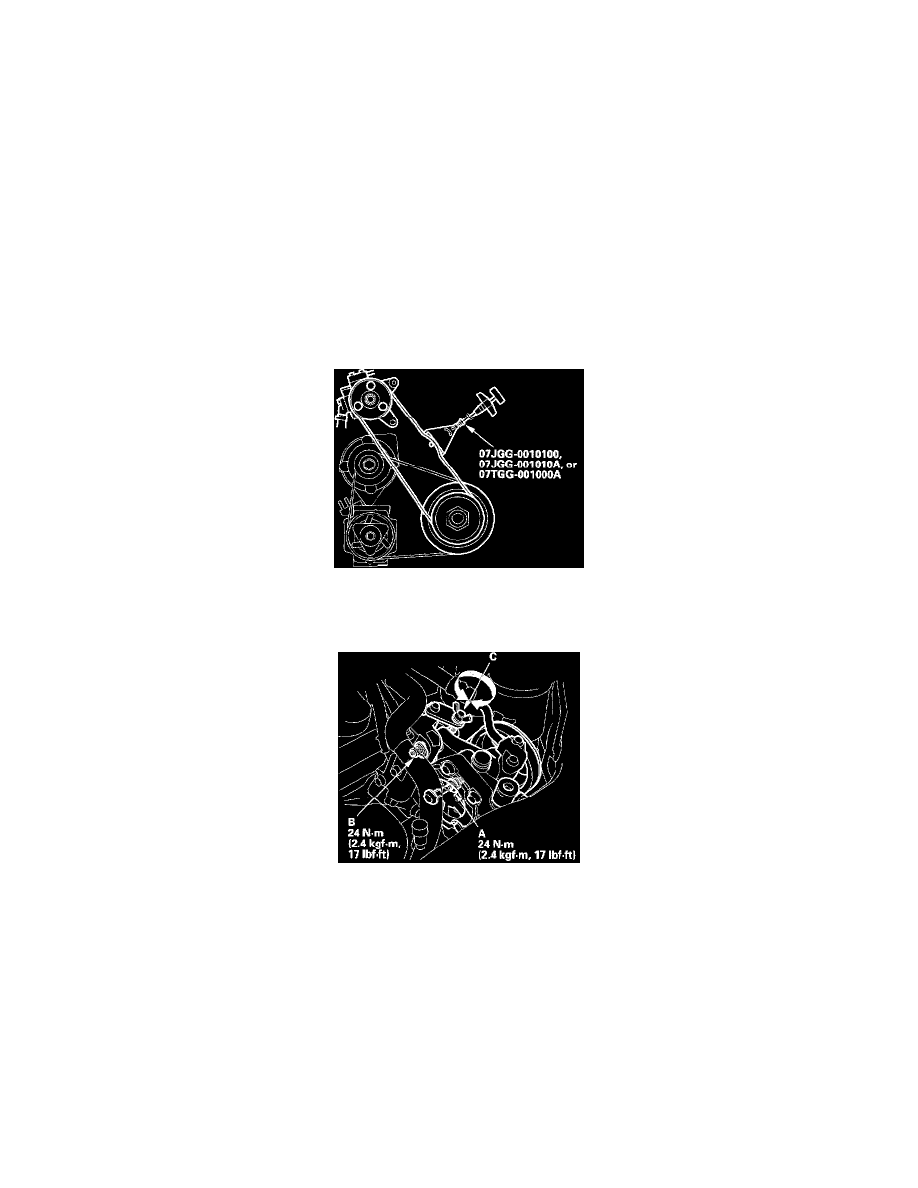
Special Tools Required
Belt tension gauge, 07JGG-0010100, 07JGG-001010A, or 07TGG-001000A
Belt Tension Gauge Method
Inspection
1. Remove the P/S reservoir from the bracket, and set it aside.
2. Attach the belt tension gauge to the belt, and measure the tension of the belt. Follow the gauge manufacturer's instructions. If the belt is worn
or damaged, replace it.
NOTE: Remove the belt tension gauge carefully to avoid hitting the gauge reset lever.
Tension:
Used Belt: 390 - 540 N (40 - 55 kgf, 88 - 121 lbs.)
New Belt: 740 - 880 N (75 - 90 kgf, 165 - 198 lbs.)
3. If you installed a new belt, run the engine for 5 minutes, then readjust the belt to the used belt specification.
Adjustment
4. Loosen the power steering pump mounting nut (A.) and pump locknut (B).
5. Turn the adjusting bolt (C) to get the proper belt tension, then retighten the mounting nut and locknut.
6. Start the engine and turn the steering wheel from lock-to-lock several times, then stop the engine and recheck the tension of the belt.
Deflection Method
Inspection
1. Apply a force of 98 N (10 kgf, 22 lbs.) and measure the deflection between the power steering pump pulley (A) and the crankshaft pulley (B).
If the belt is worn or damaged, replace it.
Deflection:
Used Belt: 13.0 - 16.5 mm (0.51 - 0.65 inch)
New Belt: 9.0 - 11.0 mm (0.35 - 0.43 inch)