
Civic L4-1668cc 1.7L SOHC MFI (2003)
Antenna Control Module: Testing and Inspection
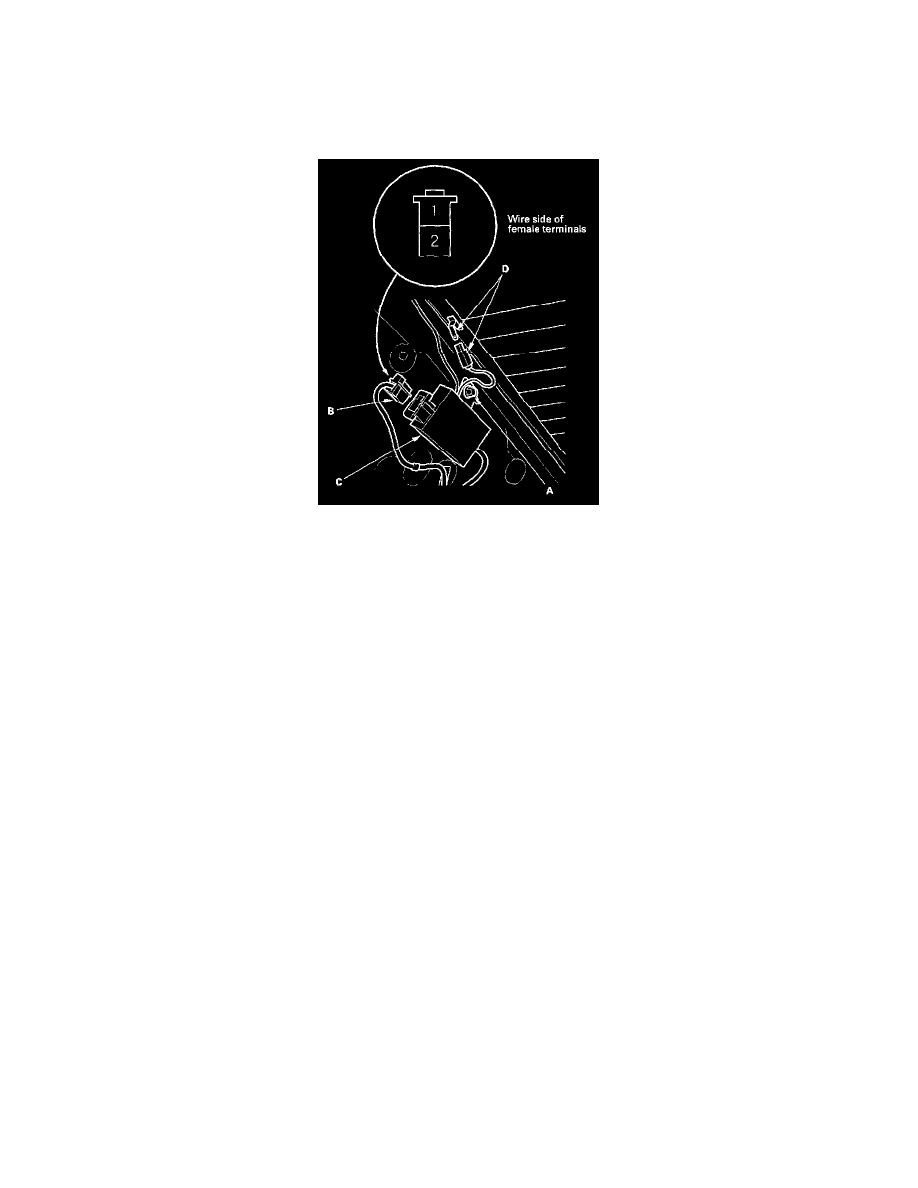
Antenna Module Input Test
2-door
1. Remove the right C-Pillar trim.
2. Make sure the antenna module mounting bolt (A) is torqued to 9.8 N.m (1.0 kgf.m, 7.2 lbf.ft)
3. Disconnect the 2P connector from the antenna module (C).
4. Turn the ignition switch ON (II), turn the rear window defogger switch ON. Check for voltage between the No.2 terminal and body ground. There
should be battery voltage.
If there is no voltage, check for:
-
Faulty rear window defogger relay.
-
Blown No.11 (40 A) fuse or No.19 (80 A) in the under-hood fuse/relay box.
-
An open in the BLK/YEL wire.
5. With the ignition switch ON (II), turn the radio ON, and turn to an FM station. Check for voltage between the No.1 terminal and body ground.
If there is no voltage, check for:
-
An open in the YEL/GRN wire.
-
A short to ground in the YEL/GRN wire.
-
Faulty audio unit.
6. Disconnect the rear window defogger (+B OUT) connector (D) from the antenna module.
7. With the ignition switch and the rear window defogger switch ON, check for voltage to ground.
If there is no voltage, replace the antenna module.
8. Turn the ignition switch OFF.