
Civic L4-1668cc 1.7L SOHC MFI (2003)
Trailing Arm: Service and Repair
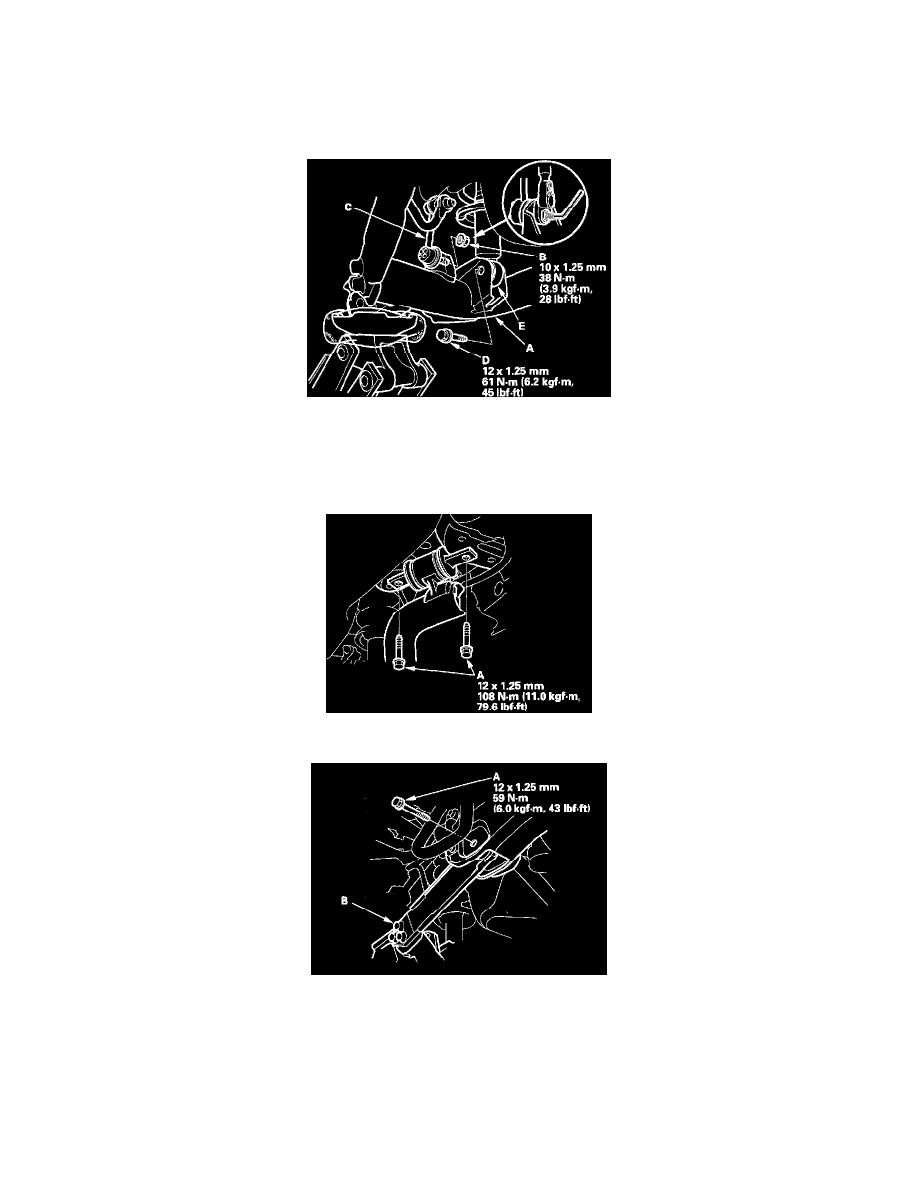
Removal/Installation
1. Raise the rear of the vehicle, and support it with safety stands in the proper locations. Remove the rear wheels.
2. Remove the knuckle.
3. Place the floor jack under the trailing arm (A) to support it.
4. Remove the flange nut (B), and disconnect the stabilizer link (C) from the trailing arm.
5. Remove the flange bolt (D), and disconnect the damper (E) from the trailing arm.
6. Remove the trailing arm front mounting bolts (A).
7. Remove the trailing arm rear mounting bolt (A).
Note: Do not loosen the special bolts (B) on the trailing arm.
8. Lower the jack, and remove the trailing arm.
9. Install the trailing arm in the reverse order of removal, and note these items:
^
First install all the suspension components and lightly tighten bolts and nuts, then place a jack under the trailing arm, and raise the suspension