
Civic L4-1668cc 1.7L SOHC MFI (2003)
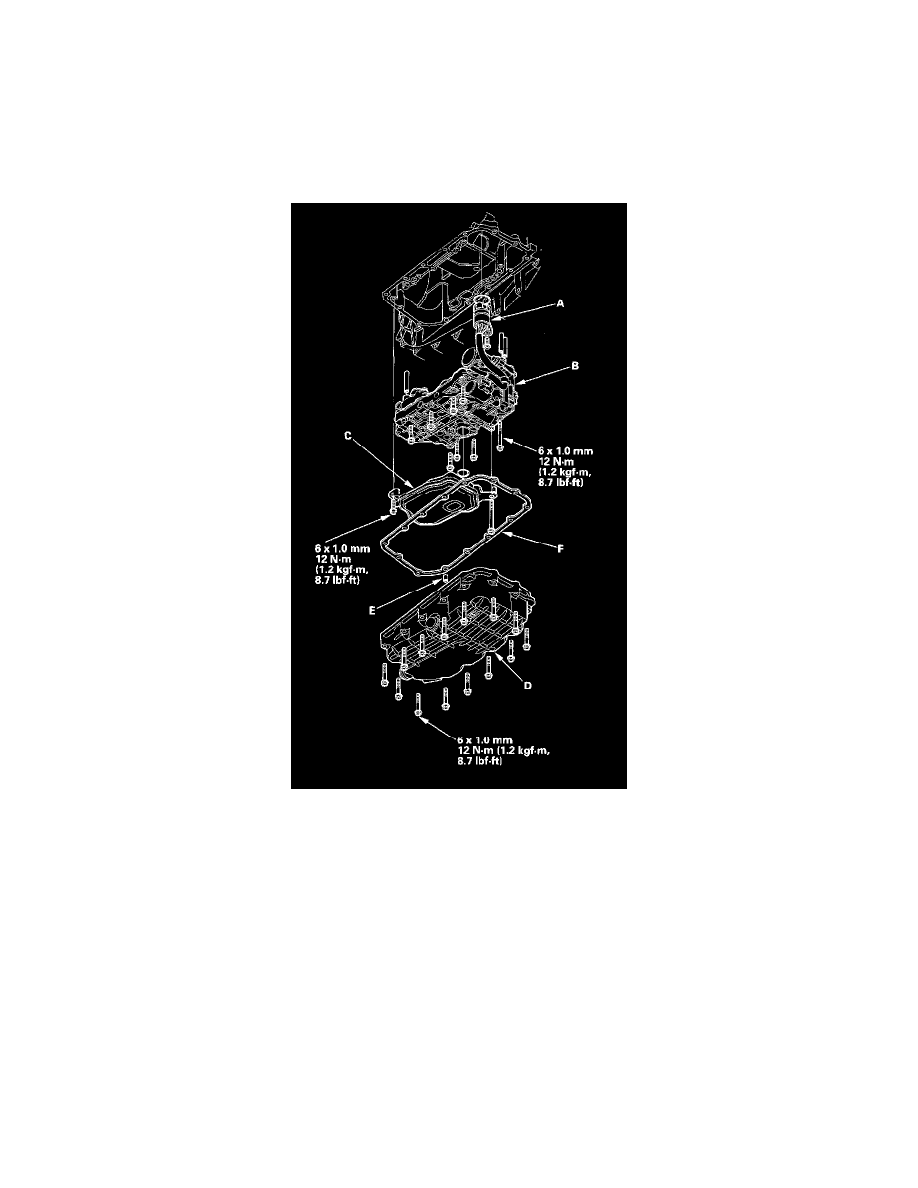
6. Remove the ATF strainer (B) (two bolts).
7. Remove the lower valve body assembly (C) (eight bolts).
8. Remove the bolt securing the solenoid harness connector (D) with holding the lower valve body assembly, and remove the connector and valve
body assembly.
Lower Valve Body Assemble Installation
1. Install the solenoid harness connector (A) with holding the lower valve body assembly (B).
2. Install the lower valve body assembly (eight bolts).
3. Install the ATF strainer (C) (two bolts).
4. Install the ATF pan (D) with the two dowel pins (E) and new gasket (F).
5. Check the solenoid harness connector for rust, dirt, or oil, then connect the connector securely.
6. Refill the transmission with ATF.
7. Perform the start clutch calibration procedure.