
Civic CX Hatchback L4-1590cc 1.6L SOHC MFI (1997)
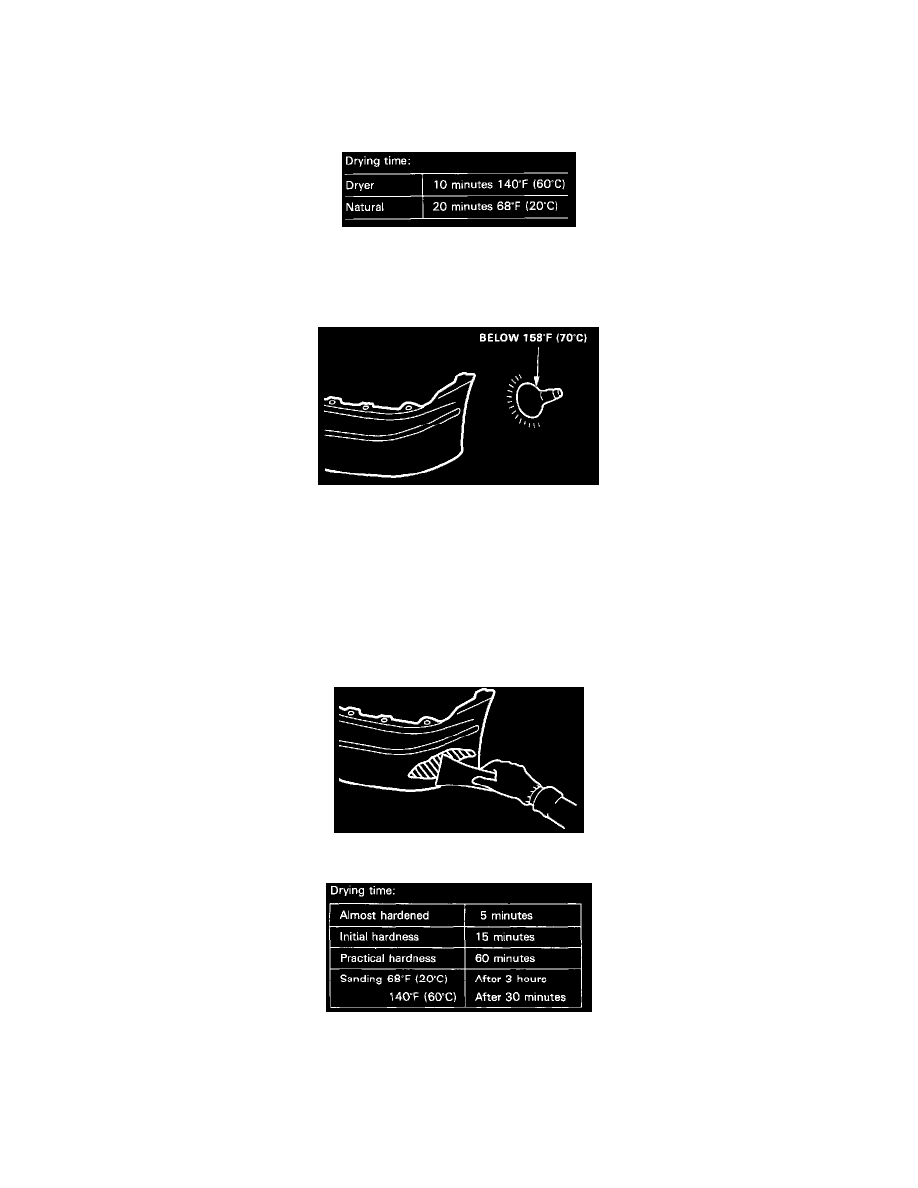
4. Drying bumper primer.
WARNING: Body parts being dried with an industrial dryer can get hot enough to cause injury.Do not touch parts being dried.
-
Dry the primer thoroughly with an infrared dryer or other dryer suitable for the purpose.
-
If the damage or groove is shallow, heat the entire surface evenly. Apply heat locally if the bumper is gouged or torn open.
NOTE:
-
Use a dryer whenever possible.
-
Do not allow temperature to exceed 158 degrees F (70 degrees C) or the bumper will deform
5. Apply filler (BOND QUICK MENDER.)
Mix the mender (A) into the hardener (B) in the ratio of I to I, and stir until they are thoroughly mixed.
-1. Apply the mixture over the damaged area with a putty knife using light pressure.
-2. Even out the surface to match the contour of the bumper.
-3. If there is a hole, cover it with a masking tape from the back, and apply the filler over the outside surface.
After the filler has been dried, remove the tape and apply filler to the side that was taped.
NOTE: Apply filler so it extends over more than the damaged area.
6. Drying filler
7. Sanding filler
WARNING: To prevent eye injury, wear goggles or safety glasses whenever sanding, cutting or grinding.
Wet sand first with #240 sandpaper then with #400 sandpaper.