
Civic DX Coupe L4-1590cc 1.6L SOHC MFI (1999)
4.
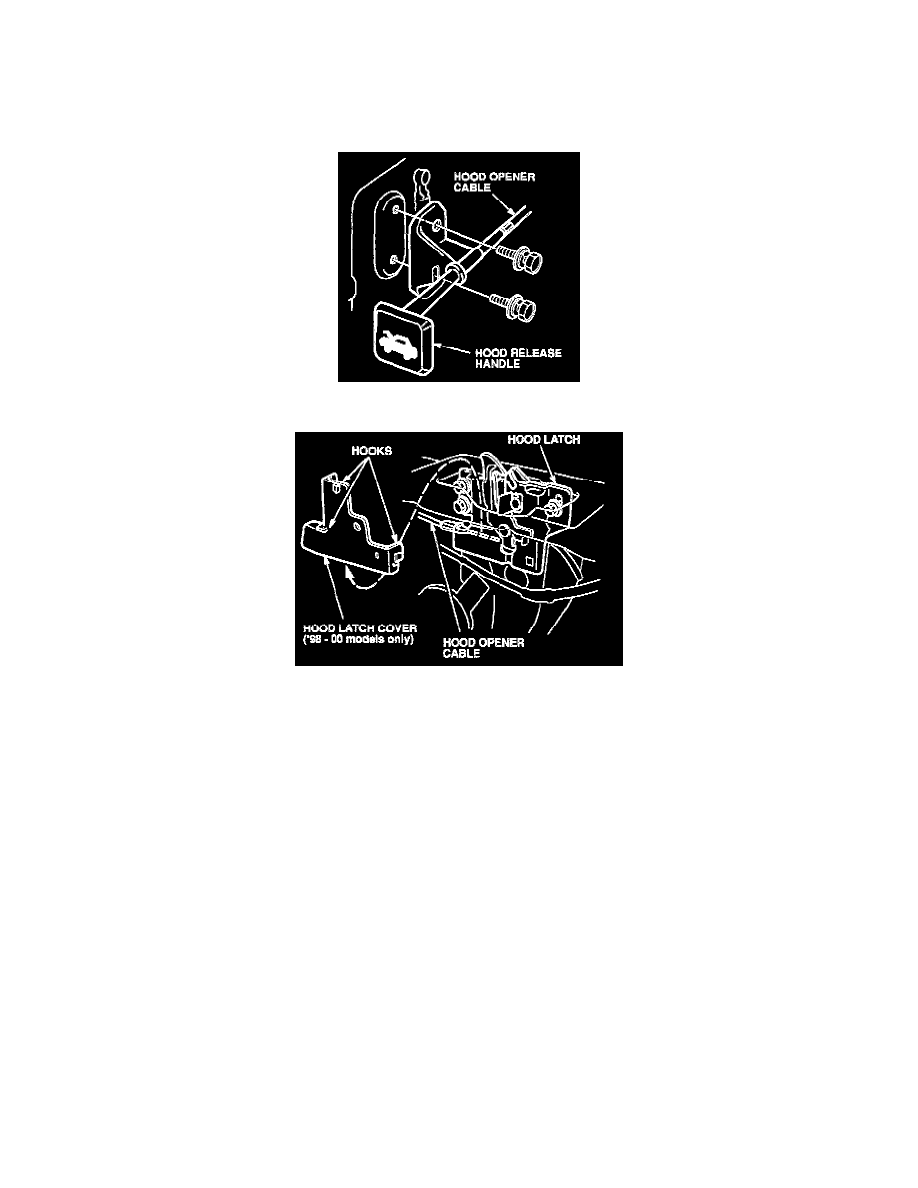
Release the four clips that attach the hood opener cable to the front bulkhead. Remove the clips from the opener cable; retain the clips.
5.
Detach the opener cable from the electrical harness clip behind the left front headlight.
6.
Release the two clips that attach the opener cable to the frame. Remove the clips from the cable; retain the clips.
7.
Remove the driver's kick panel, then remove the hood release handle (two bolts).
8.
'98-00 models only: Remove the hood latch cover.
9.
Detach the opener cable from the hood latch.
10.
From inside the passenger compartment, pull out the opener cable rubber grommet, then pull the opener cable out through the hole in the body.
Discard the opener cable and its rubber grommet.
11.
Route the end of the new opener cable through the hole in the body, into the fenderwell, through the hole in the body near the left front headlight,
and out to the hood latch.
12.
Install the hood release handle. Torque the bolts to 9.8 Nm (7.2 lb-ft).
13.
Press the opener cable rubber grommet into place. Reinstall the driver's kick panel.
14.
Attach the cable end to the hood latch.
15.
'98-00 models only: Reinstall the hood latch cover.
16.
Attach the two clips to the opener cable, and snap the clips into the mounting holes in the frame.
17.
Attach the opener cable to the electrical harness clip behind the left front headlight.
18.
Attach the four clips to the opener cable, and snap the clips into the mounting holes in the front bulkhead.
19.
Reinstall the power steering reservoir.
20.
Reinstall the left inner fender.