
Testing and Inspection of Front Brake Pads for Civic LX Sedan
-
Outer pad shim and outer pad contact surface
-
Outer pad shim and caliper body contact surface
11. Install the brake pads and pad shim correctly.
WARNING:
-
When reusing the pads, always reinstall the brake pads in their original positions to prevent loss of braking efficiency.
-
Contaminated brake discs or pads reduce stopping ability. Keep grease off the discs and pads.
NOTE: Install the pad with the wear indicator on the inside.
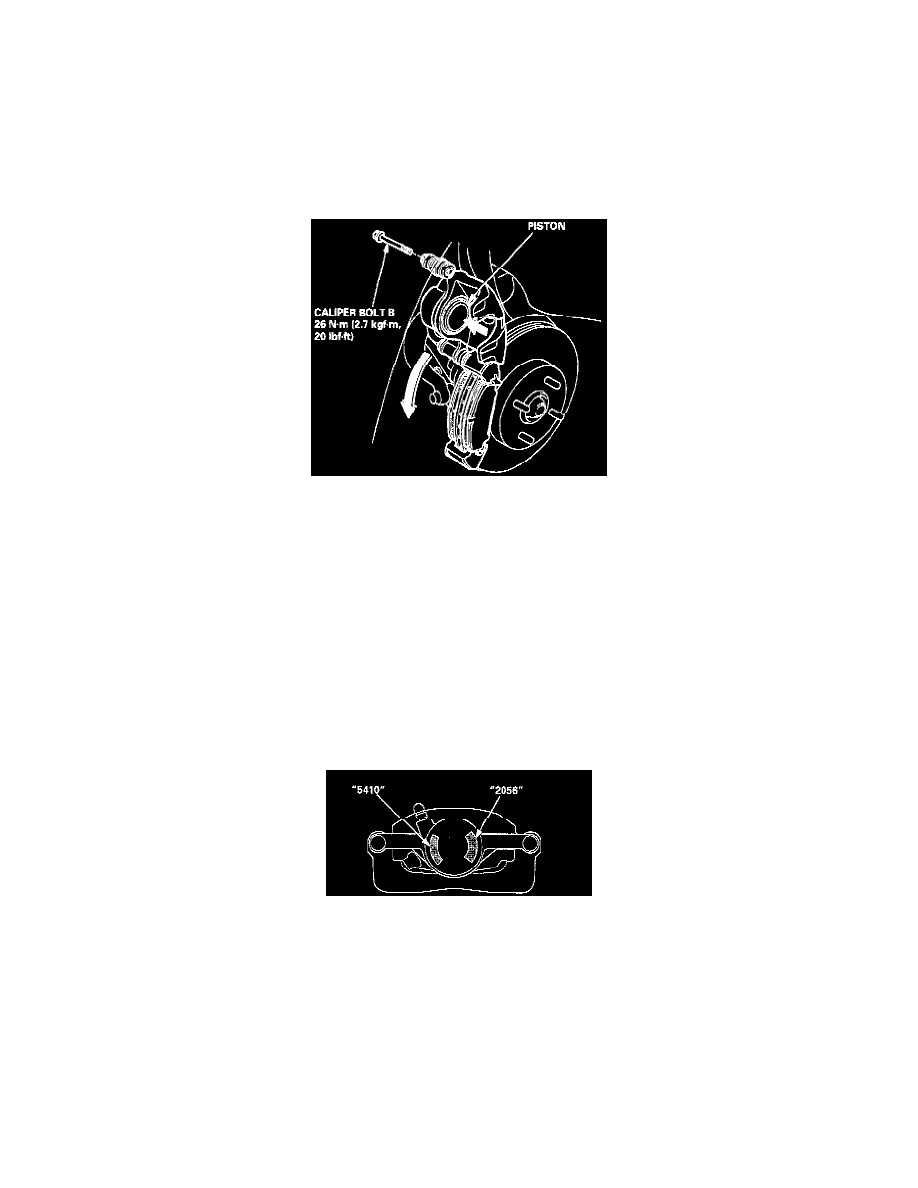
12. Push in the piston so that the caliper will fit over the pads. Make sure that the piston boot is in position to prevent damaging it when pivoting the
caliper down.
13. Pivot the caliper down into position, then install caliper bolt B and tighten it.
14. Install the brake hose bracket on the knuckle.
NOTE: Inspect the brake hose for interference and twisting.
15. Depress the brake pedal several times to make sure the brakes work, then road-test.
NOTE: Engagement of the brake may require a greater pedal stroke immediately after the brake pads have been replaced as a set. Several
applications of the brake pedal will restore the normal pedal stroke.
16. After installation, check for leaks at hose and line joints and connections, and retighten if necessary.
Type 5410
Front Brake Calipers
NOTE: There are two types of front brake calipers: The caliper types can be identified by the "5410" or "2056" stamped on the caliper body as shown.
Check the type of the brake caliper before servicing.
WARNING:
-
Never use an air hose or dry brush to clean brake assemblies.
-
Use an OSHA approved vacuum cleaner to avoid breathing brake dust.
1. Loosen the front wheel nuts slightly, then raise the vehicle, and support it on safety stands. Remove the front wheels.
2. Remove the brake hose bracket from the knuckle.