Civic LX Sedan L4-1590cc 1.6L SOHC MFI (1998)

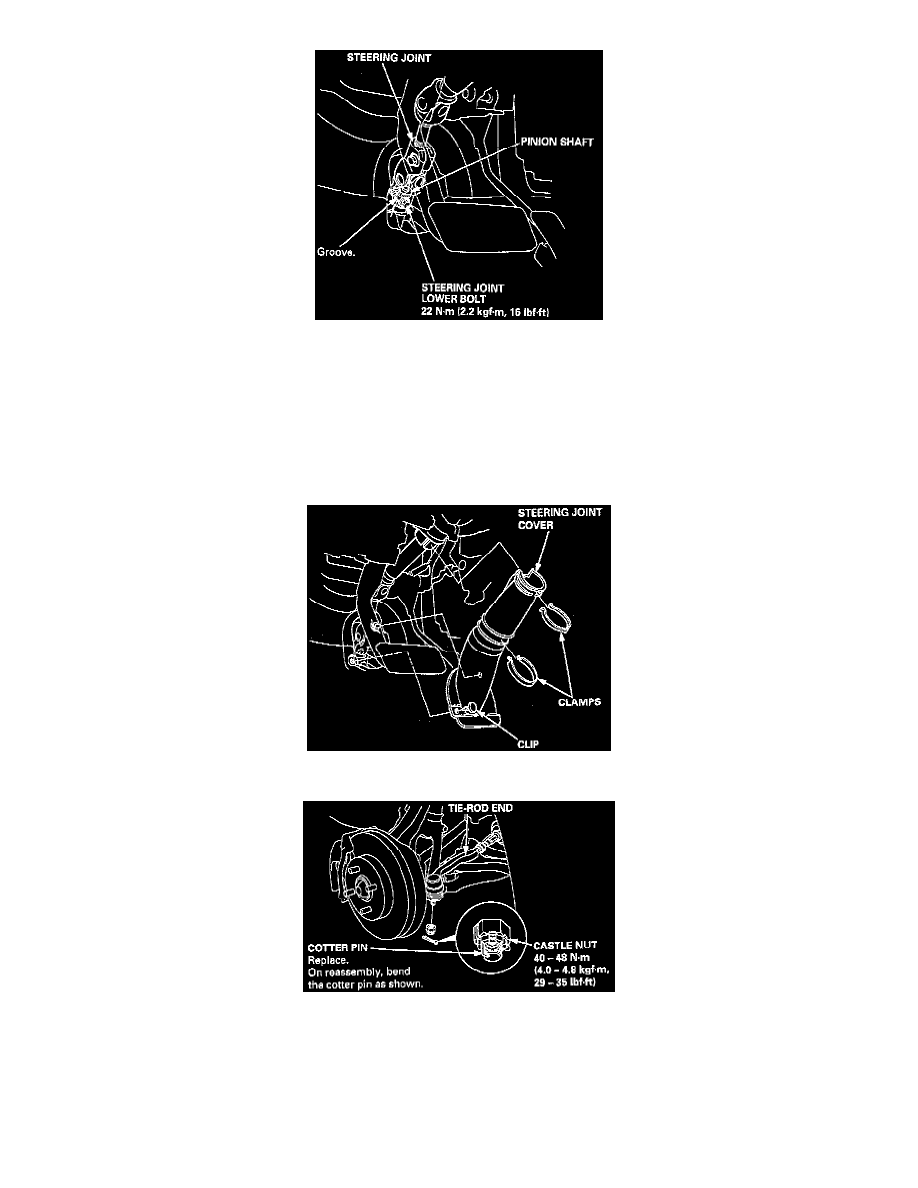
10. Slip the lower end of the steering joint onto the pinion shaft (line up the bolt hole with the groove around the shaft), and tighten the lower bolt.
NOTE:
-
Connect the steering shaft and pinion with the cable reel and steering rack centered.
-
Be sure that the lower steering joint bolt is securely in the groove in the steering gearbox pinion.
-
If the steering wheel and rack are not centered, reposition the serrations at lower end of the steering joint.
11. Center the cable reel by first rotating it clockwise until it stops. Then rotate it counterclockwise (approximately two turns) until the arrow mark on
the label points straight up. Reinstall the steering wheel.
12. Install the steering joint cover with the clamps and a clip.
13. Reconnect the tie-rod ends to the steering knuckles, tighten the castle nut to the specified torque, and install new cotter pins.
NOTE: Before connecting the tie-rod ends, wipe off any grease contamination from the ball joint tapered section and threads.
CAUTION: Torque the castle nut to the lower torque specification, then tighten it only far enough to align the slot with the pin hole. Do not align
the nut by loosening.
14. Install the exhaust pipe A or TWC.
