
Civic LX Sedan L4-1590cc 1.6L SOHC MFI (1998)
8. Install the steering joint cover with the clamps and clips.
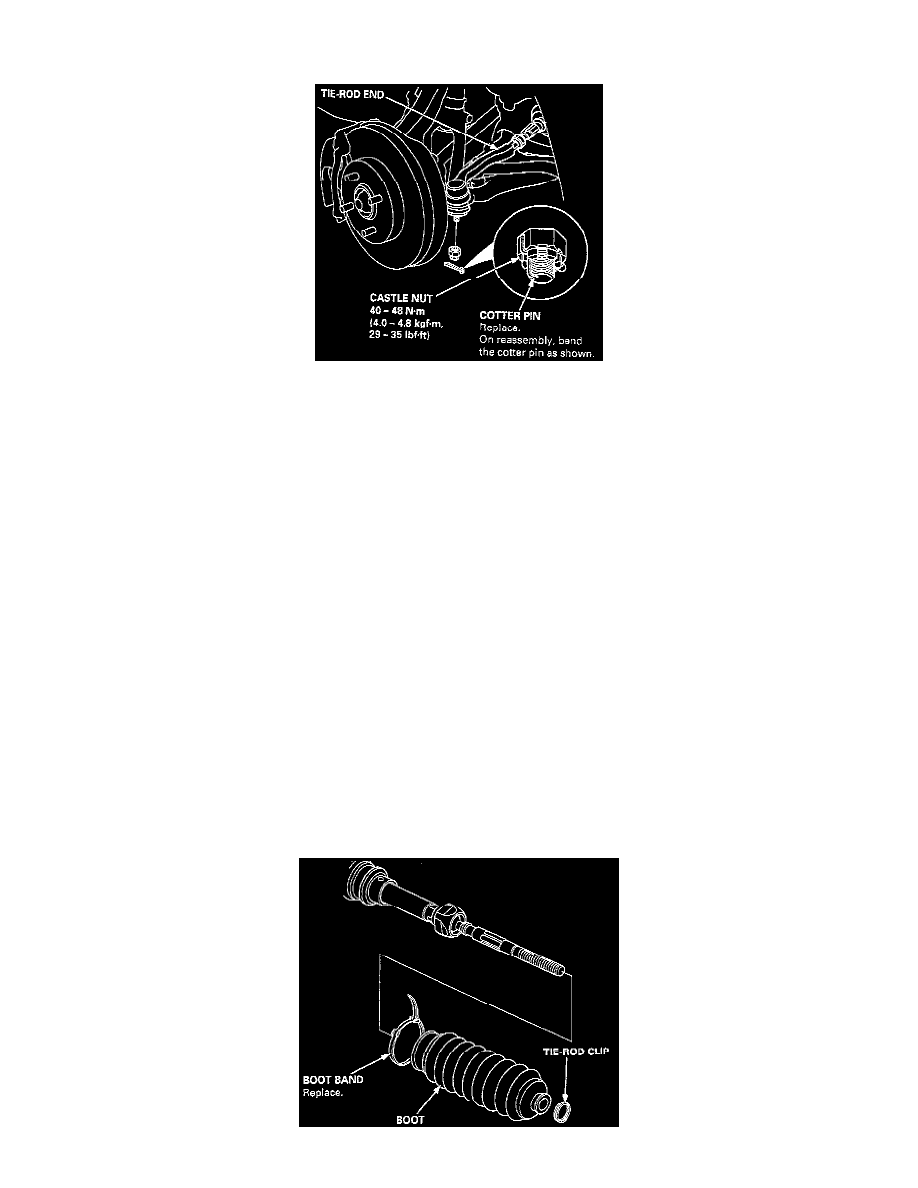
9. Reconnect the tie-rod ends to the steering knuckles, then tighten the castle nut to the specified torque, and install new cotter pins.
NOTE: Before connecting the tie-rod ends, wipe off any grease contamination from the ball joint tapered section and threads.
CAUTION: Torque the castle nut to the lower torque specification, then tighten it only far enough to align the slot with the pin hole. Do not align
the nut by loosening.
10. Install the exhaust pipe A or TWC.
11. Connect the shift linkage.
12. Install the front wheels.
13. After installation, perform the following checks.
a. Adjust the front toe.
b. Check the steering wheel spoke angle. Adjust by turning the right and led tie-rods, if necessary.
NOTE: Turn the right and left tie-rods equally.
Overhaul
TOOL REQUIRED
-
07746-0020100 Driver, 22 mm I.D.
-
Roll Pin Drift
DISASSEMBLE
1. Place the gearbox in a vise with a soft jaws, then clamp the gearbox at the mount bracket or gear housing.
CAUTION: Be careful not to distort the gear housing by clamping it too tight in the vise incorrectly.
2. Remove the tie-rod end and locknut.