
Civic Natural Gas L4-1.8L CNG (2012)
Headlamp: Service and Repair
Headlight Bracket Replacement
NOTE:
-
Put on gloves to protect your hands.
-
When the positioning pin for attaching the headlight assembly is damaged or stress-whitened, the headlight assembly can be reused if the sealing
of the headlight lens and the headlight housing is maintained.
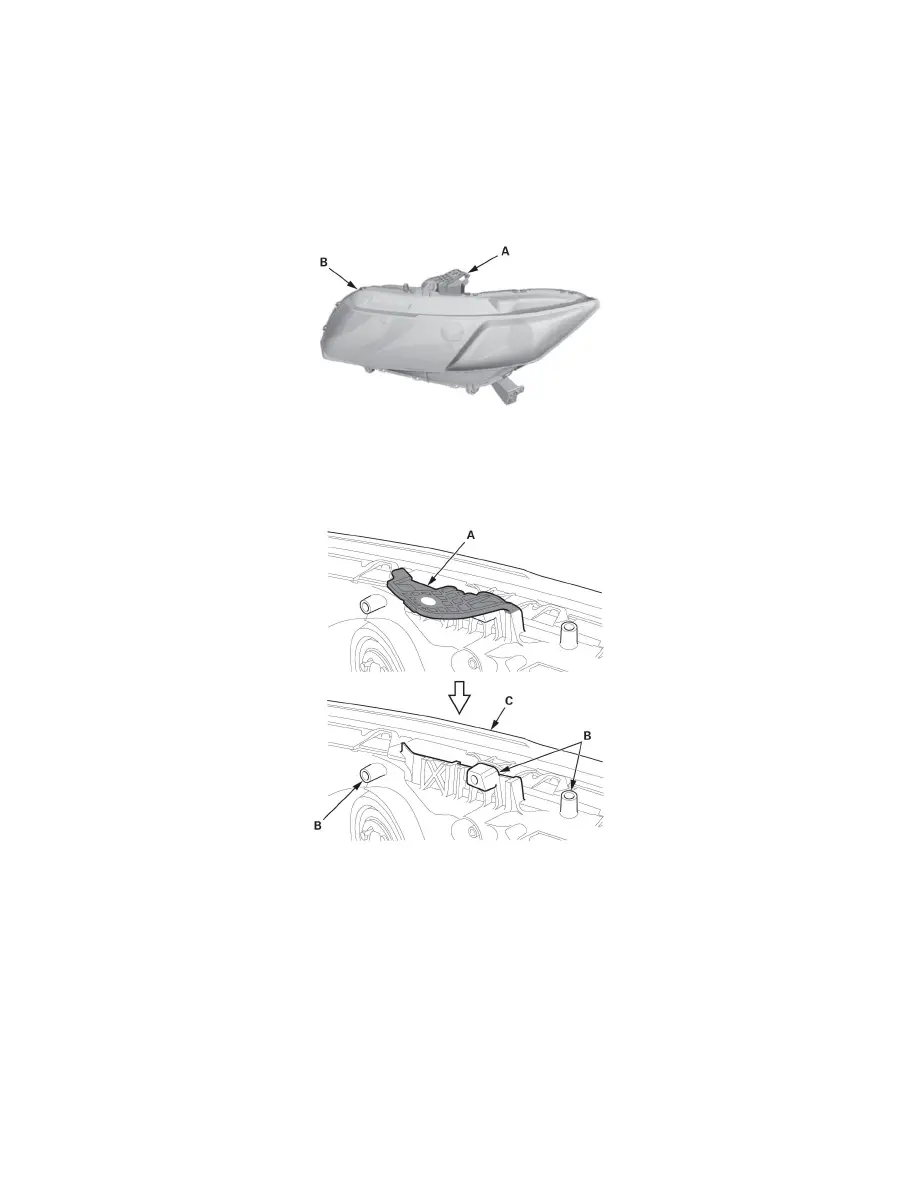
When the upper bracket (A) of the headlight assembly (B) is broken, it can be reinstalled using the repair bracket if it meets this criteria;
-
There is no damage to the headlight assembly.
-
The sealing of the headlight lens and headlight housing is maintained.
Replacement
1. Remove the front bumper.
2. Remove the headlight assembly.
3. Cut or grind off the damaged upper bracket (A) so that the bosses (B) of the headlight housing (C) are left as shown. After removing the damaged
bracket, finish the cut area with 400 grit sandpaper. Take care not to scratch the headlight assembly.
4. Install the upper repair bracket (A) on the bosses (B) of the headlight housing (C), then fasten it with the 5mm screws (D) and the 4 mm screw (E)
provided with the repair bracket.