Civic VP Sedan L4-1590cc 1.6L SOHC MFI (1999)

Valve Body: Service and Repair
Removal
NOTE: Clean all parts thoroughly in solvent or carburetor cleaner, and dry with compressed air. Blow out all passages. When removing the valve
body, replace the O-ring.
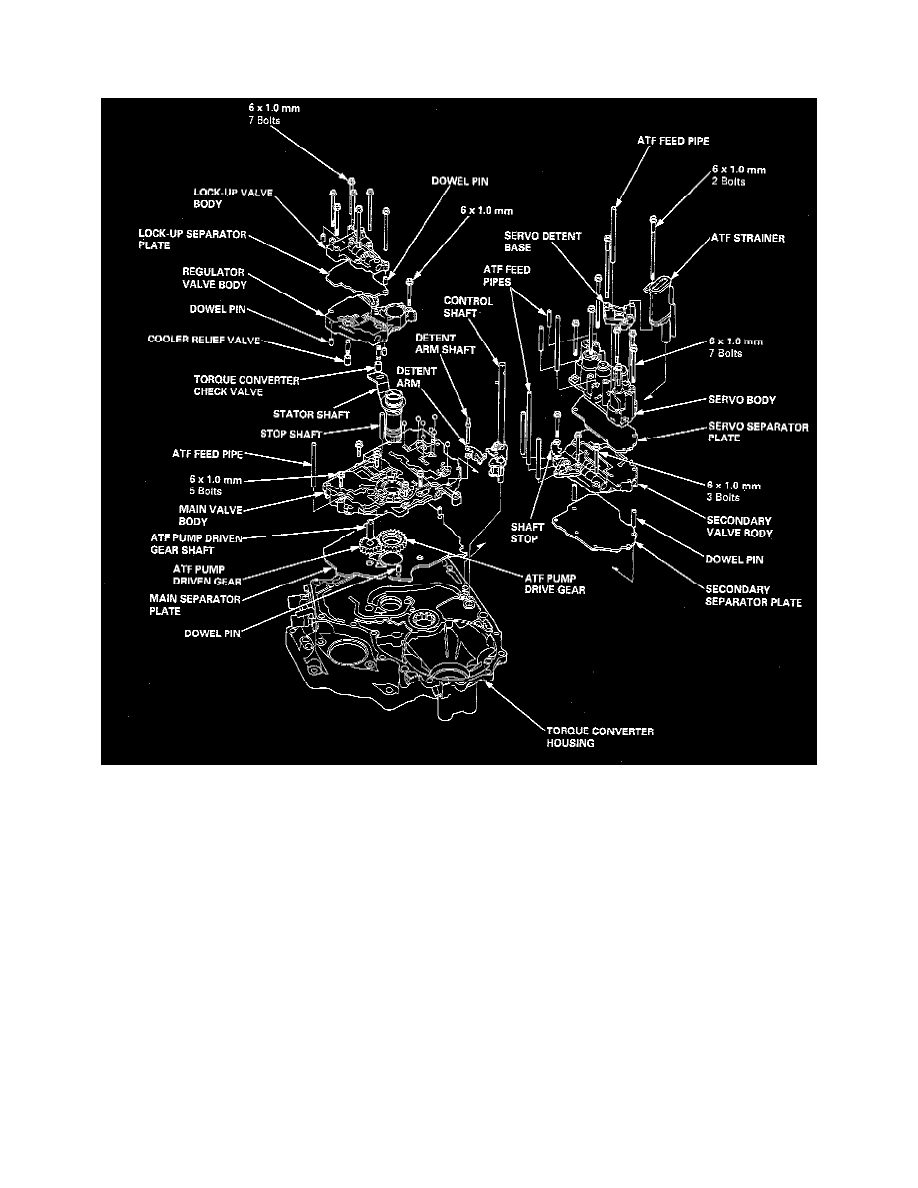
1. Remove the ATF feed pipes from the servo body, secondary valve body and main valve body.
2. Remove the ATF strainer and servo detent base (two bolts).
3. Remove the servo body and servo separator plate (seven bolts).
4. Remove the secondary valve body, shaft stop and secondary separator plate (three bolts).
5. Remove the lock-up valve body and separator plate (seven bolts).
6. Remove the regulator valve body (one bolt).
7. Remove the stator shaft and stop shaft.
8. Remove the detent spring from the detent arm, then remove the control shaft from the torque converter housing.
9. Remove the detent arm and detent arm shaft from the main valve body.
10. Remove the main valve body (five bolts).
NOTE: Do not let the eight check balls fall out of the main valve body when removing the main valve body.
11. Remove the ATF pump driven gear shaft, then remove the ATF pump gears.
12. Remove the main separator plate and two dowel pins.
