Civic VP Sedan L4-1590cc 1.6L SOHC MFI (1999)

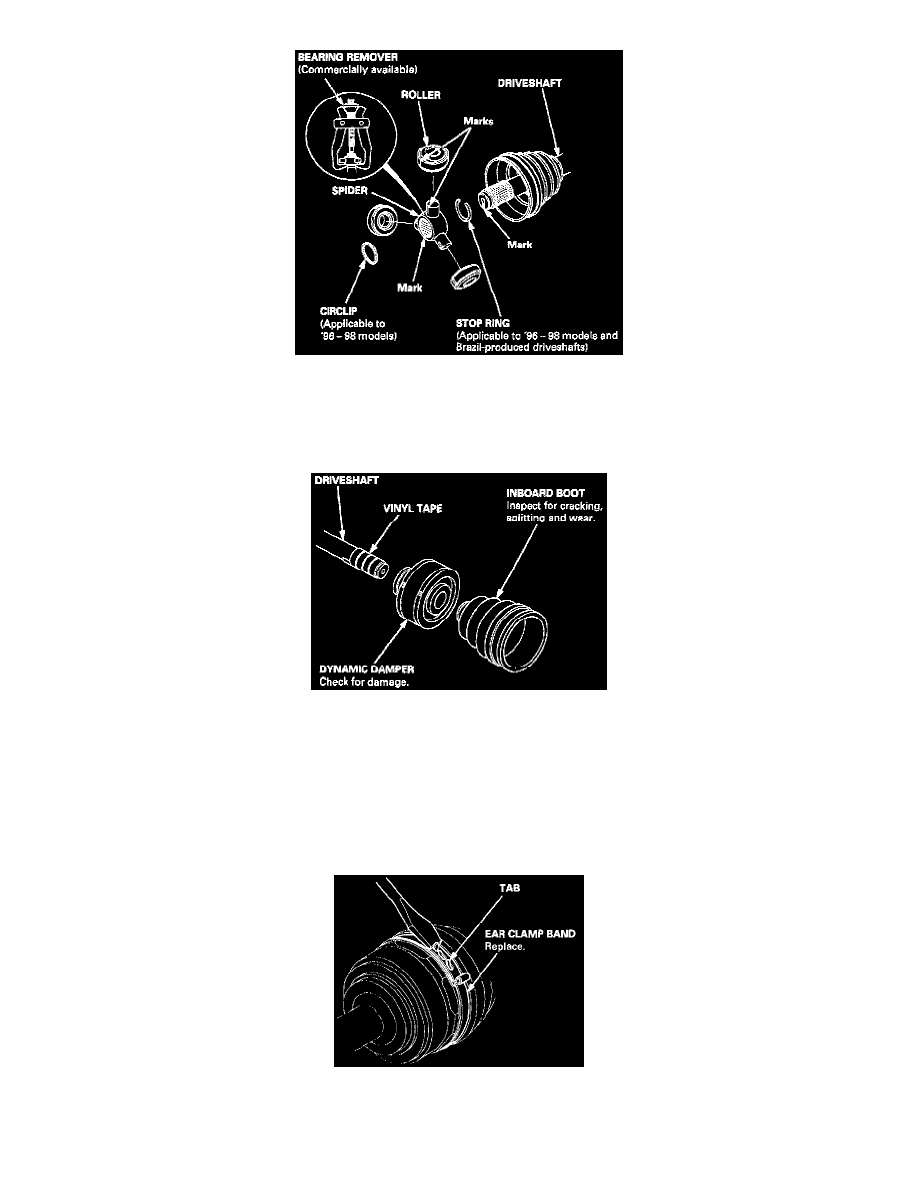
4. Mark the rollers and spider to identify the locations of the rollers on the spider, then remove the rollers.
5. Remove the circlip if applicable.
6. Mark the spider and driveshaft to identify the position of the spider on the shaft.
7. Remove the spider using a bearing remover.
8. Remove the stop ring (applicable to 98 models and Brazil-produced driveshafts).
9. Wrap the splines on the driveshaft with vinyl tape to prevent damage to the boot and dynamic damper.
10. Remove the inboard boot, and if necessary, the dynamic damper.
Outboard Joint Side:
1. Lift up the three tabs with a screwdriver, then remove the boot bands. Take care not to damage the boot.
NOTE:
-
If the boot band is a double loop type, lift up the band bend.
-
If the boot band is a welded type, cut the boot band.
-
If the boot band is a locking tabs type, pry up the tabs with a screwdriver, and lift up the end of the band.
