
CR-V 2WD L4-2.4L (2003)
2.
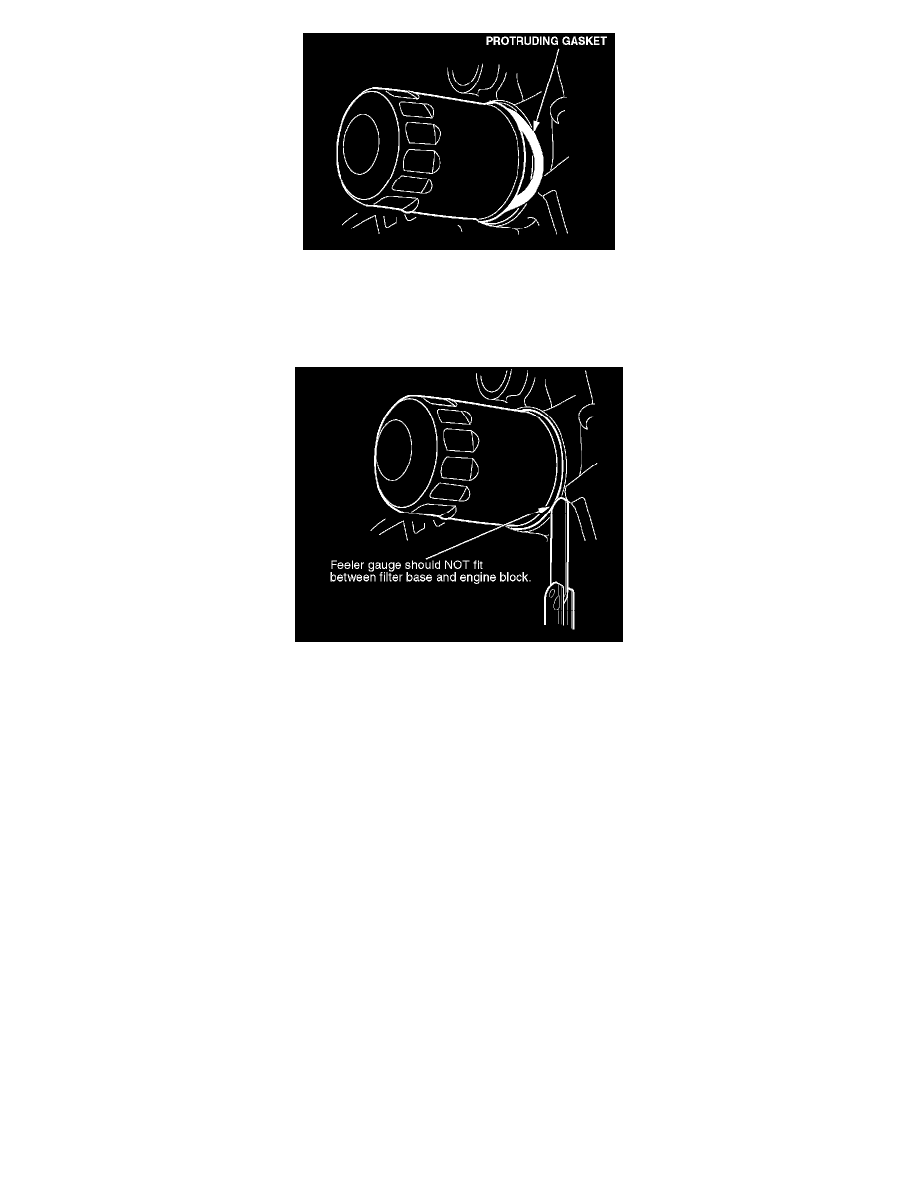
Check for a protruding gasket between the oil filter base and the engine block by running your finger around the entire base of the oil filter:
^
If you can feel a protruding gasket, go to REPAIR PROCEDURE A: CUSTOMER VEHICLES.
^
If you cannot feel a protruding gasket, go to step 3.
3.
Try to insert a 0.25 mm (0.010-inch) feeler gauge between the base of the Honda oil filter and the engine block.
^
If you can insert the feeler gauge, the filter may have a double-gasket condition. Go to REPAIR PROCEDURE A: CUSTOMER VEHICLES.
^
If you cannot insert the feeler gauge, the filter is properly installed. Return the vehicle to the customer.
REPAIR PROCEDURE A: CUSTOMER VEHICLES
1.
Take a clear, digital photo of the oil filter gasket area, and e-mail the photo to Tech Line:
^
Title your e-mail CR-V Oil Filter Gasket."
^
Attach the photo to your e-mail, then review the photo on your computer to make sure it is clear.
^
You must include the VIN and your dealer number with each e-mail.
2.
Remove the oil filter.
NOTE:
If a non-Honda oil filter with a double-gasket condition is found, document it by taking a clear, digital photo (see step 1).
3.
Wipe off the oil filter seat on the engine block.
4.
Apply a light coat of clean engine oil to the gasket on the new oil filter. Then install the new oil filter using the instructions printed on it.
5.
Run the engine for 3 minutes, and check for leaks:
^
If there are no leaks, go to step 6.