
CR-V 2WD L4-2.4L (2003)
Wiper Motor: Testing and Inspection
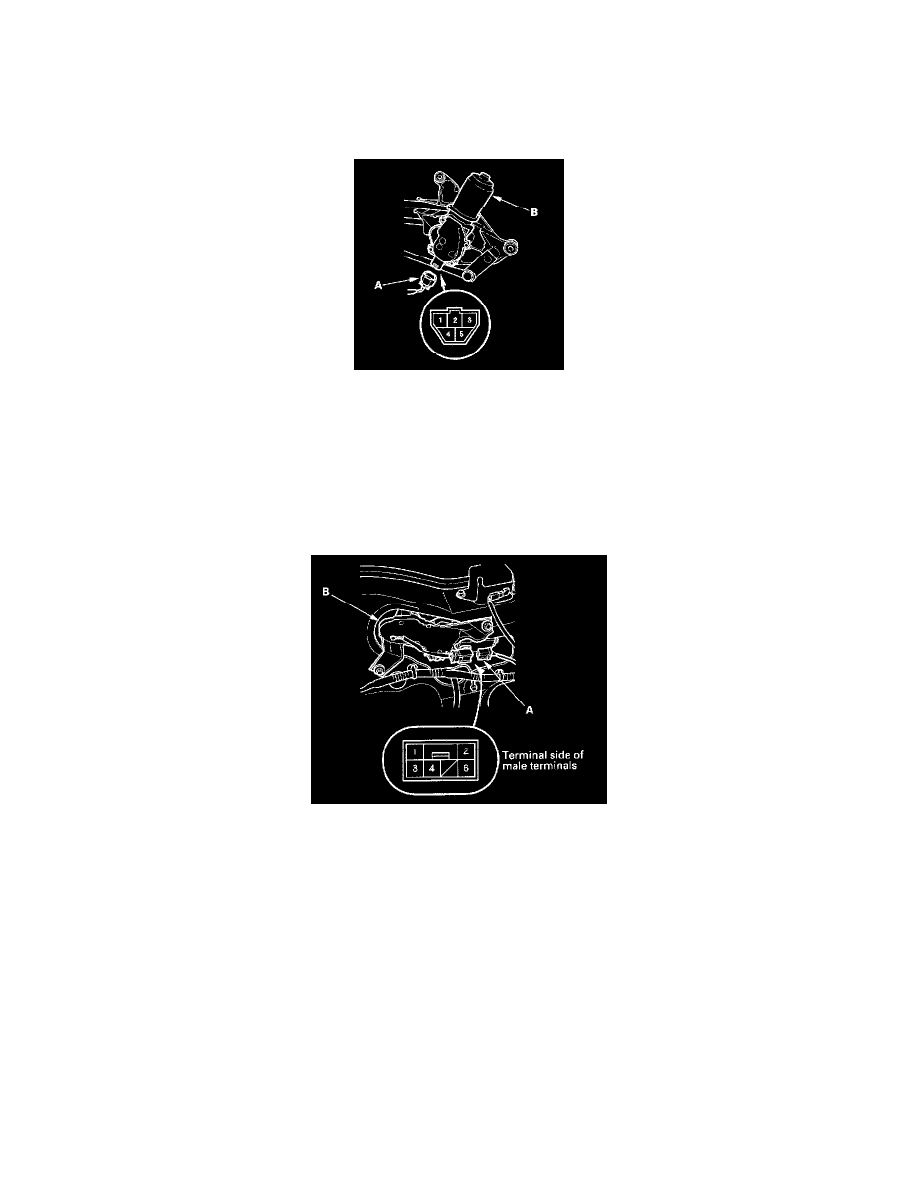
Wiper Motor Test
Windshield:
1. Remove the wiper arms, hood seals, and cowl covers.
2. Disconnect the 5P connector (A) from the wiper motor (B).
3. Test the motor by connecting battery power to the No.5 terminal and ground the No.1 terminal of the wiper motor 5P connector. The motor should
run. If the motor does not run or fails to run smoothly, replace the motor.
4. Connect an analog voltmeter between the No.3 (+) and No.4 (-) terminals, and run the motor at low or high speed. The voltmeter should indicate
12 V and 4 V or less alternately.
Rear Window:
1. Open the tailgate, and remove the tailgate lower trim panel.
2. Disconnect the 4P connector (A) from the wiper motor (B).
3. Test the motor by connecting battery power to the No.1 terminal and ground the No.3 terminal of the wiper motor. The motor should run. If the
motor does not run or fails to run smoothly, replace the motor.
4. Connect an ohmmeter between No.3 and No.6 terminal and between No.3 terminal and No.4 terminal.
There should be continuity when the wiper is in the park position.
5. Connect an ohmmeter between No.3 terminal and No.6 terminal.
There should be no continuity when the wiper is in the stand-by position.
6. Connect an ohmmeter between No.3 terminal and No.4 terminal.
There should be continuity when the wiper is in the stand-by position.