
CR-V EX 4WD L4-2.4L (2002)
9. Rotate the socket holder (A) on the shift cable (B) a quarter turn; the tab (C) on the socket holder will be in the opening (D) of the socket holder
bracket (E). Then slide the holder to remove the shift cable from the socket holder bracket.
NOTE: Do not remove the shift cable by twisting the shift cable guide (F) and damper (G).
10. Remove the shift lever assembly.
11. Remove the harness from the harness clamp on the shift lever bracket base, and remove the harness band from the harness.
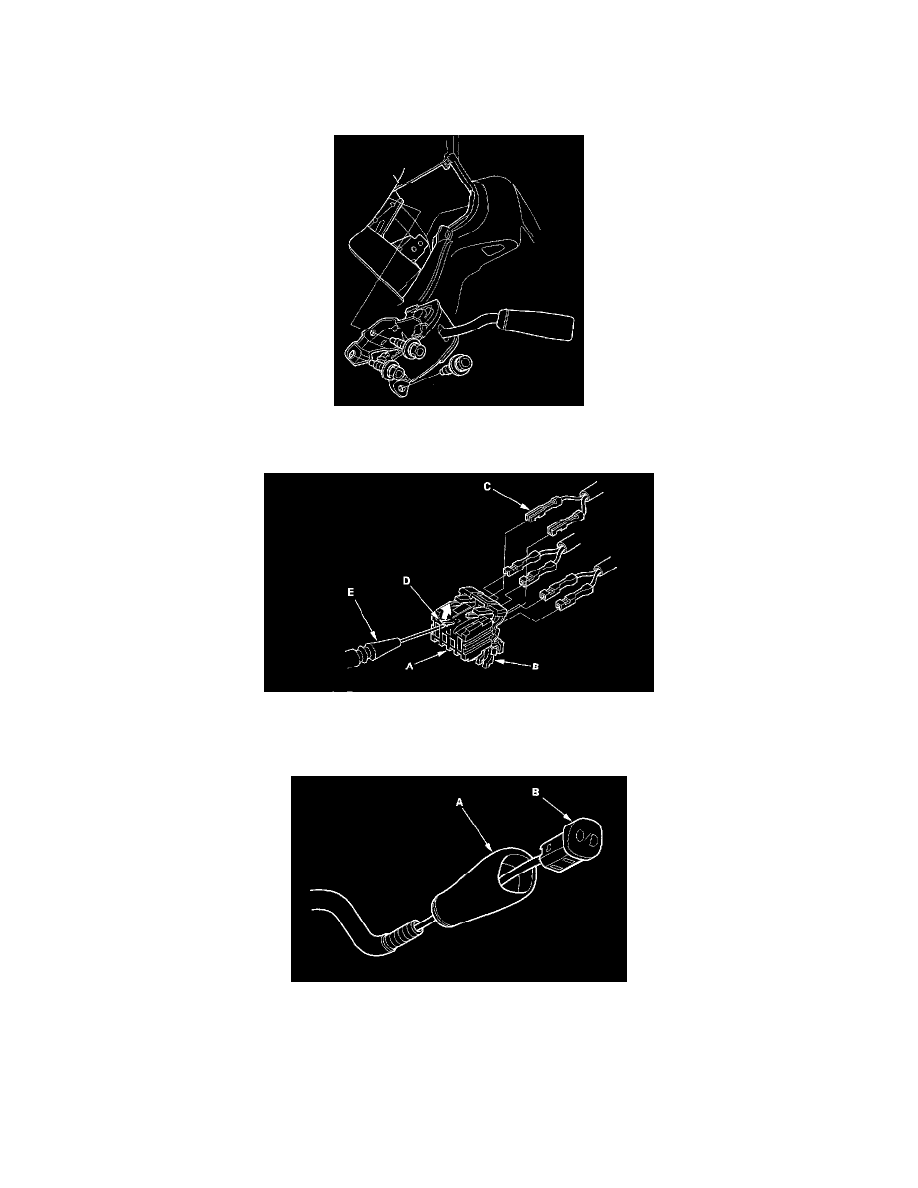
12. Pry the lock tabs on the back of the O/D switch/shift lock solenoid/park pin switch connector (A), and remove the lock (B).
13. Remove the terminal (C) from the connector by pushing the lock tab (D) up in the connector using a thin blade screwdriver (E). Remove all six
terminals.
14. Remove the shift lever knob (A), then remove the O/D switch (B) from the knob.