
CR-V LX 2WD L4-1972cc 2.0L DOHC MFI (1998)
3.
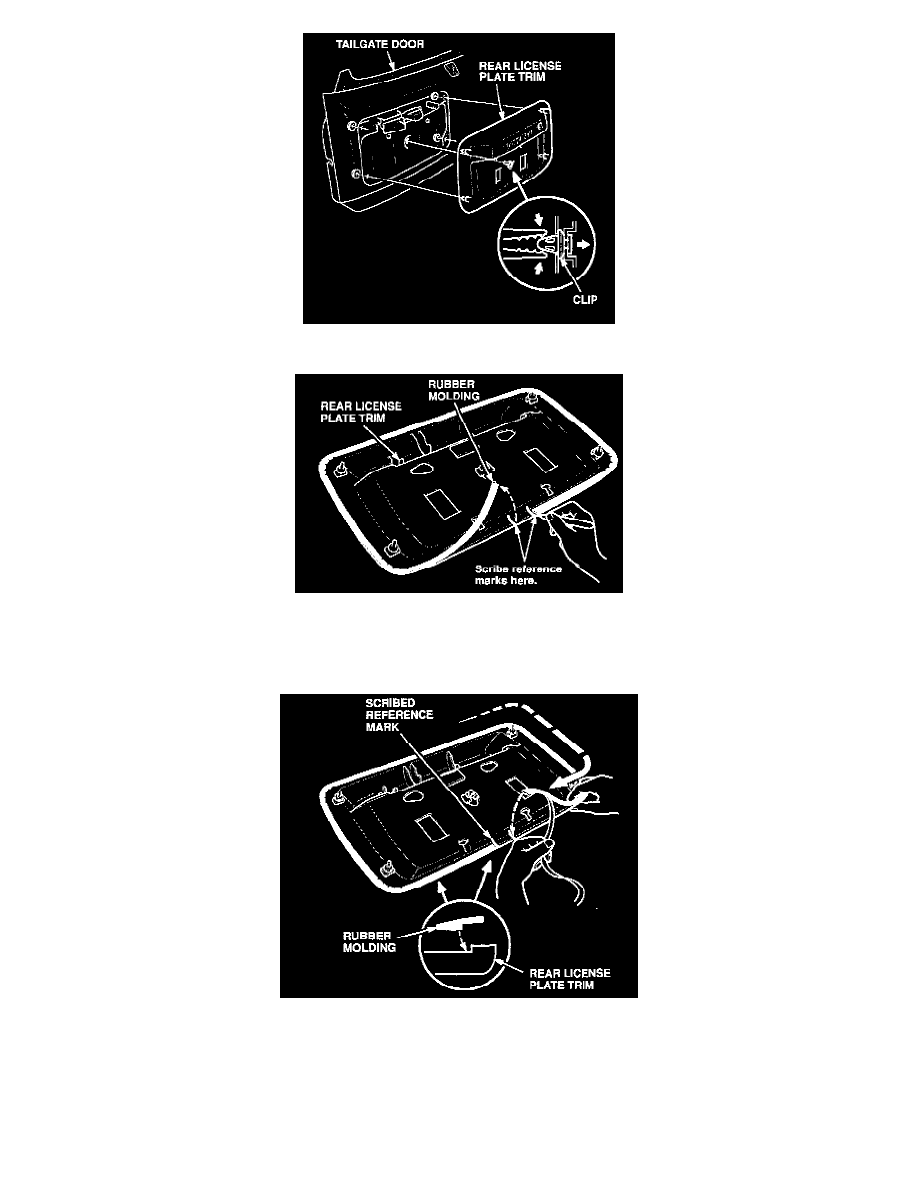
Remove the four nuts, detach the clip, and remove the rear license plate trim from the tailgate door.
4.
Scribe a reference mark on the inside of the rear license plate trim at the ends of the rubber molding.
5.
Remove the rubber molding and any remaining adhesive tape from the rear license plate trim. Remove any remaining adhesive with adhesive
cleaner (see RECOMMENDED MATERIALS).
6.
Peel the protective tape off the new rubber molding. Apply the rubber molding to the rear license trim, using one of the scribed reference marks as
a starting point. Be sure the step of the rubber molding aligns with the step on the edge of the license plate trim. Do not stretch the rubber molding
when applying it.
7.
Reinstall the rear license plate trim, and secure it with the four nuts and the clip. Torque the nuts to 1.8 Nm (16 lb-inches).
8.
Reinstall the tailgate door panel and license plate.