
CR-V LX 2WD L4-1972cc 2.0L DOHC MFI (1998)
PGM-FI Relay: Testing and Inspection
Relay Testing
NOTE: If the engine starts and continues to run, the PGM-FI main relay is OK.
1. Remove the glovebox and the passenger's dashboard lower cover.
2. Remove the PGM-FI main relay.
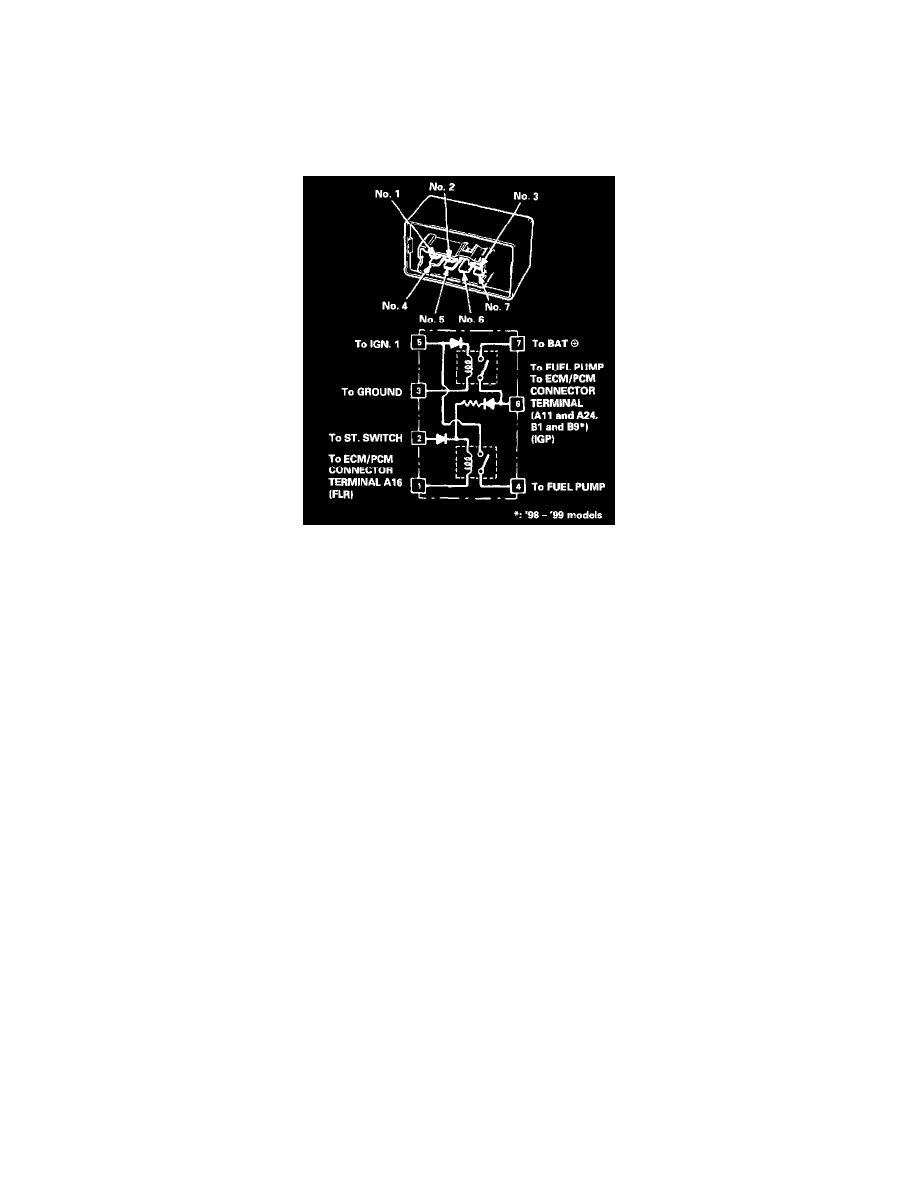
3. Attach the battery positive terminal to the No.2 terminal and the battery negative terminal to the No.1 terminal of the PGM-FI main relay. Then
check for continuity between the No.5 terminal and No.4 terminal of the PGM-FI main relay.
-
If there is continuity, go on to step 3.
-
If there is no continuity, replace the PGM-FI main relay and retest.
4. Attach the battery positive terminal to the No.5 terminal and the battery negative terminal to the No.3 terminal of the PGM-FI main relay. Then
check that there is continuity between the No.7 terminal and No. 6 terminal of the PGM-FI main relay.
-
If there is continuity, go on to step 4.
-
If there is no continuity, replace the PGM-FI main relay and retest.
5. Attach the battery positive terminal to the No.6 terminal and the battery negative terminal to the No.1 terminal of the PGM-FI main relay. Then
check that there is continuity between the No.5 terminal and No.4 terminal of the PGM-FI main relay.
-
If there is continuity, the PGM-FI main relay is OK.
-
If there is no continuity, replace the PGM-FI main relay and retest.