
CR-V LX 2WD L4-1972cc 2.0L DOHC MFI (1998)
Seat Belt Tensioner: Service and Repair
Deployment Tool Check Procedure
Deployment Tool: Check Procedure
1. Connect the yellow clips to both switch protector handles on the tool; connect the tool to a battery.
2. Push the operation switch: green means the tool is OK; red means the tool is faulty.
3. Disconnect the battery and the yellow clips.
Deploying the Seat Belt Tensioner (Inside Vehicle)
Before scrapping any airbags (and seat belt tensioners) (including those in a whole vehicle to be scrapped), the airbags (and seat belt tensioners) must be
deployed. If the vehicle is still within the warranty period the Honda District Service Manager must give approval and/or special instructions, before you
deploy the airbags (and seat belt tensioners). Only after the airbags (and seat belt tensioners) have been deployed (as the result of vehicle collision, for
example), can they be scrapped.
If the airbags (and seat belt tensioners) appear intact (not deployed), treat them with extreme caution. Follow this procedure:
Deploying The Airbags (and Seat Belt Tensioners): In-Vehicle
If an SRS vehicle is to be entirely scrapped, its airbags
(and seat belt tensioners) should be deployed while still in the vehicle. The airbags (and seat belt tensioners) should not be considered as salvageable
parts and should never be installed in another vehicle.
WARNING: Confirm that each airbag (and seat belt tensioner) is securely mounted; otherwise, severe personal injury could result from
deployment.
1. Disconnect the battery negative cable, then disconnect the positive cable.
2. Confirm that the special tool is functioning properly by following the check procedure on the tool label.
3. Remove the access panel, then disconnect the 2P connector between the driver's airbag and the cable reel.
4. Remove the glove box, then disconnect the 2P connector between the front passenger's airbag and SRS main harness.
5. Remove the center pillar lower trim panel, then disconnect the 2P connector between the seat belt tensioner and side wire harness.
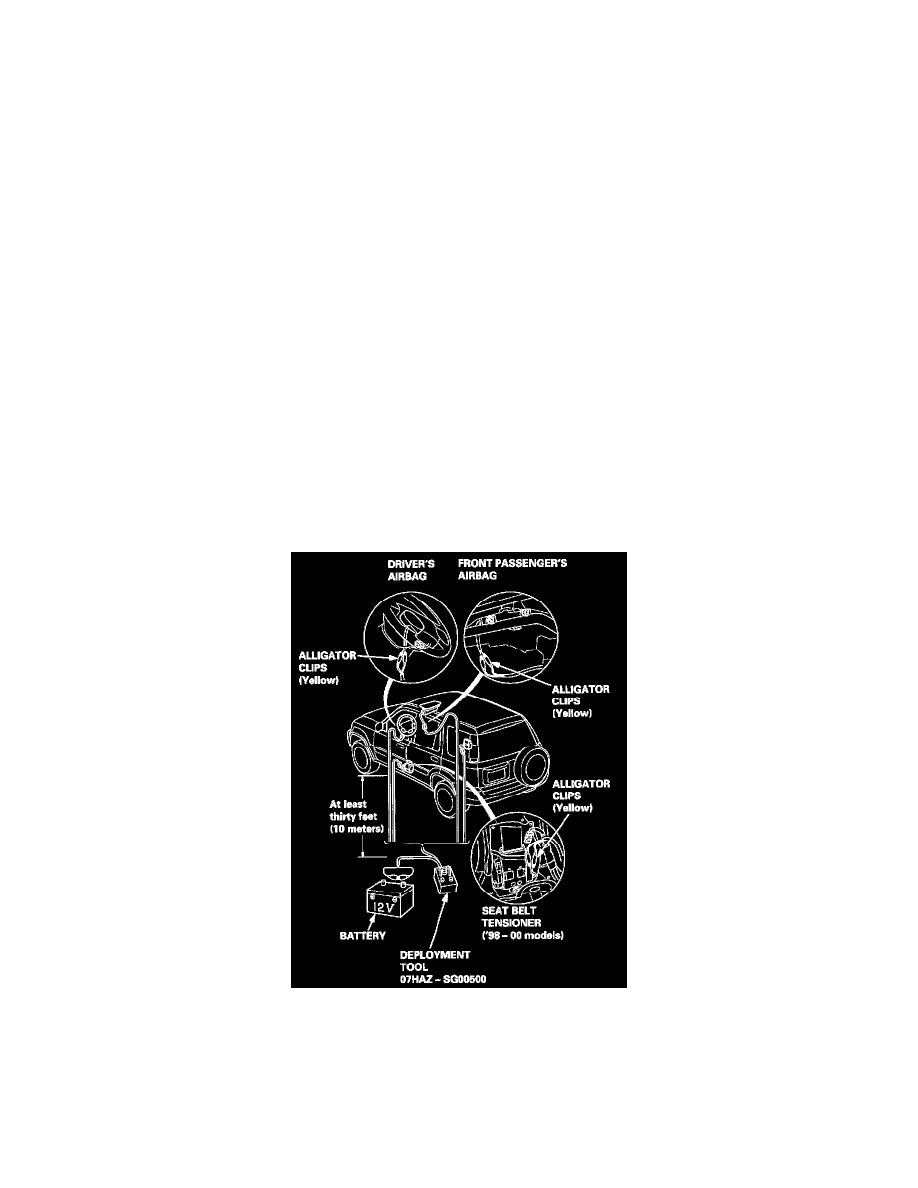
6. Cut off the airbag (and seat belt tensioner) connectors. Strip the ends of the airbag (and seat belt tensioner) wires, and connect the deployment tool
alligator clips to the airbag (and seat belt tensioner). Place the deployment tool at least thirty feet (10 meters) away from the airbag (and seat belt
tensioner).
7. Connect a 12 volt battery to the tool:
-
If the green light on the tool comes on, the air-bag igniter circuit is defective and cannot deploy the airbag. Go to Damaged Airbag Special
Procedure.
-
If the red light on the tool comes on, the airbag is ready to be deployed.