
CR-V LX 2WD L4-1972cc 2.0L DOHC MFI (1998)
Parking Pin Switch: Service and Repair
WARNING: SRS components are located in this area. Review the SRS component locations, precautions, and procedures before performing
repairs or service.
1. Remove the instrument panel lower cover.
2. Remove the upper and lower steering column covers.
3. Remove the flange nuts and bolts securing the steering column, then lower the steering column.
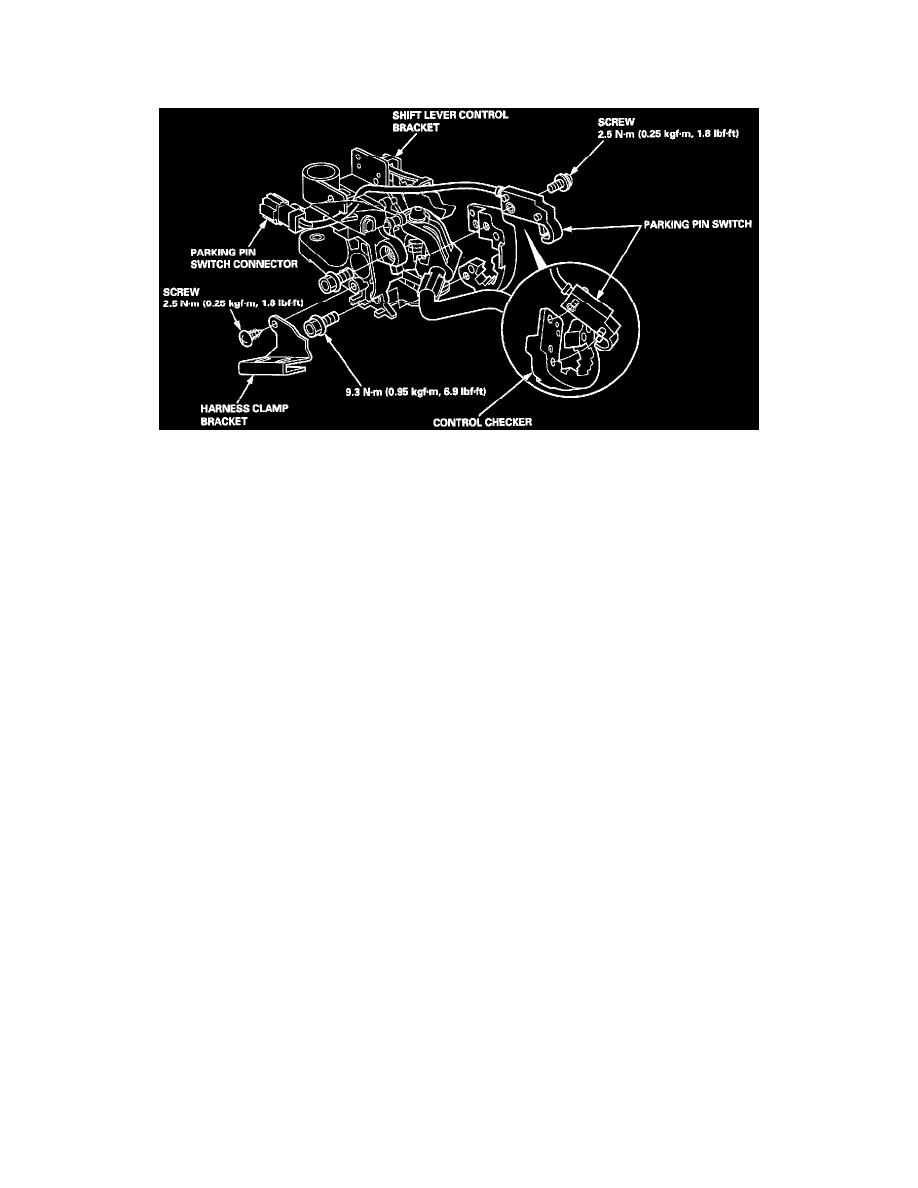
4. Disconnect the shift lock solenoid and the parking pin switch connectors.
5. Remove the harness clamp bracket.
6. Remove the bolts securing the shift lever assembly, then remove the shift lever assembly.
7. Remove the screws securing the shift lock solenoid, then remove the shift lock solenoid.
8. Remove the parking pin switch connector from the shift lever control bracket.
9. Remove the control checker from the shift lever control bracket.
10. Remove the parking pin switch from the control checker.
11. Install the new parking pin switch on the control checker.
12. Install the control checker on the shift lever control bracket.
13. Route the parking pin switch harness through the cut Out of the shift lever control bracket, then install the parking pin switch connector on the
bracket.
14. Install the shift lock solenoid by aligning the joint of the shift lock solenoid plunger with the tip of the shift lock extension.
15. Secure the shift lock solenoid with the screws.
16. Install the shift lever assembly in the reverse order of the removal.
17. Check the shift lever operation and shift lock operation.