
CR-V LX 4WD L4-1972cc 2.0L DOHC MFI (2000)
Shift Cable: Adjustments
SRS components are located in this area. Review the SRS component locations, precautions, and procedures before performing repairs or service.
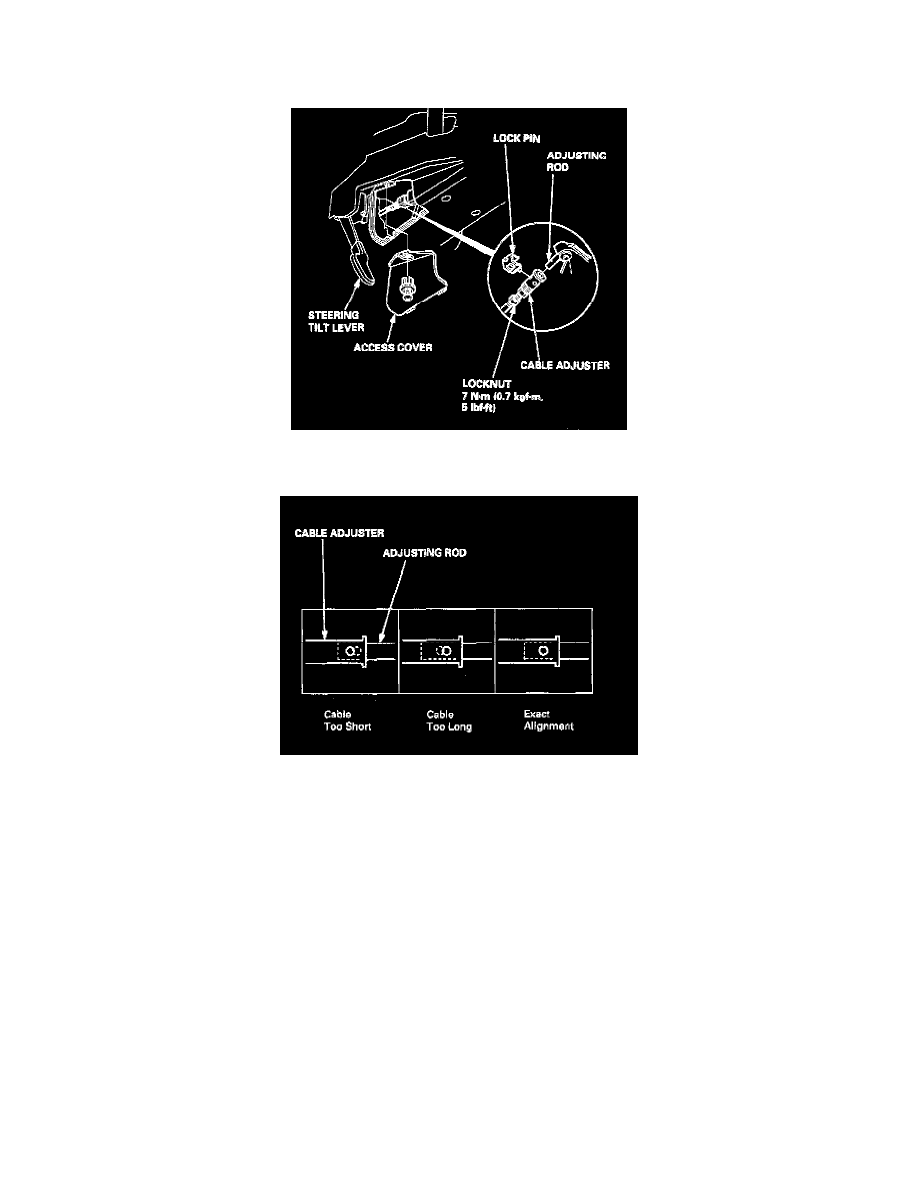
1. Release the steering tilt lever.
2. Remove the access cover from the lower column cover.
3. Shift to N position, then remove the lock pin from the cable adjuster.
4. Check that the hole in the cable adjuster is aligned with the hole in the adjusting rod. There are two holes in the cable adjuster. They are positioned
90° apart to allow cable adjustments in 1/4 turn increments.
5. If not perfectly aligned, loosen the locknut on the shift cable and adjust as required.
6. Tighten the locknut.
7. Install the lock pin on the adjuster. If you feel the lock pin binding as you reinstall it, the cable is still out of adjustment and must be readjusted.
8. Make sure the lock pin is seated securely in the adjuster. Replace the lock pin if it does not snap over the cable adjuster securely.
9. Move the shift lever to each gear, and verify that the A/T gear position indicator follows the transmission range switch.
10. Start the engine, and check the shift lever in all positions. If any gear does not work properly, refer to troubleshooting.
See: Testing and Inspection/Symptom Related Diagnostic Procedures
11. Insert the ignition key into the key cylinder on the upper column cover, and verify that the shift lock lever releases.