
CR-V LX 4WD L4-1972cc 2.0L DOHC MFI (2000)
6.
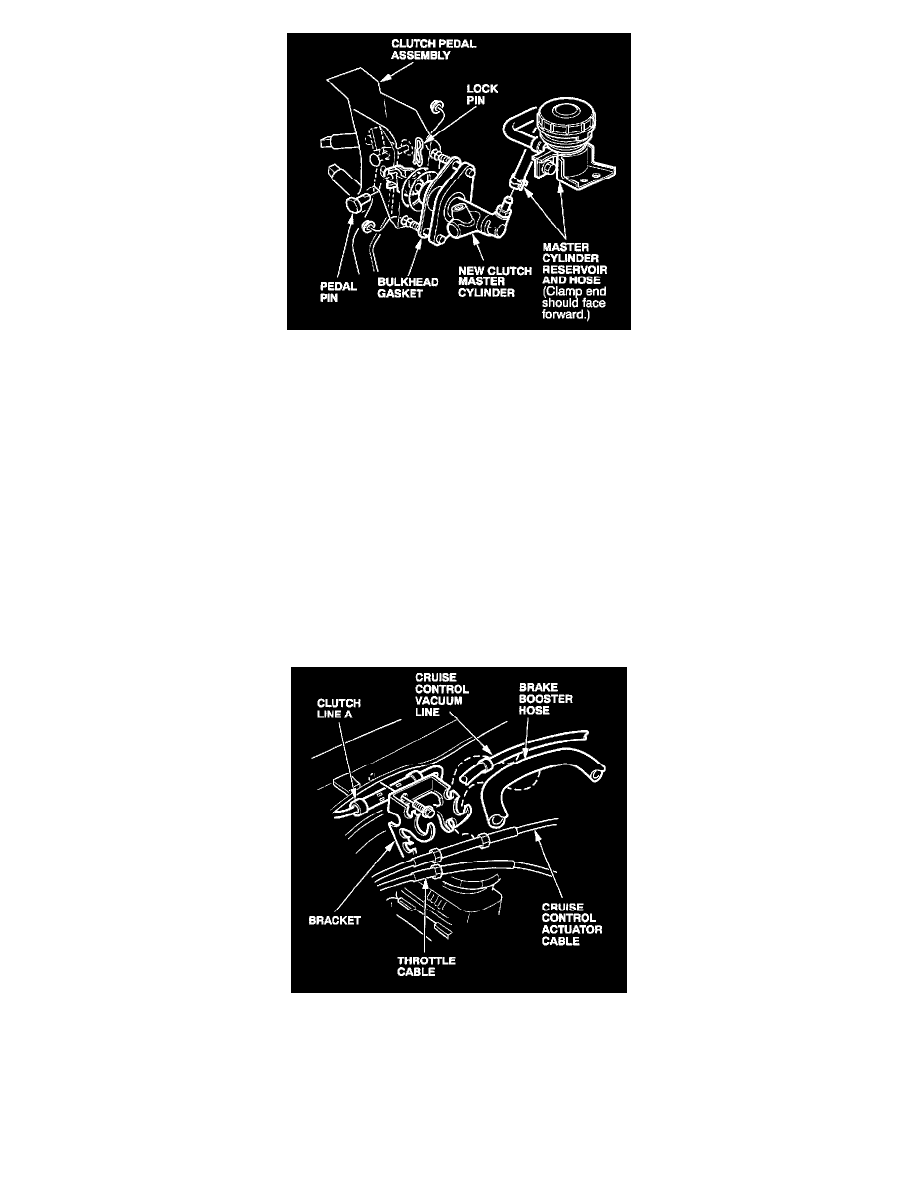
Transfer the clutch master cylinder reservoir and bulkhead gasket to the new master cylinder. Attach the reservoir hose to the master cylinder with
the clamp ends toward the front of the master cylinder.
7.
Install the new master cylinder, and loosely attach it to the bulkhead with the mounting nuts. Do not tighten the mounting nuts yet.
8.
Under the dashboard, install the pedal pin from the right side, and install the lock pin on the left side from the bottom.
NOTE:
Do not adjust the length of the clutch master cylinder pushrod; it is factory set.
9.
Torque the clutch master cylinder mounting bolt and nuts to 13 N.m (9.4 lb-ft.).
10.
Relieve the fuel pressure. Refer to page 11-180 of the service manual.
11.
Remove the lower fuel line from the fuel filter, then remove the two mounting bolts from the fuel filter bracket. Refer to page 11-184 of the service
manual.
12.
Remove the intake air duct and air cleaner housing. Refer to step 5 on page 5-2 of the service manual.
13.
Remove the brake booster hose, the cruise control vacuum line, the throttle cable, and the cruise control actuator cable from the bulkhead
mounting bracket. Remove the mounting bolt, free clutch line A (long steel line) from the bracket, and remove the bracket.