
CR-V LX 4WD L4-2.4L (2002)
3. If the clutch and the coil test good, remove and install them on the new compressor, or install a new clutch and coil if needed.
4. Adjust the amount of refrigerant oil in the new A/C compressor.
NOTE:
The new compressor comes with 130 mL of SP-10 PAG oil. Calculate the amount of oil to be drained from the new compressor for the discharge
hose, the condenser, the desiccant/filter and the compressor replacement.
Compressor: Drain the PAG oil from the failed A/C compressor into an appropriate container and record the amount in mL. Subtract the volume of
oil drained from the failed compressor from 130 mL (5-1/3 fl.oz.), and drain the calculated volume of oil from the new compressor: 130 mL (5-1/3
fl.oz.) - Volume of oil removed compressor = Volume to drain from new compressor.
NOTE:
Even if no oil is drained from the failed compressor, don't drain more than 50 mL (1-2/3 fl.oz.) from the new compressor.
Example:
When replacing the discharge hose, condenser, and desiccant/filter, the amount of oil drained from the new compressor needs to be reduced by 45
mL.
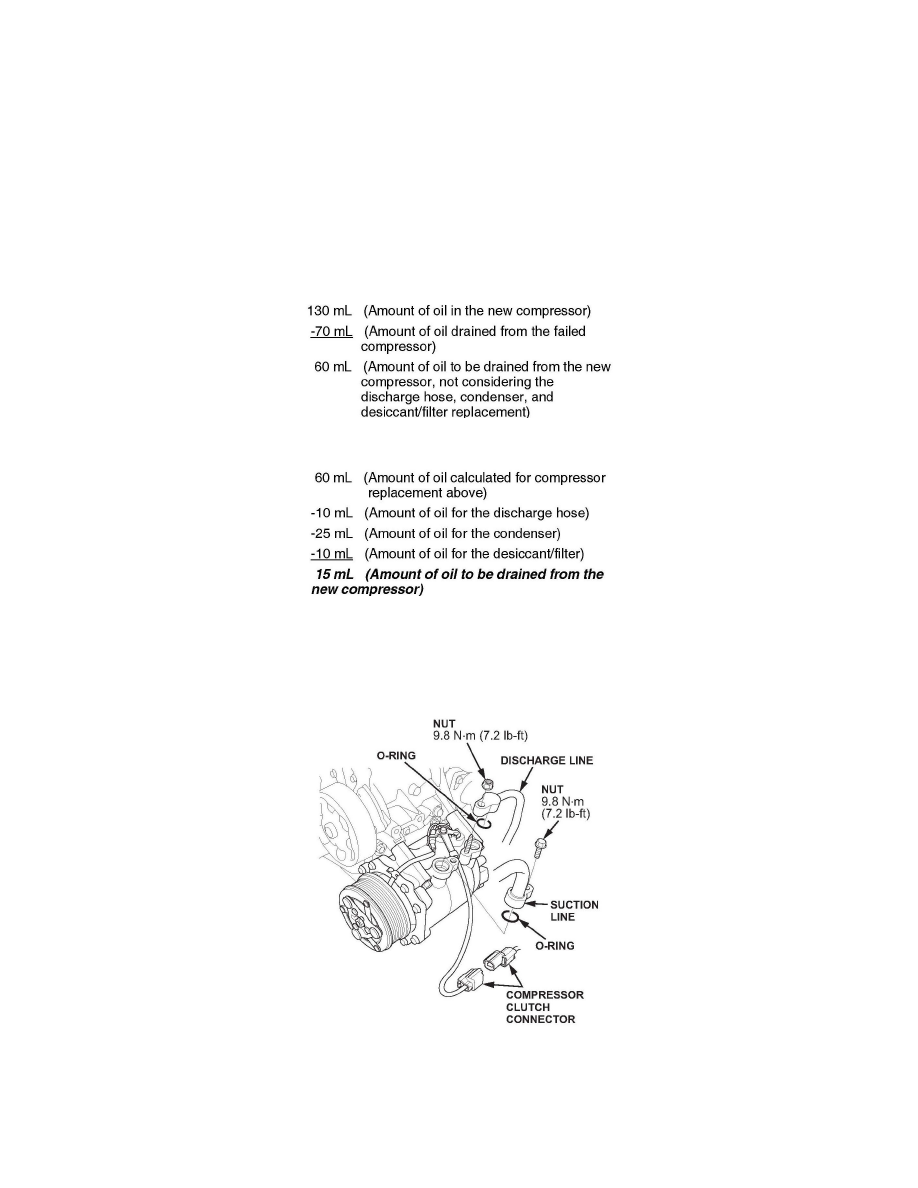
5. Install the new compressor, then torque its mounting bolts to 22 N.m (16 lb-ft). Connect the discharge line, the suction line, and the condenser line
with new 0-rings, then torque the line nut and the bolts to 9.8 N.m (7.2 lb-ft). Reconnect the compressor clutch connector.
NOTE:
Apply a thin coat of refrigerant oil to the 0-rings before installation.
6. Remove the bolts and mounting brackets, then remove the condenser by lifting it up. Be careful not to damage the radiator fins when removing the
old condenser.