
CR-V LX 4WD L4-2.4L (2002)
Torque Converter Clutch Solenoid: Service and Repair
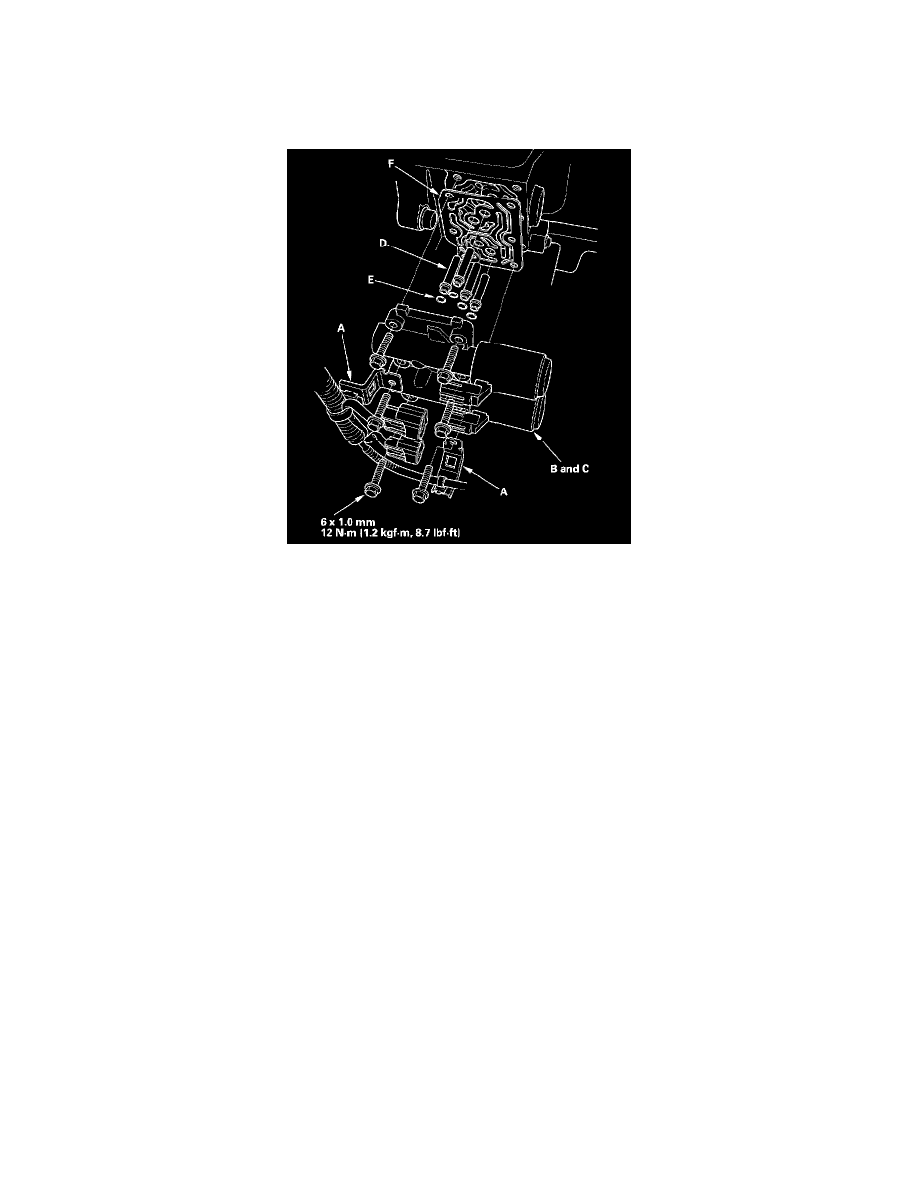
A/T Clutch Pressure Control Solenoid Valves B and C Replacement
Replacement
1. Remove the air cleaner housing.
2. Disconnect the A/T clutch pressure control solenoid valves B and C connectors.
3. Remove the mounting bolts, harness clamp brackets (A), and A/T clutch pressure control solenoid valves B and C.
4. Remove the ATF joint pipes (D), O-rings (E), and gasket (F).
5. Clean the mounting surface and fluid passage of A/T clutch pressure control solenoid valves B and C and the transmission housing.
6. Install the new gasket on the transmission housing, and install the ATF joint pipes.
7. Install the new O-rings over the ATF joint pipes.
8. Install the new A/T clutch pressure control solenoid valves B and C, and harness clamp brackets.
9. Check the A/T clutch pressure control solenoid valves B and C connectors for rust, dirt, and oil, then connect them securely.
10. Install the air cleaner housing.