CR-V LX 4WD L4-2.4L (2002)

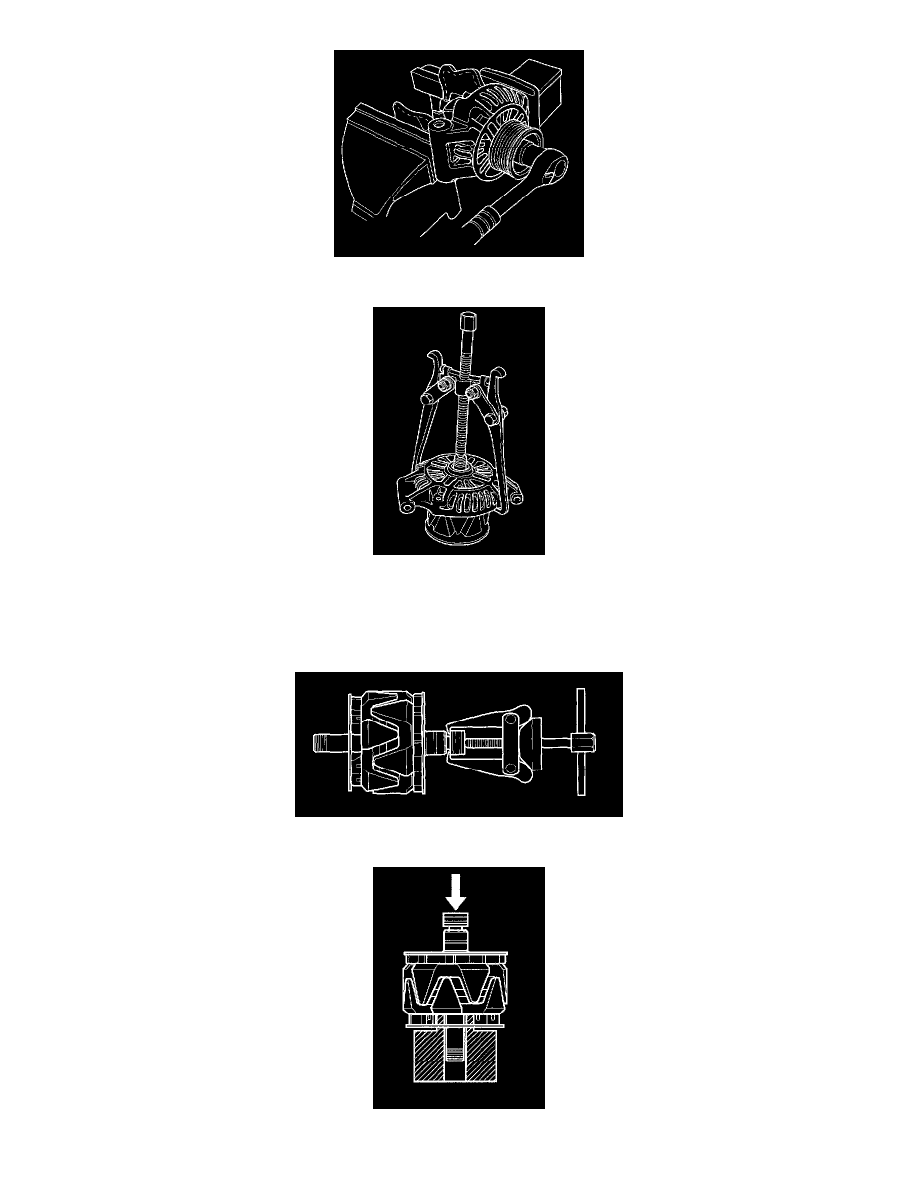
7. If you are not replacing the front bearing and/or rear bearing, go to step 15. Clamp the rotor in a soft-jawed vise, then remove the pulley locknut.
8. Remove the rotor using a puller as shown.
9. Inspect the rotor shaft for scoring, and inspect the bearing journal surface in the drive-end housing for seizure marks.
-
If either the rotor or drive-end housing is damaged, replace the alternator.
-
If both the rotor and the drive-end housing are OK, goto step 10.
10. Remove the rear bearing using the puller as shown.
11. Use a hand press to install the new rear bearing. Apply pressure only on the inner race to avoid damaging the bearing.
