
CR-V LX 4WD L4-2.4L (2002)
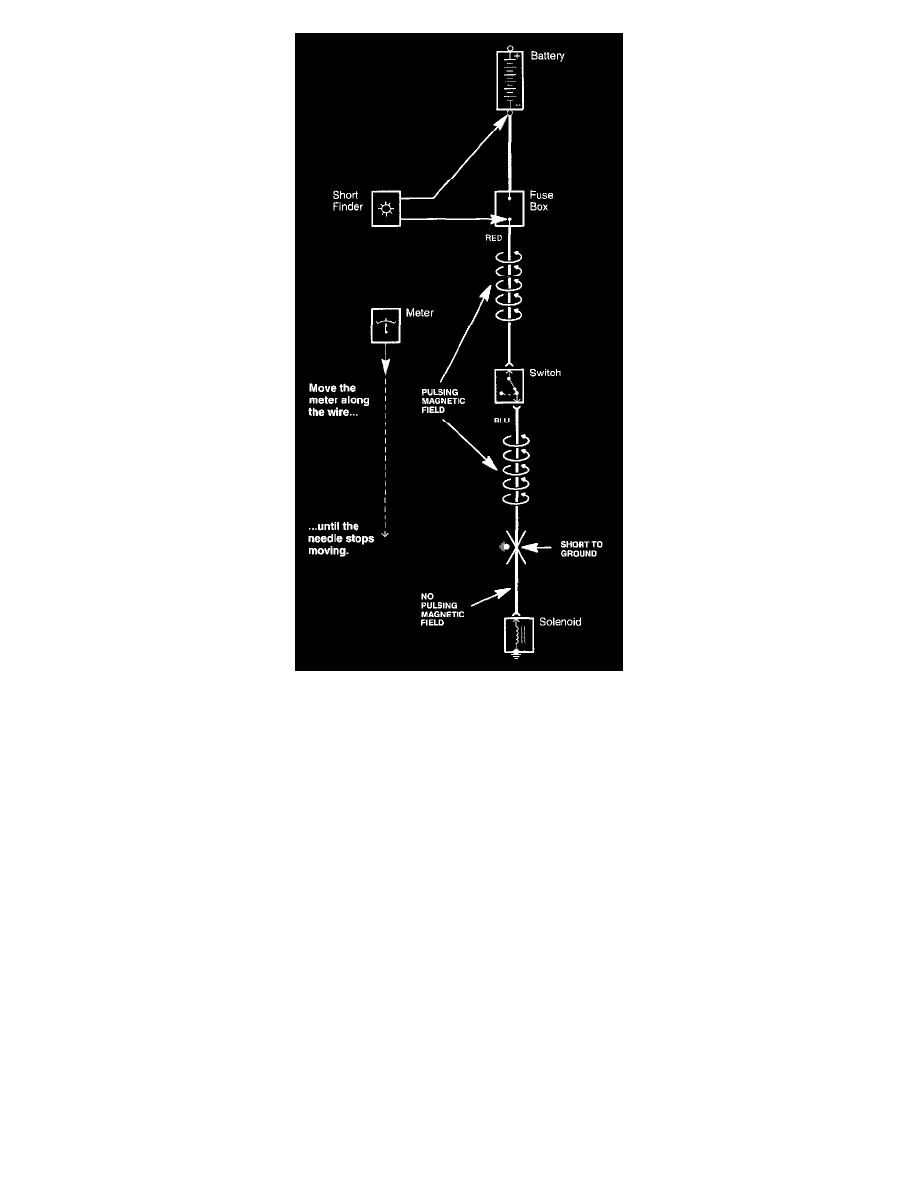
2. Connect the short finder across the battery terminals and the load (component) side of the fuse terminal.
3. Close all switches in the circuit you're testing.
4. Turn on the short finder. This creates a pulsing magnetic field around the wiring between the fuse box and the short.
5. Beginning at the fuse box, slowly move the short finder along the circuit wiring. The meter will read current pulses through sheet metal and body
trim. As long as the meter is between the fuse and the short, the needle will move with each current pulse. Once you move the meter past the point
of the short, the needle will stop moving. Check the wiring and connectors in this area to locate the cause of the short.
Testing For Continuity
Testing for Continuity
When testing for continuity at a connector without wire seals, you do not have to separate the two halves of the connector. Instead, probe the connector
from the back. Always check both sides of the connector because dirty, corroded, and bent terminals can cause problems (no electrical contact = an
open).
1. Disconnect the negative cable from the car battery. If you're using a DVOM, place it in the lowest "OHMS" range.