
CR-V LX 4WD L4-2.4L (2002)
3. Install the stabilizer link on the stabilizer bar and trailing arm with the joint pins set at the center of their range of movement.
4. Install the self-locking nut and flange nut, and lightly tighten them.
NOTE: Use a new self-locking nut on reassembly.
5. Place a jack under the trailing arm at the knuckle side end, and raise the suspension to load it with the vehicle's weight.
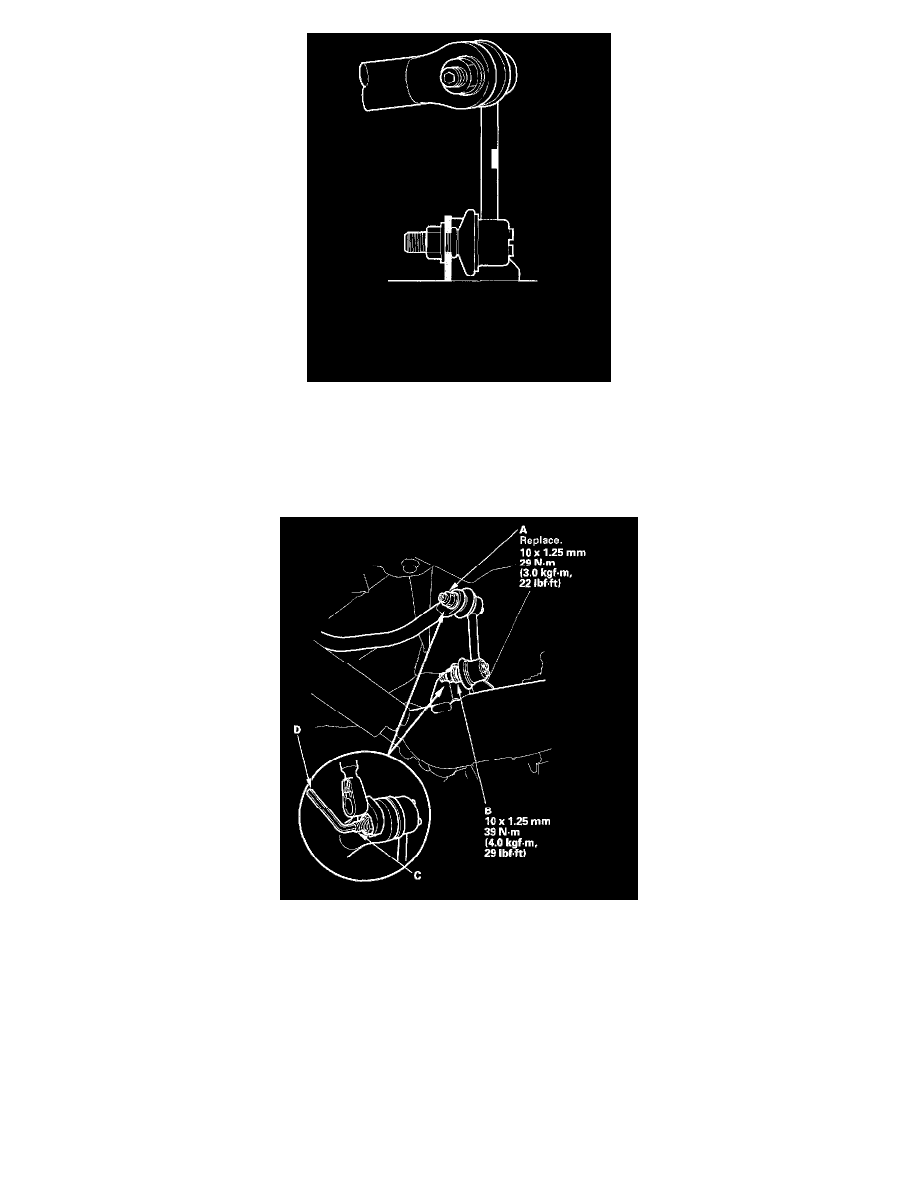
6. Tighten the new self-locking nut (A) and flange nut (B) to the specified torque values while holding the respective joint pins (C) with a hex wrench
(D).
7. After 5 minutes of driving, re-tighten the self locking nut again to the specified torque.