
CR-V LX 4WD L4-2.4L (2002)
21. Install the O/D switch harness terminals in the new O/D switch. Either harness terminal can be installed in either cavity.
22. Install the new O/D switch in the shift lever knob.
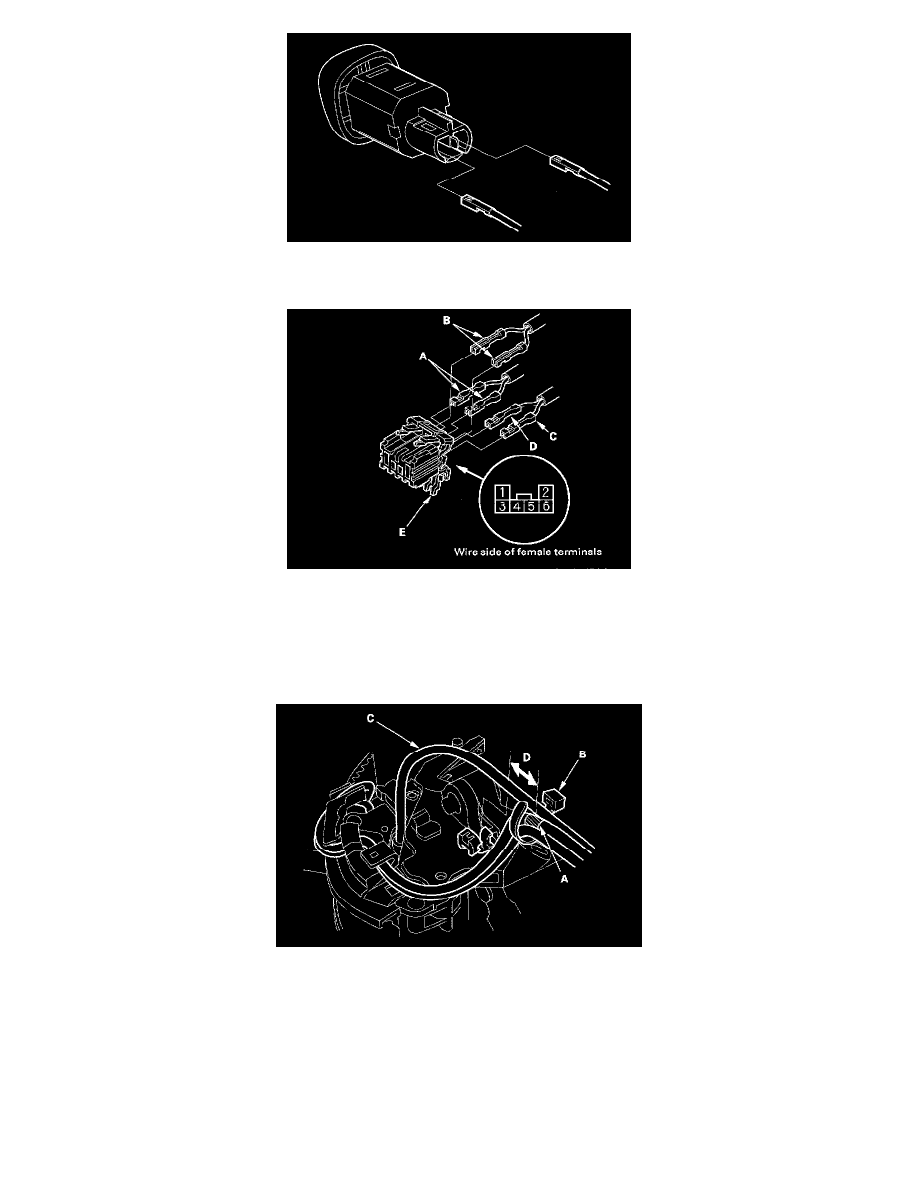
23. Install the O/D switch harness terminals (A) in the No. 5 and No. 6 cavities. Either O/D switch harness terminal can be installed in the No. 5 and
No. 6 cavities.
24. Install the park pin switch harness terminals (B) in the No. 1 and No. 2 cavities. Either park pin switch harness terminal can be installed in the No.
1 and No. 2 cavities.
25. Install the BLU harness terminal (C) of the shift lock solenoid in the No. 3 cavity, and the RED harness terminal (D) in the No. 4 cavity. Make
sure that the all six terminals lock securely, then install the lock (E) securely in place.
26. Align the marks (A) on the harnesses, and tie the harness band (B) over the marks. Clamp the O/D switch harness (C) 15 mm (0.6 inch) (D) from
the harness band.