
CR-V LX 4WD L4-2.4L (2002)
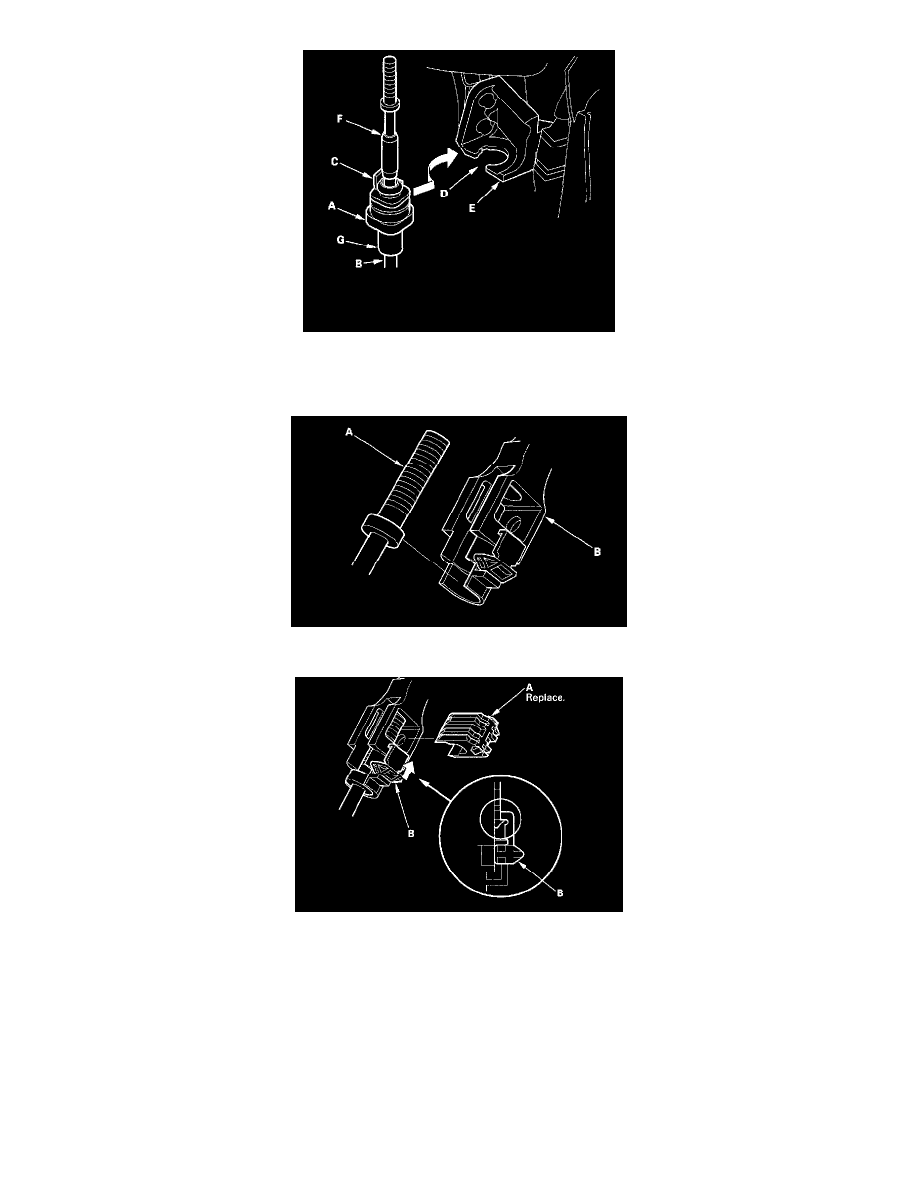
32. Rotate the socket holder (A) on the shift cable (B) to place the tab (C) on the holder opposite of the opening (D) in the socket holder bracket (E).
Align the holder with the opening in the bracket, then slide the holder into the bracket. Rotate the holder a quarter turn to secure the shift cable. Do
not install the shift cable by twisting the shift cable guide (F) and damper (G).
33. Install the shift cable end (A) in the shift cable end holder (B). Keep the shift cable end and end holder free of grease.
34. Install the new shift cable lock (A) to secure the shift cable end and shift cable end holder, then push the lock tab (B) up until it stops to lock the
joint.
35. Remove the 6.0 mm (0.24 inch) pin that was installed to hold the shift lever.
36. Connect the O/D switch/shift lock solenoid/park pin switch connector.
37. Move the shift lever to each gear, and verify that the A/T gear position indicator follows the transmission range switch.
38. Check that the O/D switch operates.
39. Install the instrument panel and the driver's dashboard lower cover.