
CR-V SE 4WD L4-1972cc 2.0L DOHC MFI (2001)
Wheel Bearing: Service and Repair
Front
TOOL REQUIRED
-
07MAC-SL00200 Ball Joint Remover, 28 mm
-
07MAC-SL00200 Ball Joint Remover, 28 mm
-
07GAF-SE00100 Hub Dis/Assembly Tool
-
07749-0010000 Driver
-
07947-6340400 Driver Attachment, 62 x 64 mm
-
07965-SA00600 Driver Attachment
-
07965-SD90100 Support Base
NOTE:
-
Replace the self-locking nuts after removal.
-
The vehicle should be on the ground before any bolts or nuts connected to rubber mounts or bushings are tightened.
-
Torque the castle nut to the lower torque specification, then tighten it only far enough to align the slot with the pin hole. Do not align the nut by
loosening.
-
Use only genuine Honda wheel weights for aluminum wheels. Non-genuine wheel weights may corrode and damage the aluminum wheels.
-
On the aluminum wheels, remove the center cap from the inside of the wheel after removing the wheel.
-
Before installing the brake disc, clean the mating surfaces of the front hub and brake disc.
-
Before installing the wheel, clean the mating surfaces of the brake disc and wheel.
-
Wipe off the grease before tightening the nut at the ball joint.
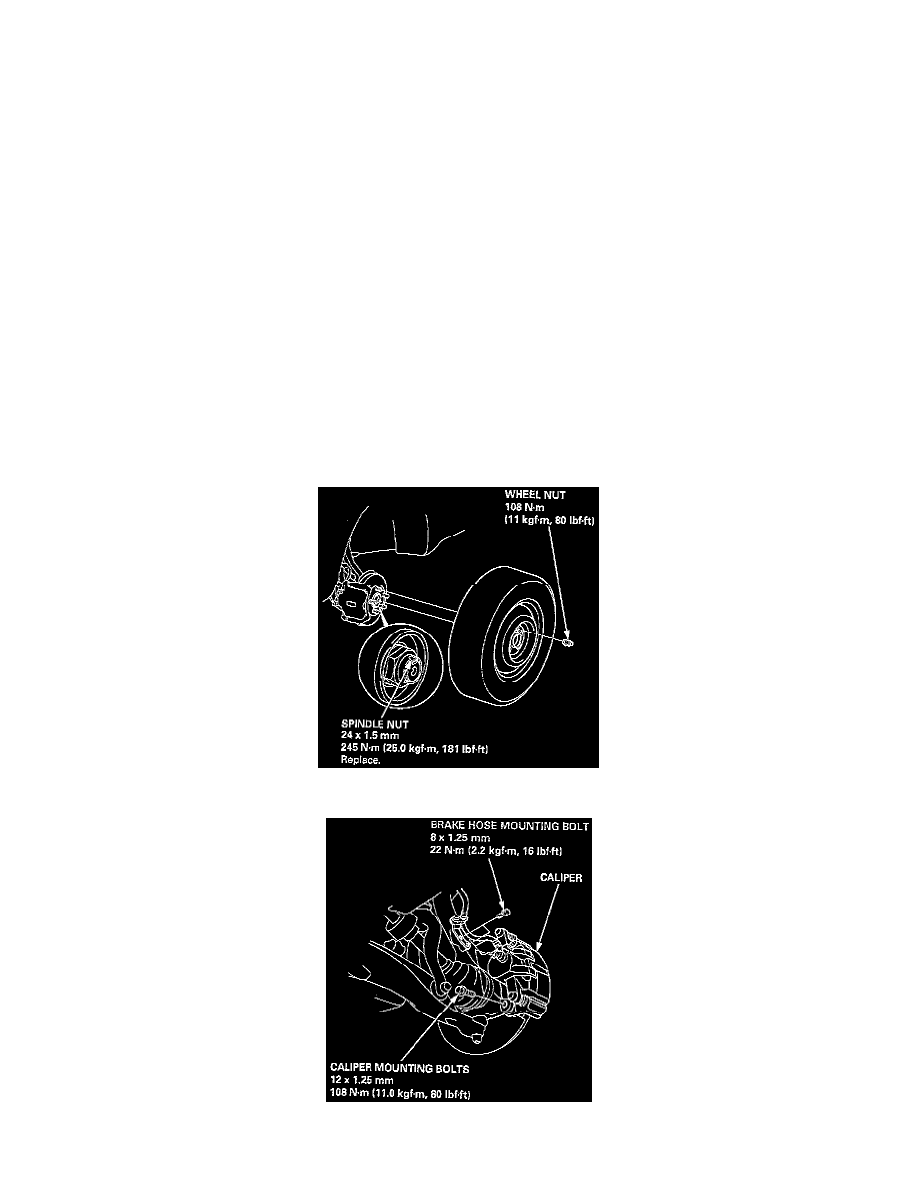
1. Loosen the wheel nuts slightly.
2. Raise the front of the vehicle, and support it with safety stands in the proper locations.
3. Remove the wheel nuts and wheel.
4. Raise the locking tab on the spindle nut, then remove the nut.
5. Remove the brake hose mounting bolts.