
CR-V SE 4WD L4-1972cc 2.0L DOHC MFI (2001)
Engine Control Module: Service and Repair
How to Remove the ECM/PCM For Testing
How to Remove the ECM/PCM for Testing
If the inspection for a trouble code requires voltage or resistance checks at the ECM/PCM connectors, remove the ECM/PCM and test it:
1. Make sure you have the anti-theft code for the radio, then write down the radio station presets.
2. Disconnect the negative cable from the battery.
3. Remove glove box.
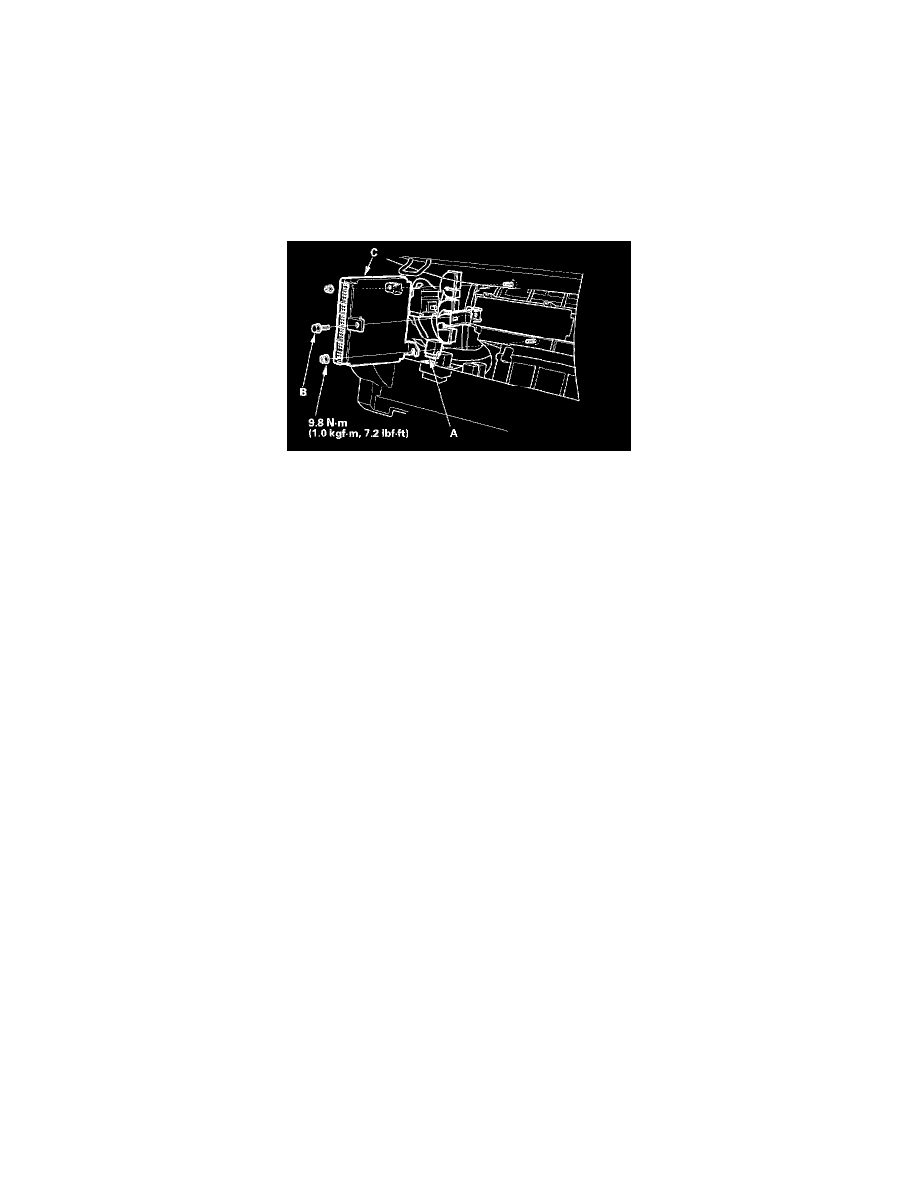
4. Disconnect the gray 20P ECM/PCM wire harness connector, and remove it from the ECM/PCM mounting bracket. Disconnect the 7P mode
control motor connector. Remove PGM-FI main relay 2 (A). Remove the ECM/PCM mounting bolt (B) and the bracket.
5. Remove the nuts, then remove the ECM/PCM (C).
6. Install the ECM/PCM in the reverse order of removal.
7. Reconnect the negative cable to the battery.
8. Enter the radio anti-theft code and the radio station preset then set the clock.
ECM/PCM Idle Learn Procedure
ECM/PCM Idle Learn Procedure
NOTE: The ECM/PCM reset procedure and disconnecting the battery or the No.6 ECU (ECM/PCM) (15 A) fuse cancels the ECM/PCM memory for
idle control. The following procedure is needed after the ECM/PCM reset procedure and reconnecting the battery or the No.6 ECU (ECM/PCM) (15 A)
fuse.
1. Start the engine. Hold the engine at 3,000 rpm with no load (in Park or neutral) until the radiator fan comes on.
2. Let the engine idle for approx. 5 minutes under the following conditions:
-
Transmission in Park or neutral
-
A/C switch OFF
-
Headlights OFF
-
Rear defogger OFF
How to Reset the ECM/PCM