CR-V SE 4WD L4-1972cc 2.0L DOHC MFI (2001)

Mainshaft: Testing and Inspection
Inspection
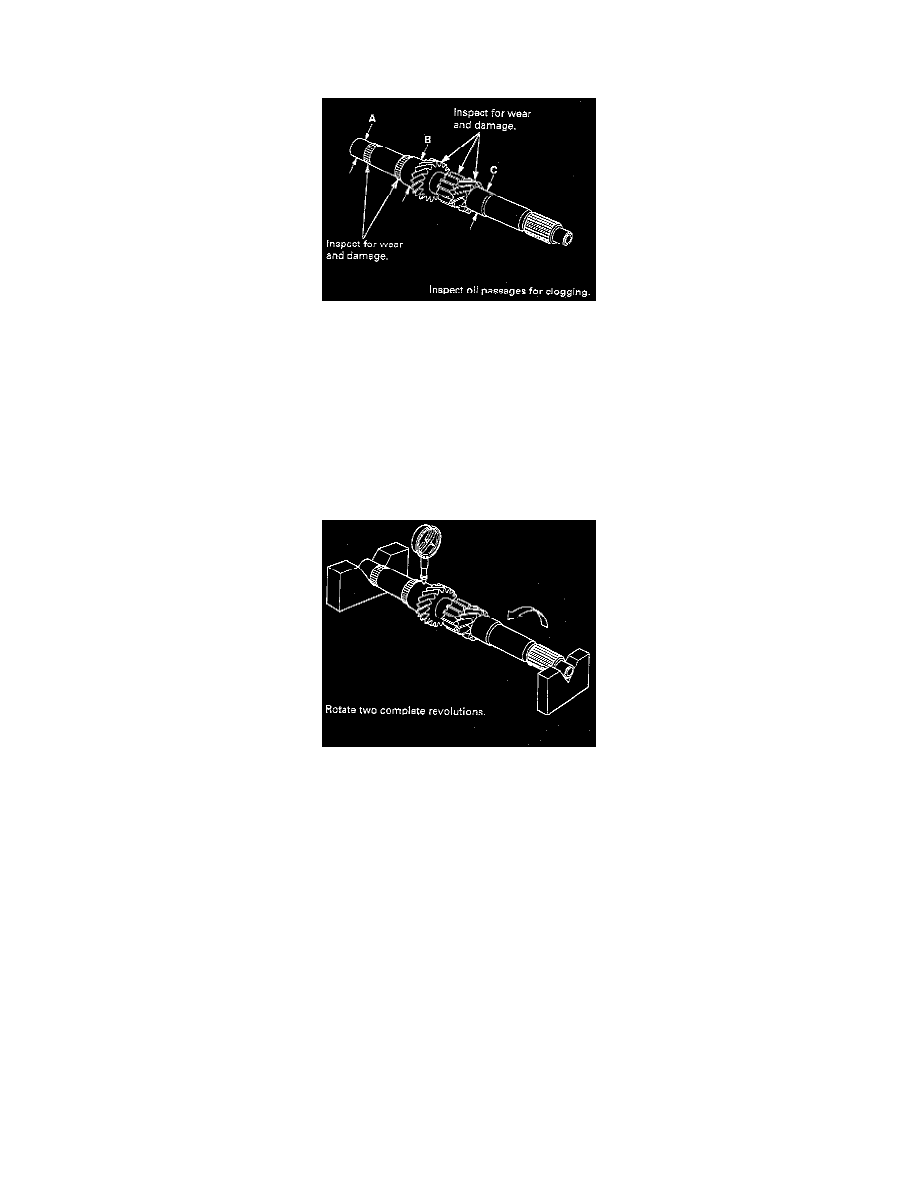
1. Inspect the gear surface and bearing surface for wear and damage, then measure the mainshaft at points A, B. and C.
-
Standard:
A (Ball bearing surface): 27.987 - 28.000 mm (1.1018 - 1.1024 inch)
B (Needle bearing surface): 37.984 - 38.000 mm (1.4954 - 1.4961 inch)
C (Ball bearing surface): 27.977 - 27.990 mm (1.1015 - 1.1020 inch)
-
Service Limit:
A: 27.94 mm (1.100 inch)
B: 37.93 mm (1.493 inch)
C: 27.94 mm (1.100 inch)
NOTE: If any part of the mainshaft is less than the service limit, replace it with a new one.
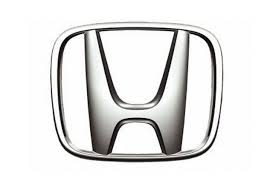
2. Inspect for runout.
-
Standard: 0.02 mm (0.0008 inch) max.
-
Service Limit: 0.05 mm (0.002 inch)
NOTE: Support the mainshaft at both ends as shown. If the runout is more than the service limit, replace the mainshaft with a new one.
