
Del Sol L4-1.5L SOHC (1993)
23.
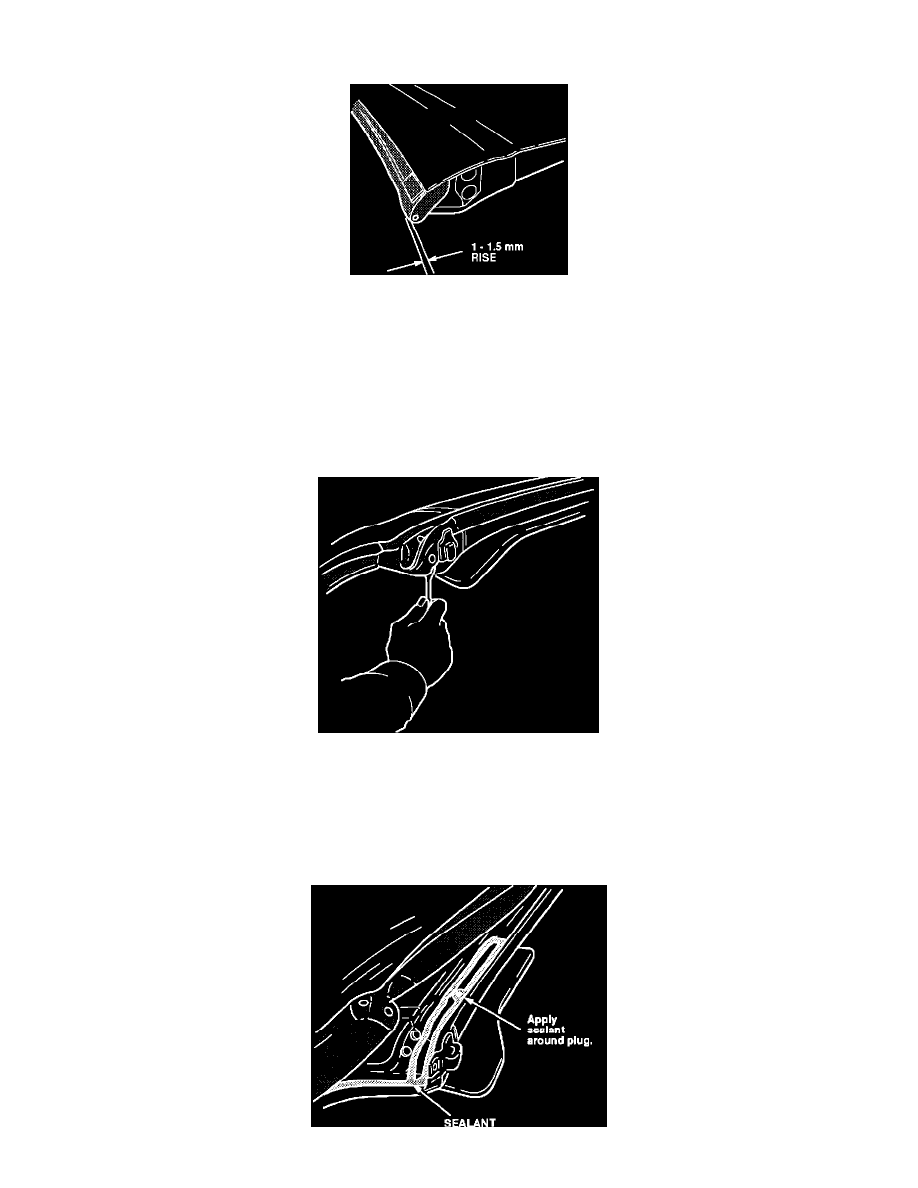
Insert the soft plug into the roof side seal as shown.
24.
Lock the roof, and check the outside of the seal. The additional soft plug should create a rise in the outside surface of the roof side seal of 1-1.5
mm.
NOTE:
If the water was leaking from above the sunvisor area in the initial leak test, continue to step 25. If the area above the sunvisor was not leaking, proceed
to step 33.
25.
Remove the roof, and store it in the trunk.
26.
Remove the round clips from the top and bottom of the A pillar weatherstrip on both sides, with a clip removing tool.
27.
Remove the two screws on both sides; then remove the A pillar weatherstrip.
[NOTICE]
The A pillar weatherstrip has a metal core. Remove it carefully to avoid scratching the paint.
28.
Remove all traces of the old sealer from the A pillar and weatherstrip with 3M General Purpose Adhesive Cleaner (P/N 051135- 08984) and a
shop towel.