Del Sol L4-1.5L SOHC (1993)

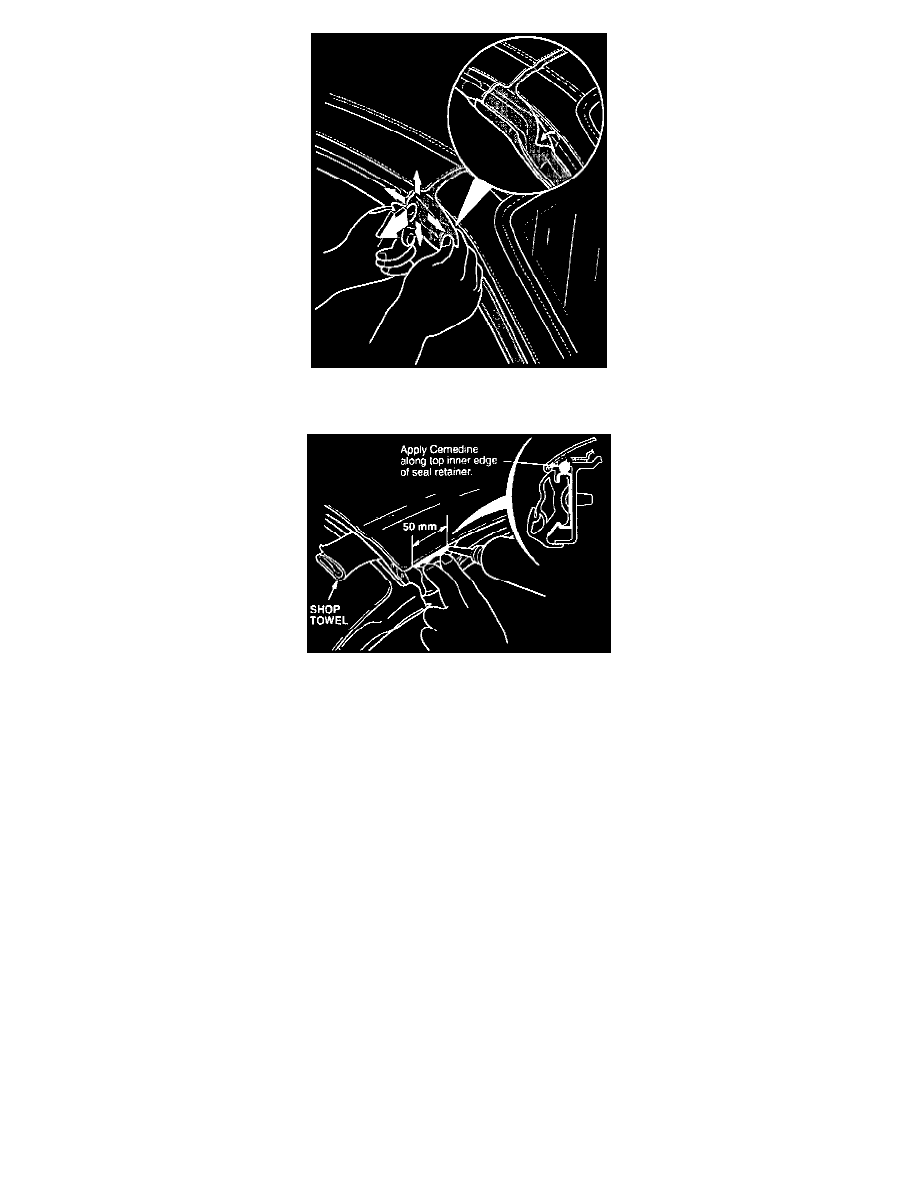
When you're certain that the side seal and the "A" pillar seal fit together properly, press the "A" pillar seal firmly against the pillar to make sure the
adhesive sticks securely.
5.
Reinsert the folded shop towel under the roof. Then pull back the top edge of the side seal. and apply a bead of Cemedine along the first 50 mm of
its inner edge. If you replaced this seal (procedure B1), you already did this.
6.
Apply Silicone (or Lithium Dielectric) grease to the mating surfaces of both seals.
7.
Leak test the repaired area. If the leak persists. replace all four seals (see B1). If you've already replaced the seals, but the roof still leaks, check the
related adjustments described in this section (A1, and A3 thru A6); also check related areas where you applied Cemedine.
A3 - Glass Alignment Adjustment
A3 - GLASS ALIGNMENT ADJUSTMENTS
Glass-to-"B" Pillar Alignment
1.
With the window rolled up and the door closed, measure the distance from the rear edge of the glass to the crease molded down the middle of the
"B" pillar seal. (The rear run channel may have been misadjusted during an effort to resolve problems with window operation.)
