
Del Sol L4-1.5L SOHC (1993)
5.
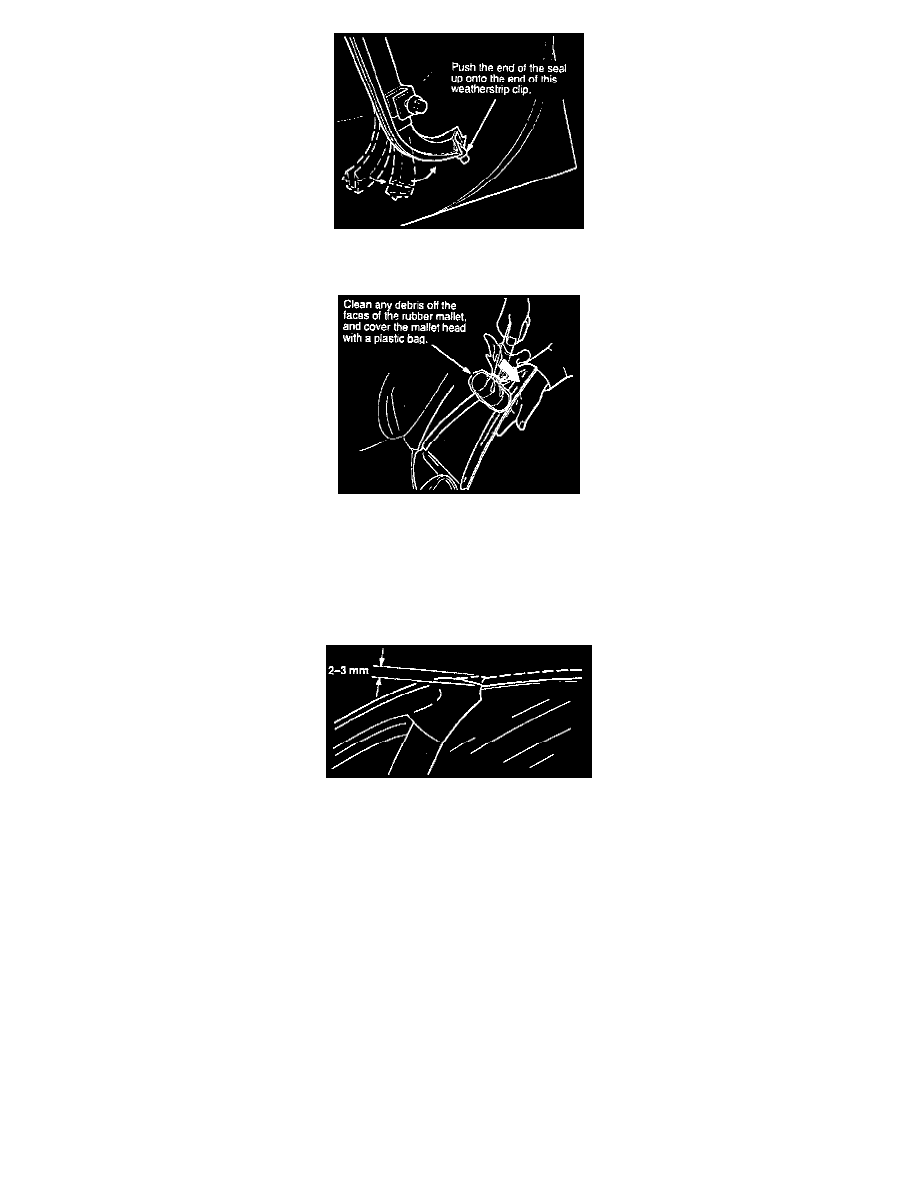
Press the run back into its channel. Then push the 20 to 40 mm excess length forward under the end of the channel and up past the end of the door
weatherstrip clip, as shown, to keep the run in place.
6.
With the window rolled all the way down, use a soft rubber mallet to carefully narrow the top 100 mm of the run channel. Support the inside of the
run channel with your hand while you work.
7.
After one pass with the mallet, roll the window all the way up. If the glass chatters or binds against the weatherstrip, widen the channel by gently
spreading it with a pair of flat-nose, snap-ring pliers.
8.
Roll the window all the way down, and lightly lube the glass run with Silicone (or Lithium Dielectric) grease.
9.
With the door open, roll the window all the way up, and check that the top of the door glass pushes the end of the glass run up 2 to 3 mm. If more
than 3 mm or less than 2 mm, go to A3, step 3 (Glass Height Adjustment) and adjust the glass height.
10.
Squeeze some Cemedine up under the "eyelid" of the quarter window seal. This will keep water from getting under the top of the quarter window
seal and dripping down on the inside of the glass.
^
First put a piece of masking tape under the edge of the "eyelid" to catch any excess Cemedine.
^
Fill the cavity with Cemedine, let the excess flow out onto the tape, and then remove the tape.
^
Clean off any remaining sealant with 3M General Purpose Adhesive Cleaner (P/N 051135.08984) on a shop towel.
NOTE
Repeat this procedure anytime the top of the quarter window seal is pulled away from the frame around the quarter window glass.
11.
Leak test the repaired area. If it still leaks, repeat steps 6 and 7, and leak test the area again. If the leak persists, reevaluate your diagnosis.
A2 - Side Seal Front End Fit Adjustment
A2 - SIDE SEAL FRONT END FIT ADJUSTMENT
Flushness with the "A" Pillar Seal
1.
Check that the end of the side seal is flush with the "A" pillar seal.