
Del Sol L4-1.5L SOHC (1993)
27.
Remove the two screws on both sides; then remove the A pillar weatherstrip.
[NOTICE]
The A pillar weatherstrip has a metal core. Remove it carefully to avoid scratching the paint.
28.
Remove all traces of the old sealer from the A pillar and weatherstrip with 3M General Purpose Adhesive Cleaner (P/N 051135- 08984) and a
shop towel.
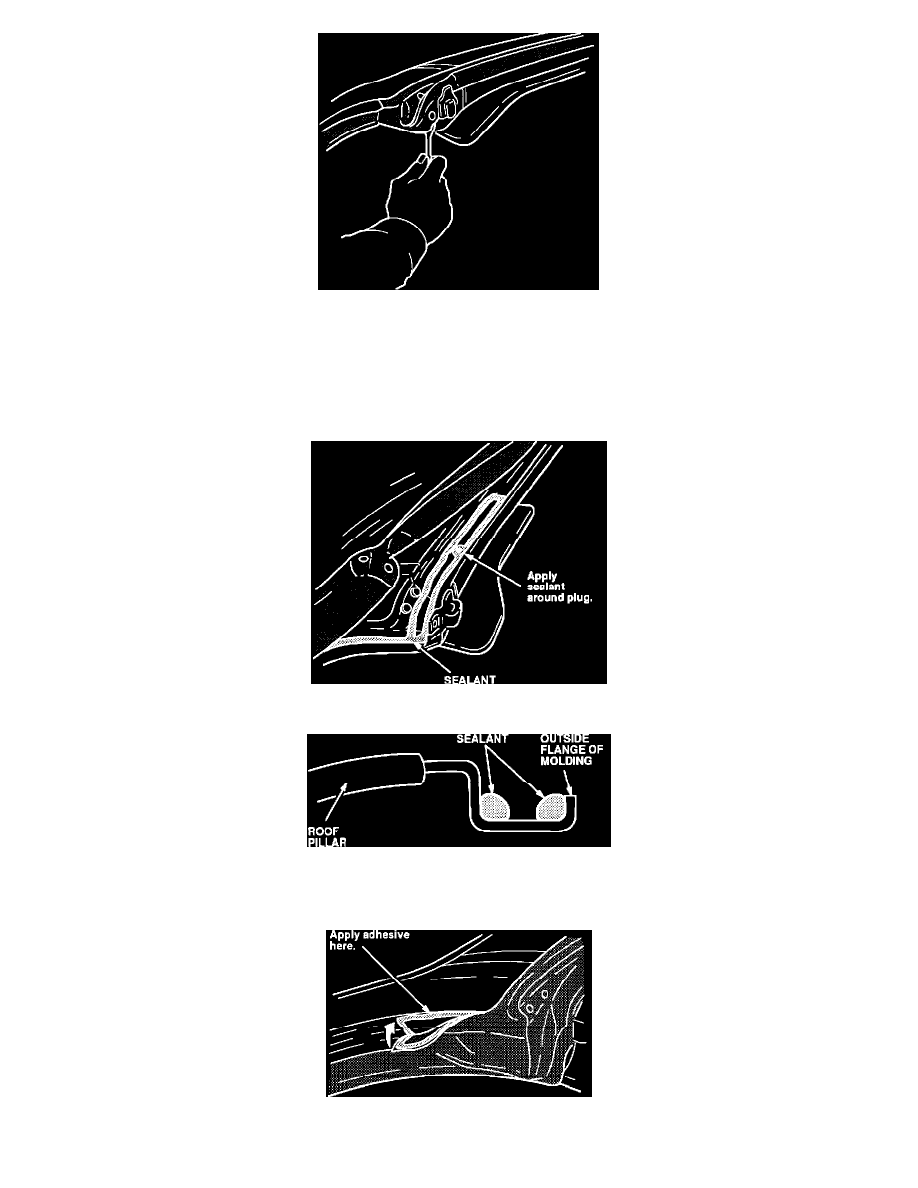
29.
Apply 3M Ultrapro Auto Body Sealant-Clear (P/N 051135-08302) along the roof molding as shown, and down the full length of the A pillar.
Be sure the sealant is on the inside and outside flanges of the roof molding.
30.
Press the weatherstrip into position, and allow the sealant to set.
31.
Apply 3M Weatherstrip Adhesive (P/N 051135-08011) to the underside of the weatherstrip as shown.