
Del Sol L4-1.5L SOHC (1993)
1.
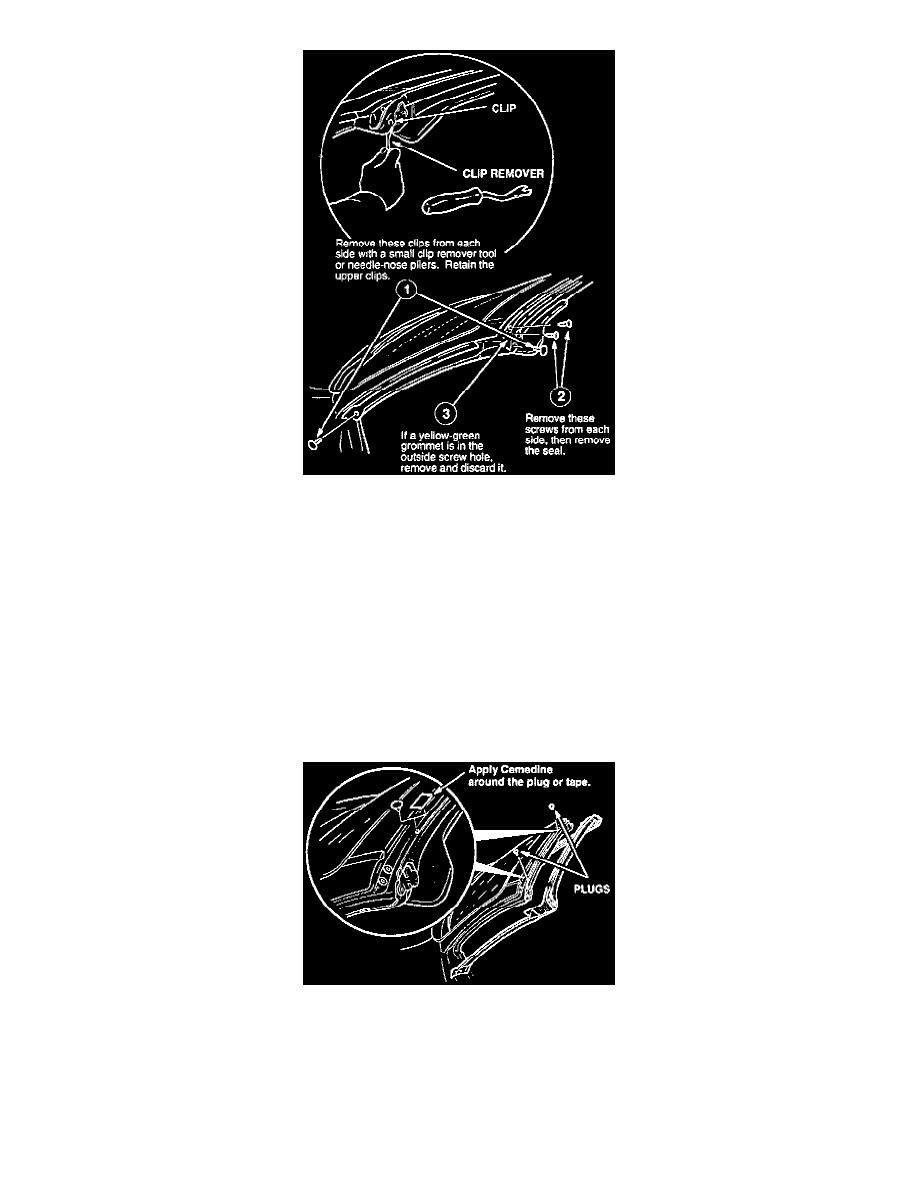
Carefully remove the "A" pillar seal. Save the two plastic clips from the upper corners and the four screws for reuse. (New lower clips are captive
in the new seal.)
2.
Inspect the square hole in each pillar, where the yellow-green grommets came from, for any distortion caused by their removal. If the metal is bent
up, carefully flatten it with a small hammer.
3.
Remove all traces of the old adhesive from the "A" pillar and windshield header with 3M Adhesive Cleaner and a shop towel. If all of the old
adhesive is not removed, the new seal will not stick properly. Use a plastic scraper (available at local paint and hardware stores) to avoid breaking
the paint surface You may also cover the adhesive with duct tape and then peel the tape off-the adhesive should come off with it.
4.
Apply a bead of Cemedine around the edge of each square hole, and then install the two new white grommets supplied with the new seal. Position
each grommet so the slot in it forms the letter I, not the letter H.
5.
Inspect the two remaining white grommets for holes made by improperly installed screws. If you find any holes, replace the damaged grommets in
the same way you replaced the yellow-green ones. (Order screw grommet, P/N 91620-SR2-003, H/C 4020939.)
6.
Remove the two small rubber plugs from the holes in the trough of the windshield header, put a bead of Cemedine around each hole, and then
reinstall the plugs. If a plug is missing. it may be stuck to the old seal. If you can't find it, cover the hole with a piece of tape, and then cover the
tape with Cemedine.