
Element 2WD L4-2.4L (2003)
^
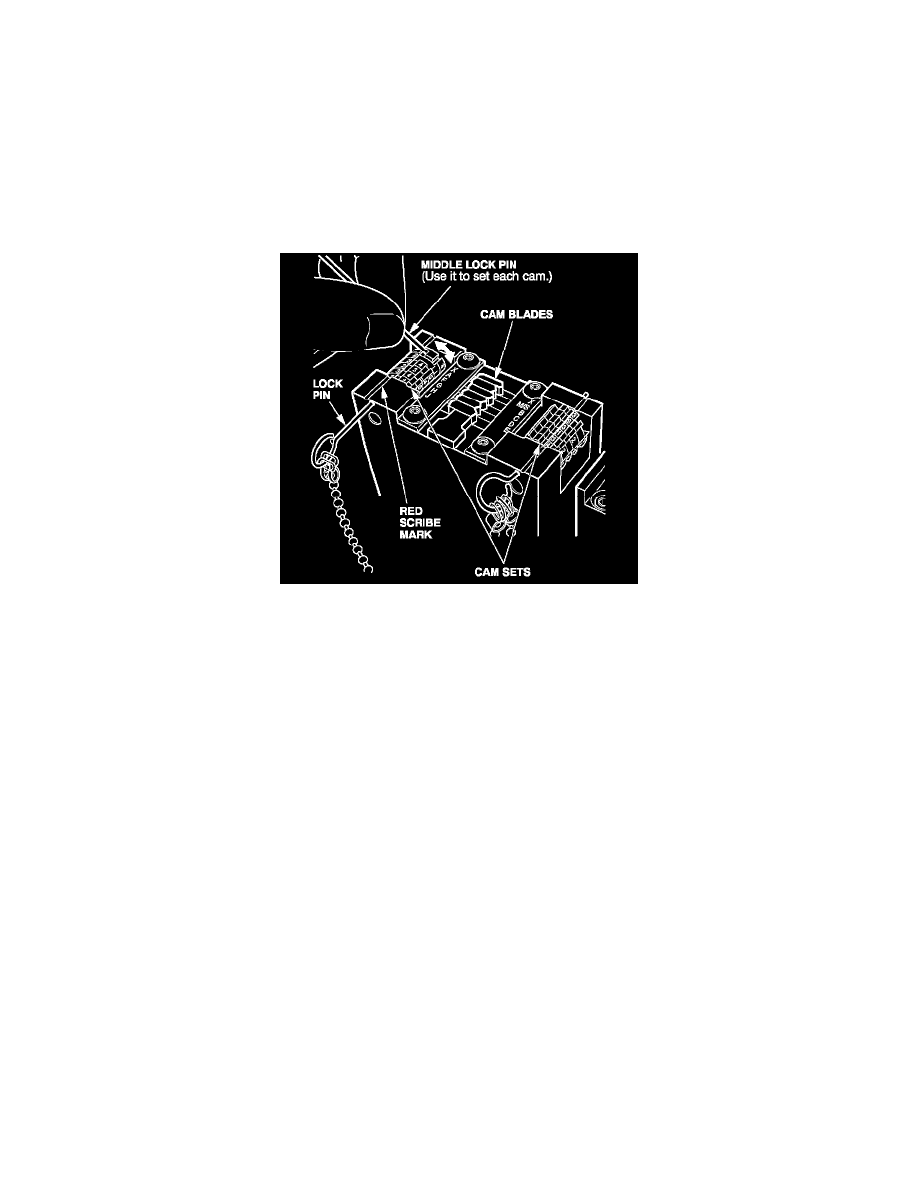
Going from front to back, use the middle lock pin to set the first cam to the appropriate key code number in the code book. (The cam is
properly set when the number on the cam lines up with the red scribe mark on the clamp unit.)
^
Slide the lock pin through the notch in the cam. (This locks the cam in place.)
^
Keep doing this for each of the remaining cams in the set until all the cams are set and locked, then push the lock pin all the way in.
Repeat this process to set and lock the cams for the right cam set.
NOTE:
Make sure you set the MIS cam in the right cam set for the type of key you are cutting. For a master key, set the cam to M; for a valet key, set it to S.
When you are done, push all the cam blades to the left until they touch the cams in the left cam set.
10.
Pull the vertical carriage lever toward you until the tracer touches the flat surface on the right side at the front of the cams. Gently twist the lever
clockwise to lock the vertical carriage at this height. Do not overtighten the lever.
11.
Turn on the cutter motor with the motor start switch.
[NOTICE]
^
To avoid damaging the locking jaws while cutting, keep your hand off the vertical carriage lever. Pressure on the lever will change the cutting
depth.
*
^
To avoid breaking the cutter bit, never back up while cutting.*
^
Wear proper eye protection (safety glasses, goggles, etc.)
12.
Use the clamp carriage lever and the tracer to follow the contours of the cam blades from front to back. (The cutter bit cuts the same contours into
the right edge of the key blank, from head to tip.)