
Element 2WD L4-2.4L (2003)
13. Hold the pads on both sides firmly with your fingers, and install the new pad springs (A) on the pads. Holding the pads, set the caliper over the
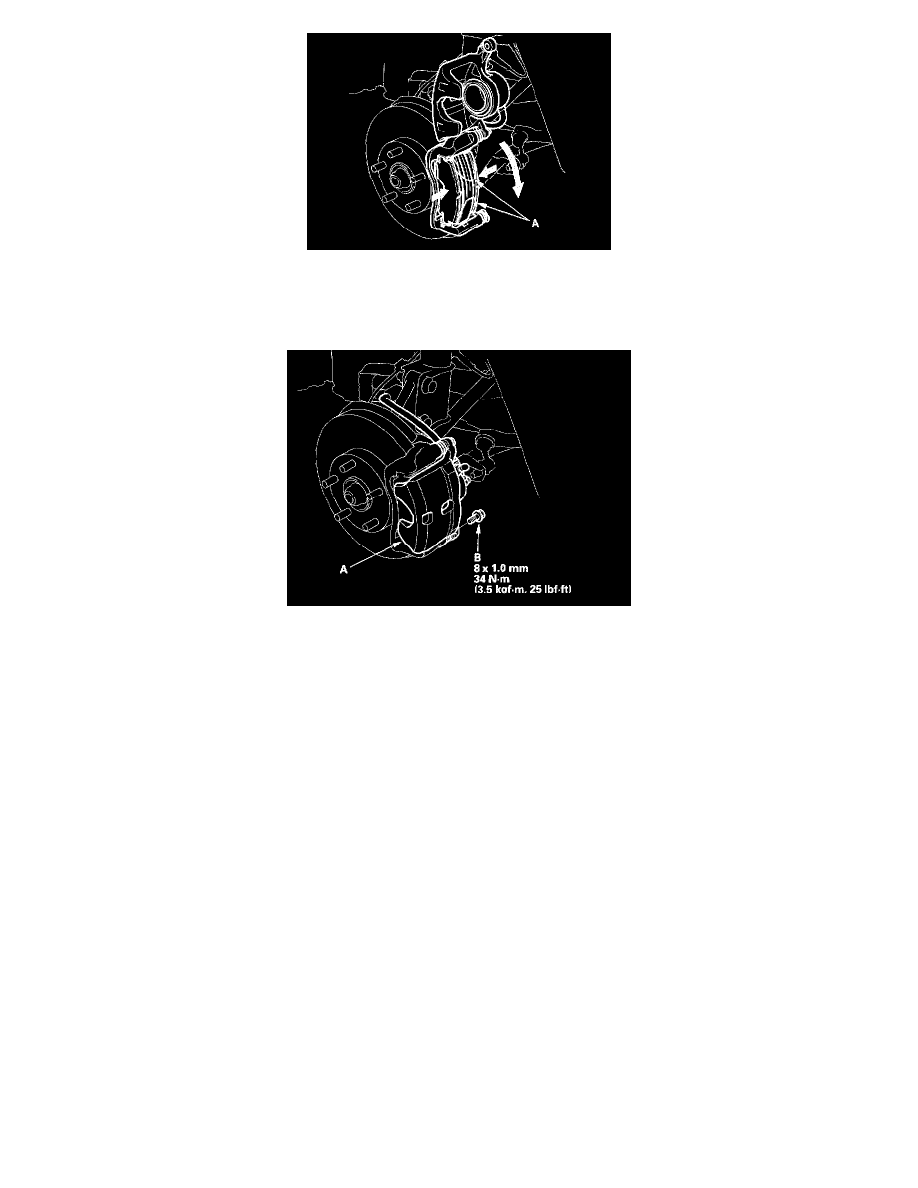
pads by pivoting it down slowly.
NOTE: Insert the pad spring ends into the pad installation holes securely.
14. Pivot the caliper (A) down into position. Be careful not to damage the pin boots.
15. Install the flange bolt (B), and tighten it to the specified torque.
16. Press the brake pedal several times to make sure the brakes work, then test-drive.
NOTE: Engagement of the brake may require a greater pedal stroke immediately after the brake pads have been replaced as a set. Several
applications of the brake pedal will restore the normal pedal stroke.
17. After installation, check for leaks at hose and line joints or connections, and retighten if necessary.
Disassembly and Reassembly
Overhaul
CAUTION: Frequent inhalation of brake pad dust, regardless of material composition, could be hazardous to your health.
^
Avoid breathing dust particles.
^
Never use an air hose or brush to clean brake. Use an OSHA-approved vacuum cleaner.