
Element 2WD L4-2.4L (2003)
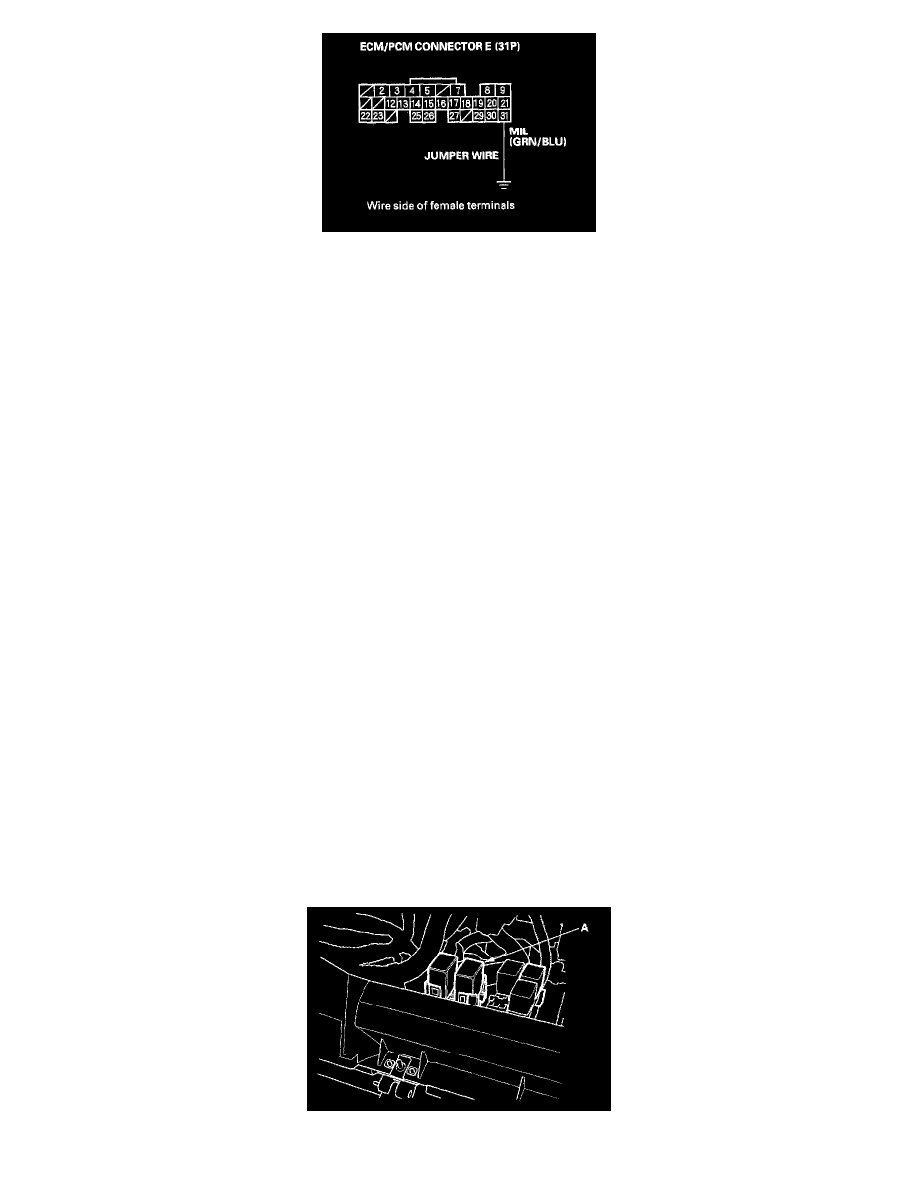
21. Connect ECM/PCM connector terminal E31 to body ground with a jumper wire.
22. Turn the ignition switch ON (II).
Is the MIL on?
YES - Go to step 23.
NO - Check for an open in the wire between the ECM/PCM (E31) and the gauge assembly.
23. Turn the ignition switch OFF.
24. Connect the Honda PGM Tester or the HDS.
25. Turn the ignition switch ON (II), and read the Honda PGM Tester or the HDS.
Does the Honda PGM Tester or the HDS communicate with the ECM/PCM?
YES - Update the ECM/PCM if it does not have the latest software, or substitute a known-good ECM/PCM, then recheck. If the
symptom/indication goes away with a known-good ECM/PCM, replace the original ECM/PCM.
NO - Go to "DLC Circuit Troubleshooting".
26. Turn the ignition switch OFF.
27. Inspect the No.20 IG (50A) fuse in the under-hood fuse/relay box.
Is the fuse OK?
YES - Check for open in the wire between the No, 20 IG (50A) fuse and the ignition switch. If the wire is OK, go to step 28.
NO - Repair short in the wire between No.20 IG (50 A) fuse and the under-hood fuse/relay box. Also replace the No.20 IG (50A) fuse.
28. Inspect the No.6 ECU (ECM/PCM) (15A) fuse in the under-hood fuse/relay box.
Is the fuse OK?
YES - Go to step 35.
NO - Go to step 29.
29. Remove the blown No.6 ECU (ECM/PCM) (15A) fuse from the under-food fuse/relay box.
30. Remove the glove box, and remove PGM-FI main relay 1 (A).