
Element 4WD L4-2.4L (2004)
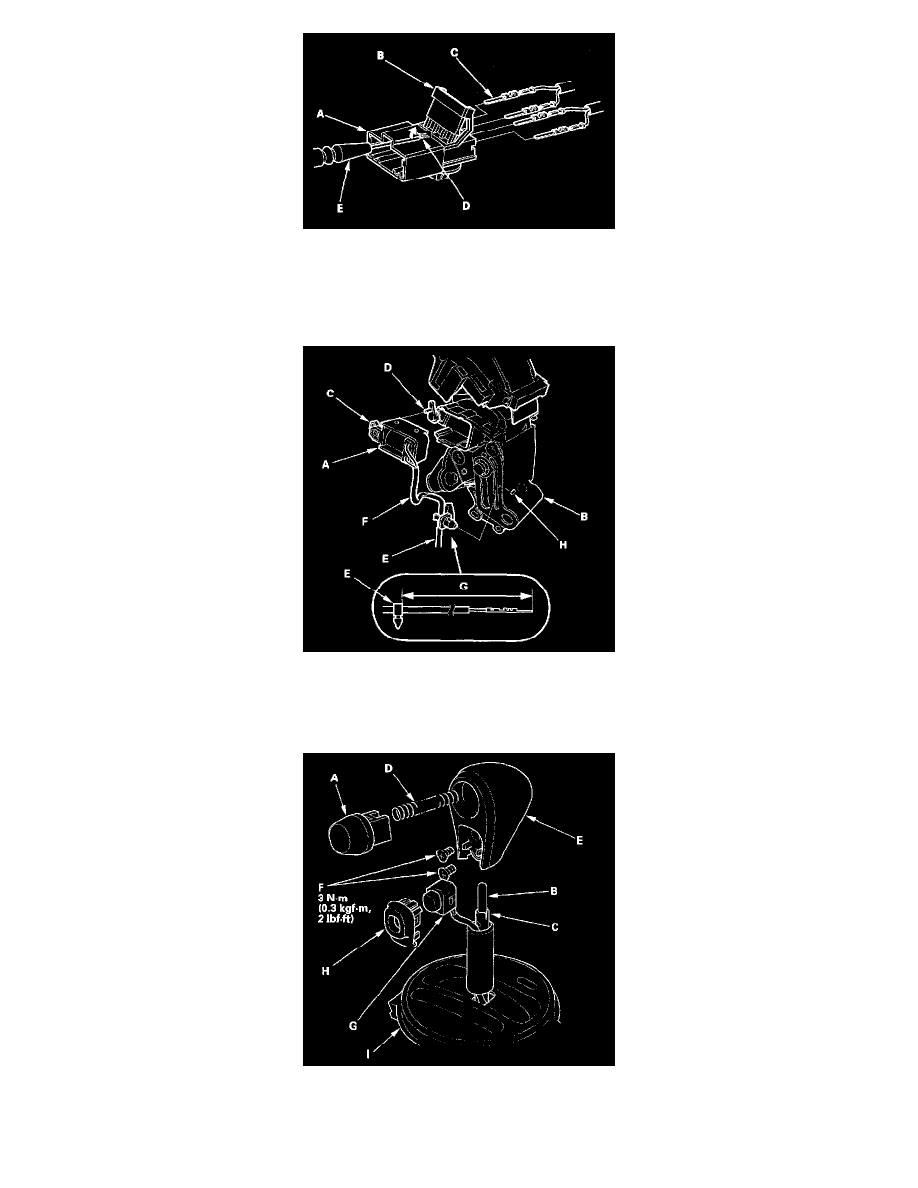
19. Pry the lock tabs on the back of the O/D switch/shift lock solenoid connector (A), and remove the back cover (B).
20. Remove the terminal (C) from the connector by pushing the lock tab (D) up in the connector using a thin blade screwdriver (E). Remove all four
terminals.
21. Remove the shift lock solenoid harness clamp from the shift lever bracket, and remove the shift lock solenoid.
22. Replace the shift lock solenoid.
23. Install the new shift lock solenoid (A) on the shift lever/bracket assembly (B) with aligning the shift lock solenoid plunger (C) with the tip of the
shift lock stop (D).
24. Install the harness clamp (E) on the shift lock solenoid harness (F) at 128 - 138 mm (5.0 - 5.4 inch) (G) from the harness terminal end.
25. Install the clamp in the hole (H) of the shift lever bracket.
26. Apply silicone grease to the shift lever button (A) and push rod (B) of the shift lever (C), and install the spring (D), shift lever button, and shift
lever knob (E). Install the screws (F) to secure the shift lever knob to the shift lever.
27. Install the O/D switch (G) and the O/D switch cover (H), and install the A/T gear position indicator panel (I) on the shift lever bracket.