
Element 4WD L4-2.4L (2004)
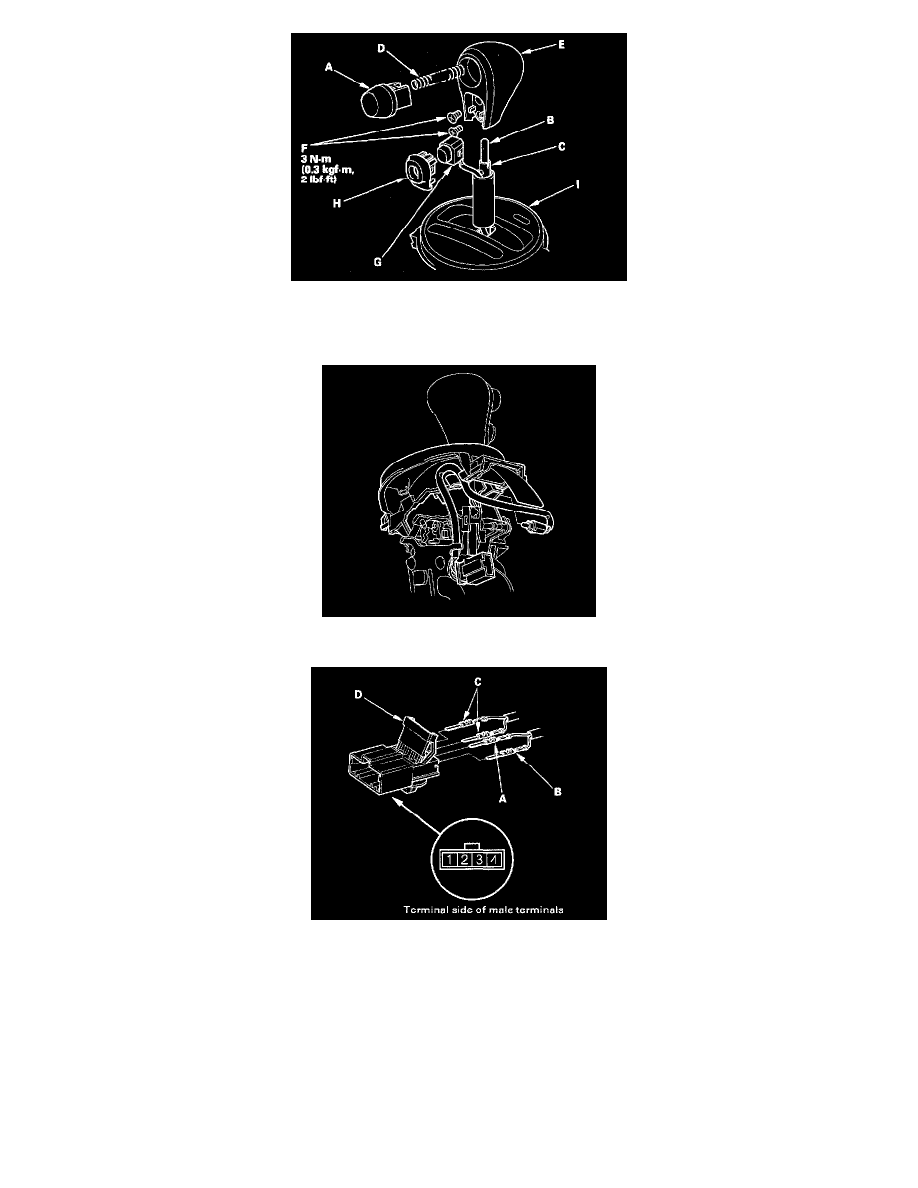
24. Apply silicone grease to the shift lever button (A) and push rod (B) of the shift lever (C), and install the spring (D), shift lever button, and shift
lever knob (E). Install the screws (F) to secure the shift lever knob to the shift lever.
25. Install the O/D switch (G) and the O/D switch cover (H), and install the A/T gear position indicator panel (I) on the shift lever bracket.
26. Install the A/T gear position indicator panel light socket.
27. Install BLU/RED harness terminal (A) of the shift lock solenoid in the No. 3 cavity, and BLK harness terminal (B) in the No. 4 cavity.
28. Install the O/D switch harness terminals (C) in the No. 1 and No. 2 cavities. Either O/D switch harness terminal can be installed in No. 1 and No. 2
cavities.
29. Make sure that the all four terminals lock securely, then install the back cover (D) securely in place.
30. Install the shift lever assembly.