
Element 4WD L4-2.4L (2004)
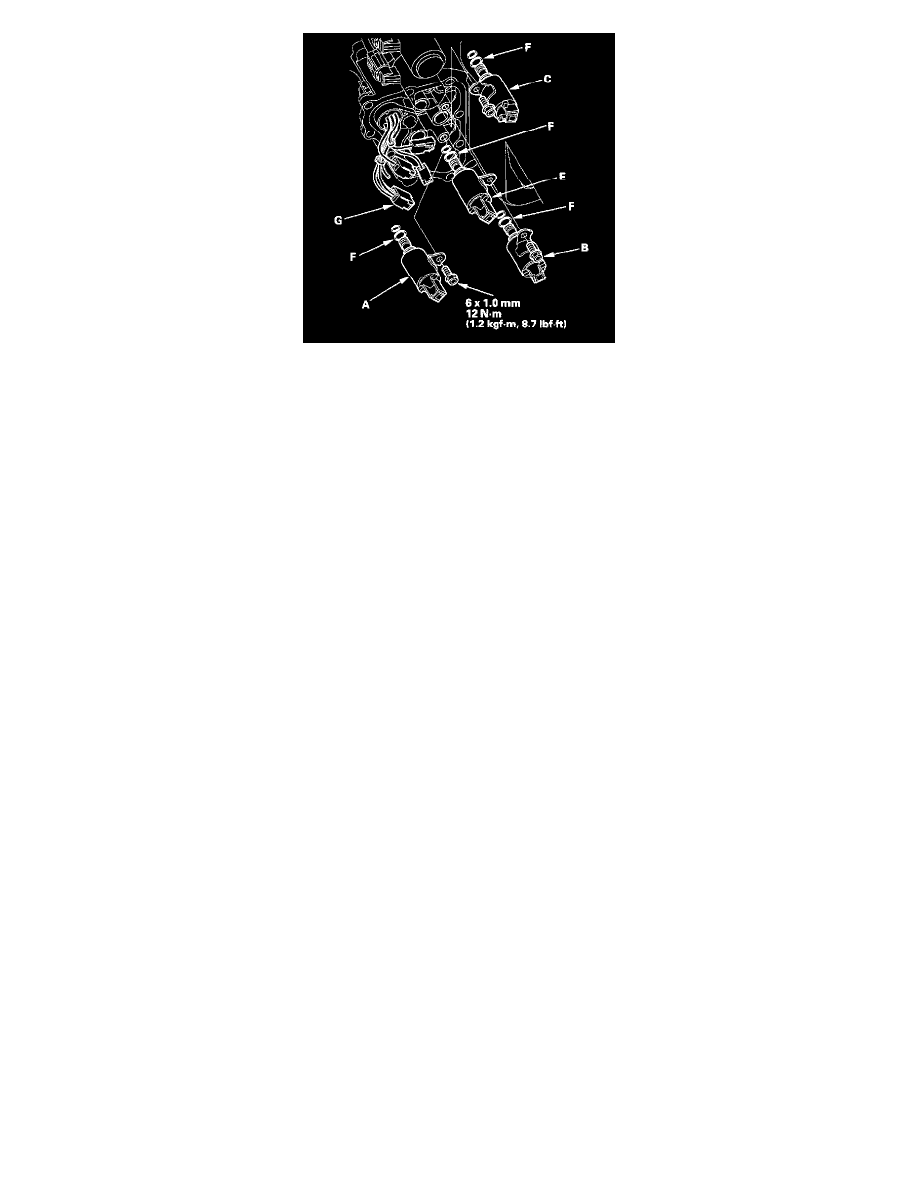
8. Install the new O-rings (two O-rings per a solenoid valve) (F) on the good solenoid valve. The replacement solenoid valve comes with new
O-rings.
9. Install shift solenoid valves A, C, and E by holding the shift solenoid valve body; be sure to install the solenoid valves until their mounting bolt
brackets contact the servo body.
NOTE: Do not install shift solenoid valve B before installing shift solenoid valve E. If solenoid valve B is installed before solenoid valve E, it
may damage the hydraulic control system.
10. Install shift solenoid valve B by holding the shift solenoid valve body; be sure to install the solenoid valve until its mounting bolt bracket contacts
the bracket of installed solenoid.
11. Connect shift solenoid valve A connector (G) with the ATF temperature sensor.
12. Connect solenoid valve B connector (ORN wire), solenoid valve C connector (GRN wire), and solenoid valve E connector (RED wire).
13. Install the shift solenoid valve cover with the new gasket and dowel pins.
14. Install the ATF cooler inlet line with the line bolt and the new sealing washers. Create clearance with the jack between the transmission and the
front subframe to tighten the line bolt with the torque wrench.
15. Install the bracket of the ATF cooler inlet line on the shift solenoid valve cover with the bolt.
16. Remove the transmission jack.
17. Refill the transmission with the recommended fluid.