
Element 4WD L4-2.4L (2004)
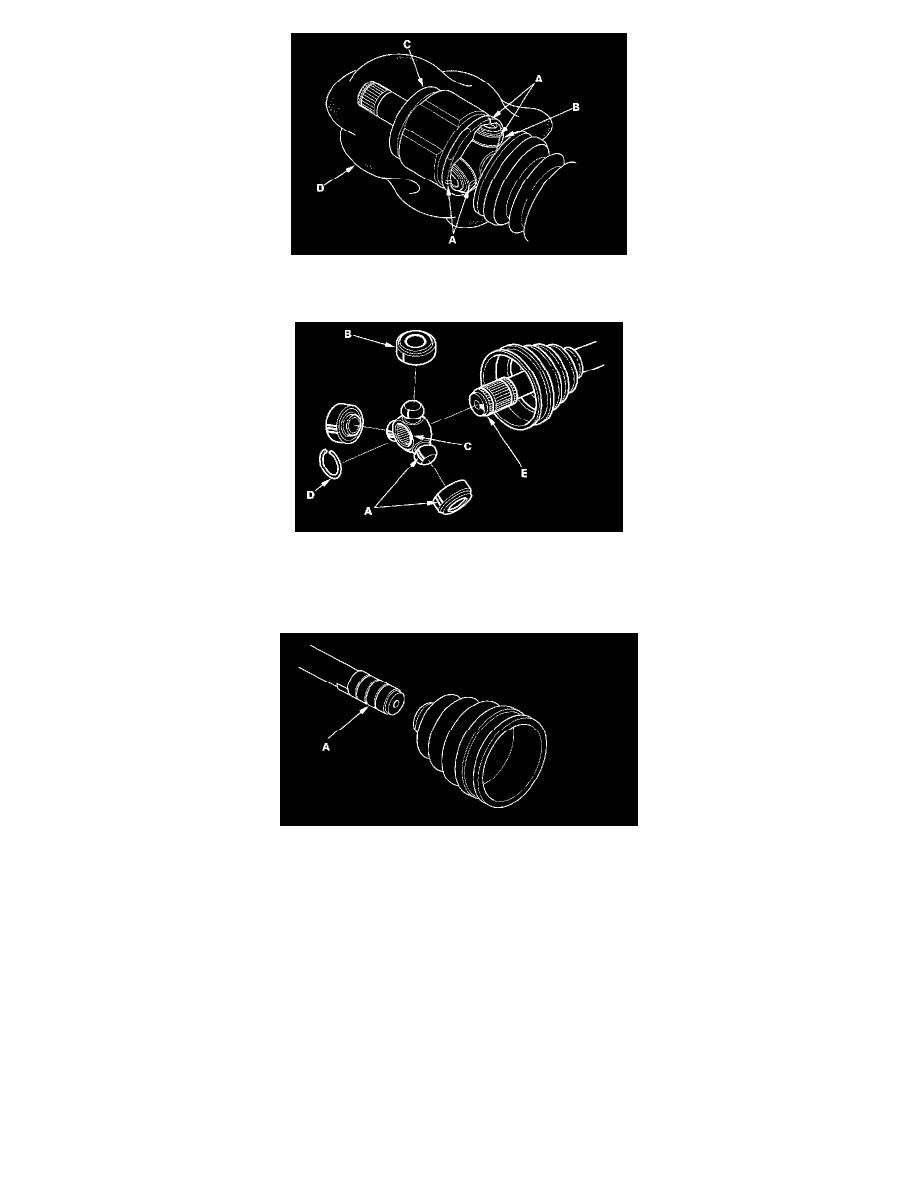
3. Make a mark (A) on each roller (B) and inboard joint (C) to identify the locations of rollers and grooves in the inboard joint. Then remove the
inboard joint on the shop towel (D). Be careful not to drop the rollers when separating them from the inboard joint.
4. Make a mark (A) on the rollers (B) and spider (C) to identify the locations of the rollers on the spider, then remove the rollers.
5. Remove the circlip (D).
6. Mark the spider (C) and driveshaft (E) to identify the position of the spider on the shaft.
7. Remove the spider (C).
8. Wrap the splines on the driveshaft with vinyl tape (A) to prevent damage to the boot.
9. Remove the inboard boot. Be careful not to damage the boot.
10. Remove the vinyl tape.
Outboard Joint Side: