
Element 4WD L4-2.4L (2004)
11. Remove the O/D switch/shift lock solenoid connector (C), then disconnect the connector.
12. Check for continuity between O/D switch/shift lock solenoid connector terminals No. 1 and No. 2 while pushing the O/D switch toggle. The O/D
switch terminals continuity is toggled by pushing the O/D switch ON and OFF.
13. If the O/D switch works properly, connect the connector and install the removed parts. If the switch is faulty, go to step 14, and replace the switch.
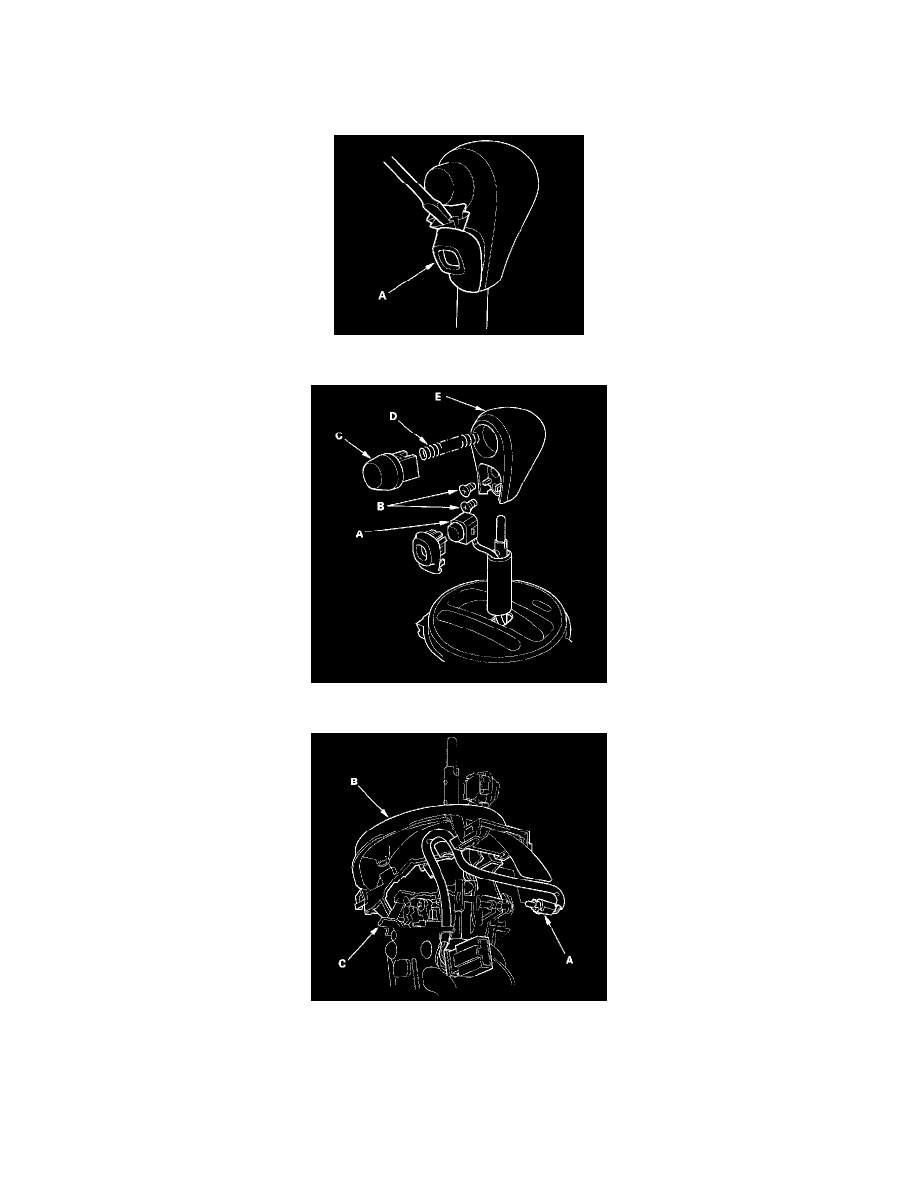
14. Remove the shift lever assembly.
15. Pry the O/D switch cover (A), and remove it.
16. Remove the O/D switch (A) by expanding its locks, and remove the screws (B), shift lever button (C), spring (D), and shift lever knob (E).
17. Remove the A/T gear position indicator panel light socket (A), then separate the A/T gear position indicator panel (B) from the shift lever bracket
(C).