
Element 4WD L4-2.4L (2004)
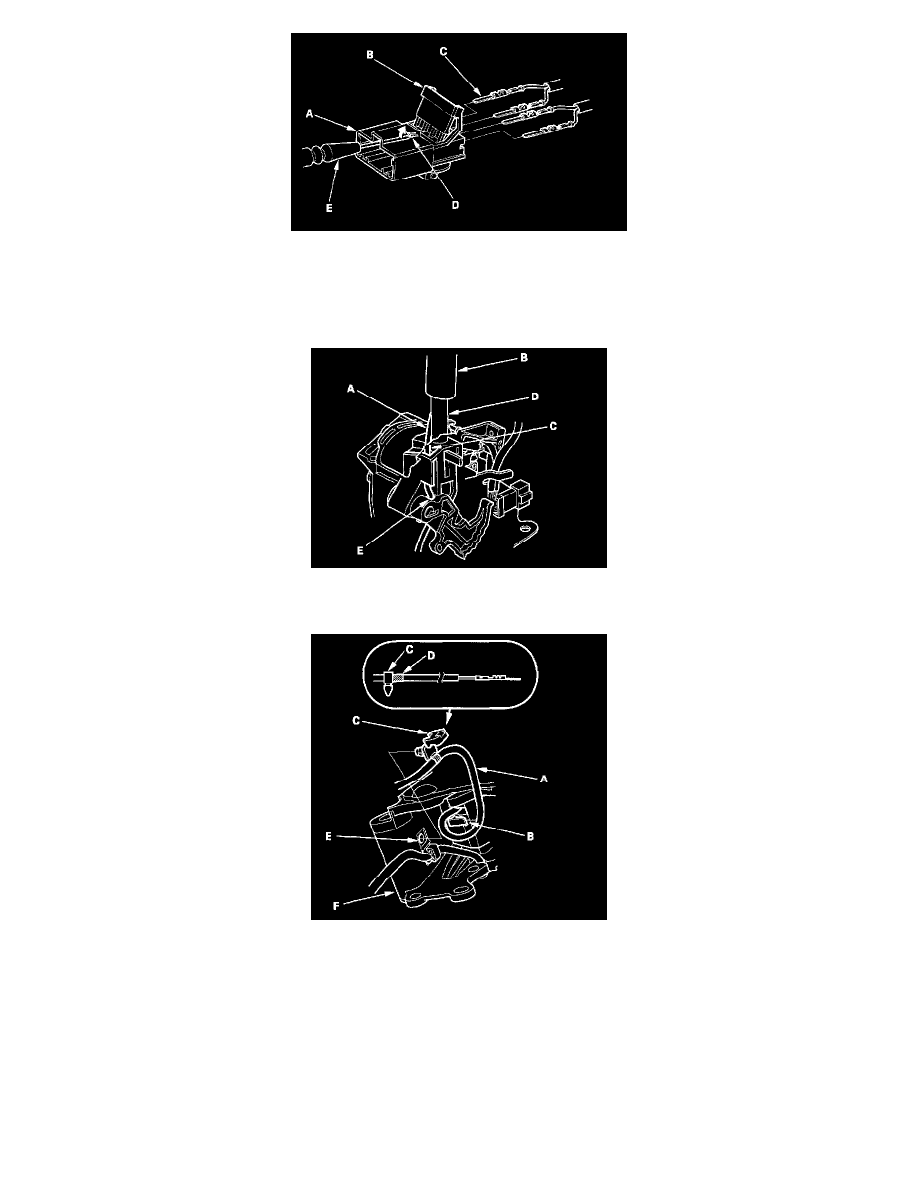
18. Pry the lock tabs on the back of the O/D switch/shift lock solenoid connector (A), and remove the back cover (B).
19. Remove the terminal (C) from the connector by pushing the lock tab (D) up in the connector using a thin blade screwdriver (E). Remove all four
terminals.
20. Remove the O/D switch harness clamp from the shift lever bracket and from the harness, and pull the O/D switch harness out to remove the shift
lever assembly.
21. Insert the new O/D switch harness (A) into the shift lever ring (B), and route the harness through the groove (C) of the shift lever (D) into the hole
(E). Do not pinch the harness.
22. Wind the O/D switch harness (A) one turn around the clamp (B) on the bottom of the shift lever.
23. Install the harness clamp (C) at the reference tape (D) on the harness, then install the clamp in the hole (E) of the shift lever bracket (F).